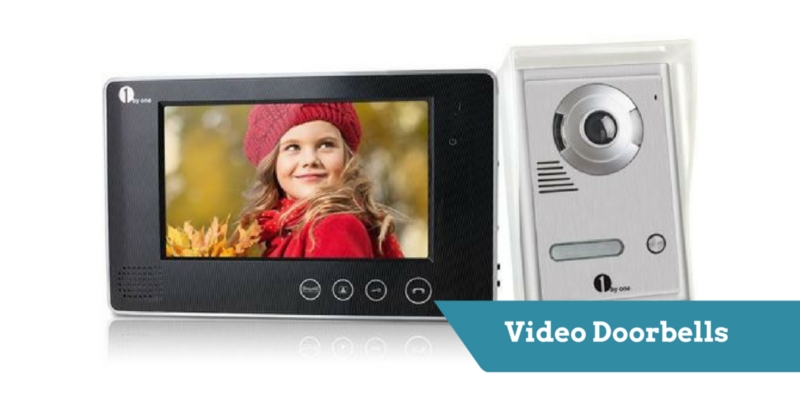
After trying a variety of doorbell systems on the market ranging from Doorbot now Ring, Skybell, etc. I decided to create my own intercom system which integrates into my home automation system. The reasoning for that was based on not having the ability to integrate any of those Out-of-box doorbell solutions into any existing home automation system without major hassle.
For example almost all of those vendors promised for over 1 year now that they will release an API to 3rd party vendors can integrate to. They never provided any date and as a matter of fact they all changed their hardware and didn’t release any APIs.
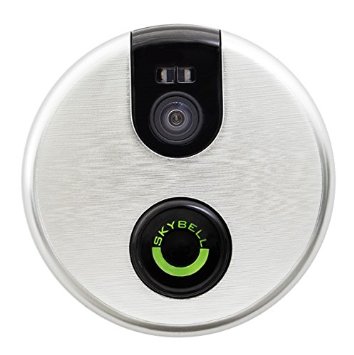
Doorbot is no longer available and Ring is completely redesigned. Skybell is now at revision two of their hardware due to issues and on top of that some of those vendors don’t comply with standards. A great example is Skybell where they are changing multiple times per day their MAC address. Although intended to be a permanent and globally unique identification, it is possible to change the MAC address on most modern hardware. Changing MAC addresses is necessary in network virtualization. It can also be used in the process of exploiting security vulnerabilities. This is called MAC spoofing.
MAC addresses are formed according to the rules of one of three numbering name spaces managed by the Institute of Electrical and Electronics Engineers (IEEE): MAC-48, EUI-48, and EUI-64. EUI is an abbreviation for Extended Unique Identifier.
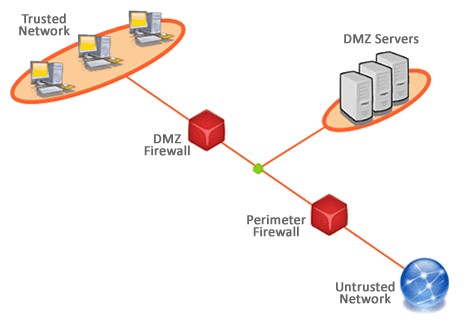
The real issue with Skybell is that they change their fourth digit of their MAC address multiple times per day from 0 to F randomly which makes it impossible to add the Skybell into the DMZ of your firewall of your router which is THE recommended solution of that company to ensure you can see and hear visitors when you are not at home and you want to talk to those visitors on your phone app.
After all of this and more negative experiences I decided to use a combination of hardware and software to accomplish my goals.
Required hardware:
You can buy cheap no-name tablets off Amazon starting at $60 for 10.1″ inches unless you want to go with smaller tablets.
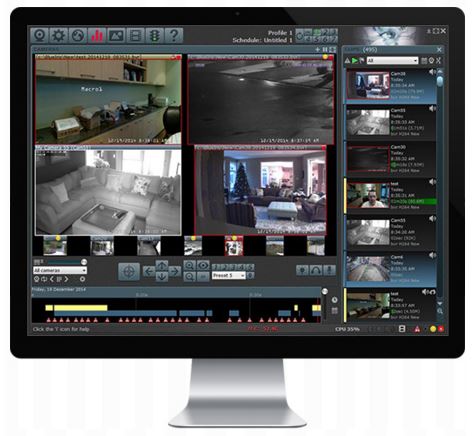
You will need a BlueIris server which is one of the best video surveillance NVR solutions out there but I am sure you can do the same with a DVR solution instead of a NVR solution.
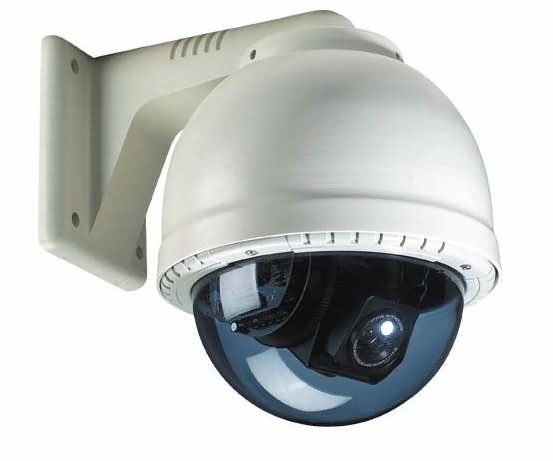
At least one camera at the front door and this camera should support 2 way audio communication
Required software:
BlueIris software ($60)
Tasker app from the Play Store ($3)
AutoVera app from the Play Store ($2.78)
BlueIris App from the Play Store ($9.99)
(sorry, but I am not an Apple/iOS guy anymore)
High level concept:
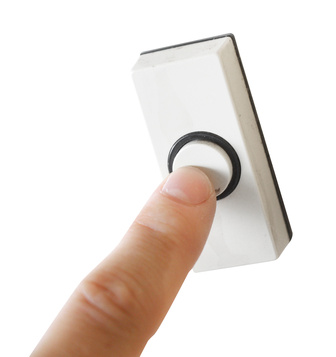
The doorbell press triggers a scene in Vera which can do a variety of things.
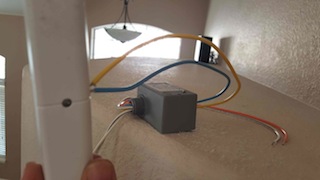
In parallel to that trigger you configure AutoVera to toggle notification on the “Doorbell” device which is the SM-103 from my previous post.
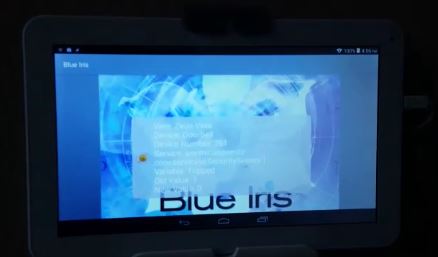
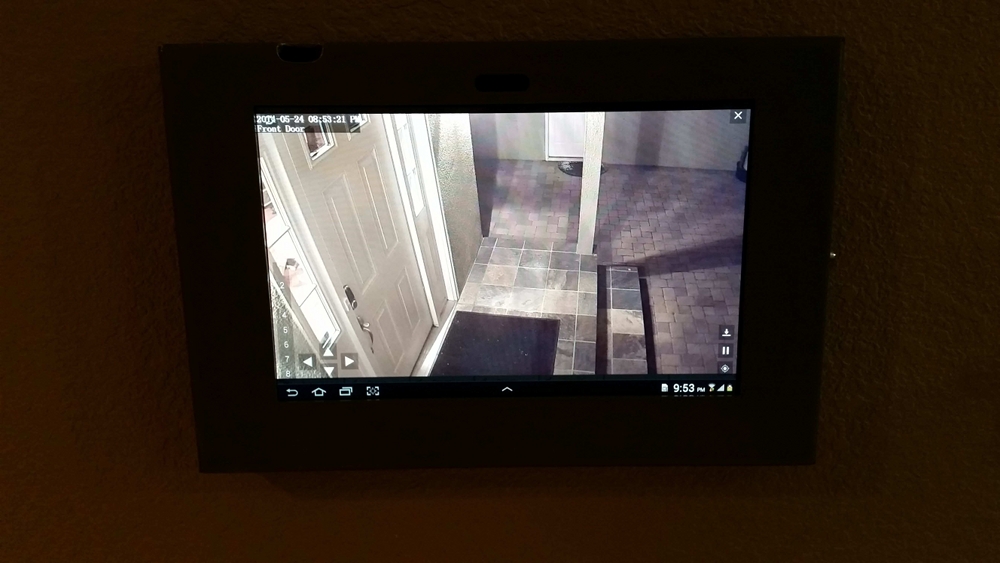
This notification then triggers Tasker which then triggers the opening of the BlueIris App on the tablet.
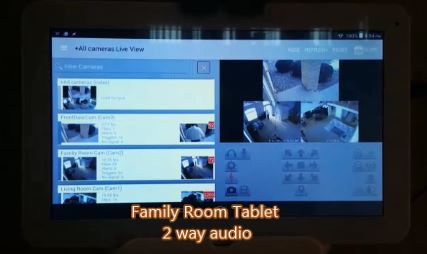
Within BlueIris you can define groups of cameras which then allows you to configure the App on the Tablet to start the desired camera in full screen mode.
Challenges with this approach:
The 2 way audio communication is highly dependent on the camera hardware and its audio capabilities. Most cameras claim audio support which is great and their microphones pick up sound fairly decent in most cases but unless you really invest in an expensive camera, you will have echos coming your way. The more expensive cameras do have “AEC” which is Acoustic Echo Cancellation as a feature and some of them also have “VAD” which is “Voice Activity Detection”.
Without those features you will have Echo when you open the BlueIris App on the tablet and you enable the 2 way audio communication. So unless you spend more money for a more sophisticated surveillance camera, your only option is to use the speak button on the tablet for your speech and you disable it after each sentence. In other words use the app like you would use a walky talky.
You should also check which camera has a built-in speaker or how do you want to connect an outdoor speaker to that camera. Most indoor cameras have very low quality speakers while most outdoor cameras don’t have any speaker at all but they have connectors to third party speakers.
Here is a video showing the working solution and you can hear the sound from outside on one of the tablets ready for 2 way audio communication.
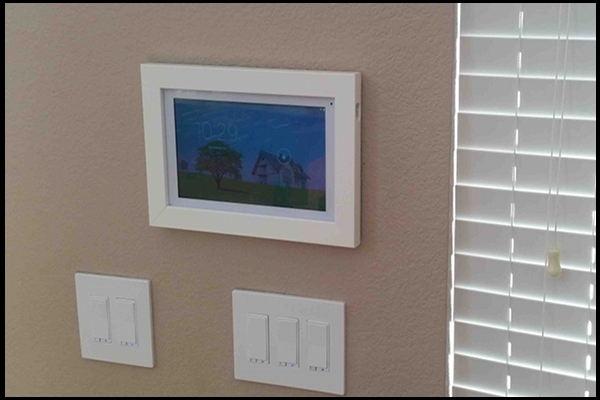
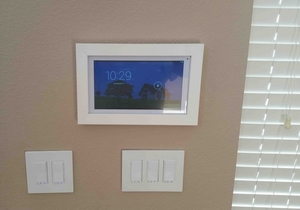
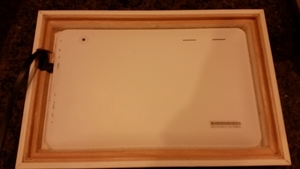
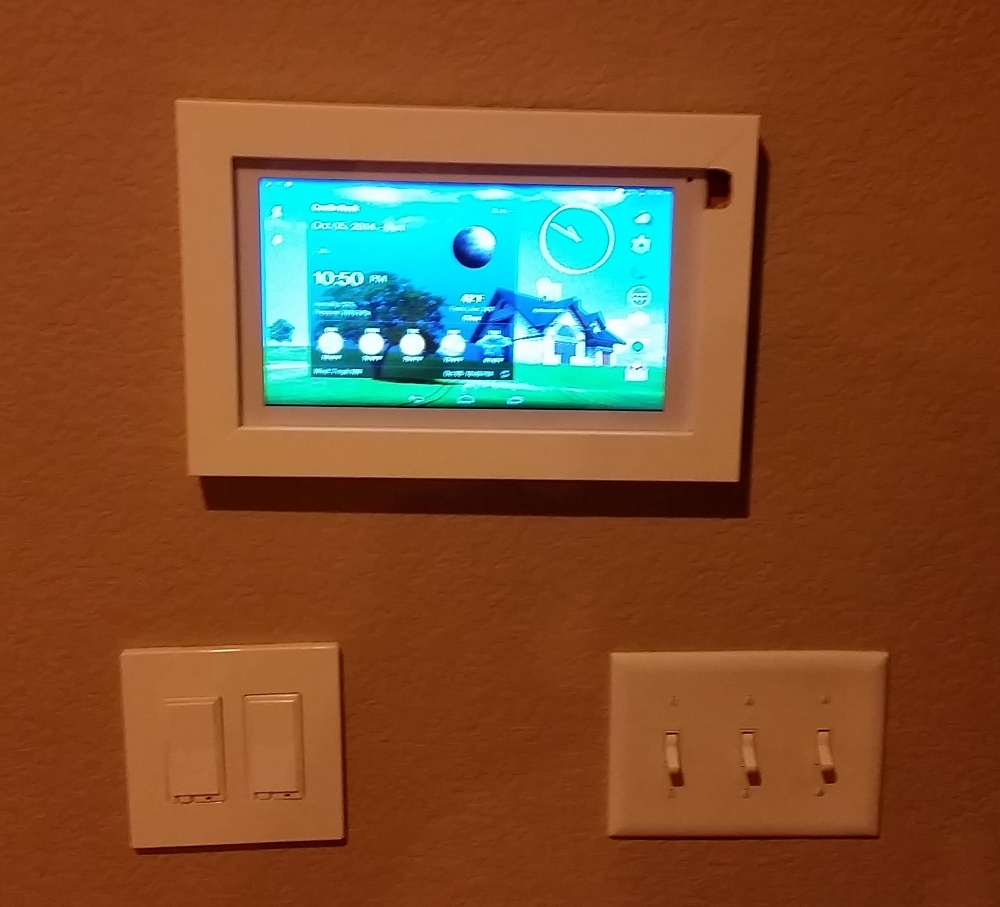
Here is a way to frame any Android based tablet and wall mount it in the frame, color and style of your choice instead of buying a metal enclosure fitting it perfectly into your existing home design.
Tools needed:
– Drill for wood
– Drywall cutter
– enough cable 14/2 (code standard) to go from any light switch or power outlet to power the recessed power outlet behind the frame
– screwdriver
– Velcro within the frame and behind the frame
– Studfinder
Project:
– Frame order takes about 2 weeks at Michaels.
– Use the drill to make the whole for the edged power USB cable and a hole for your finger to power on/off the tablet. First attempt as you see was a hole in the front but my second tablet I mounted I made a hole at the side of the frame which looks much better
– Use Velcro within the frame so the tablet doesn’t move in any direction when you are using it
– Cut a hole in the wall after you checked for power lines and/or studs and install the recessed box for the USB receptacle (instructions come with the box)
– draw power from any existing switch or power outlet to the recessed box and ensure the wires are properly installed (outlet tester recommended)
– Install Velcro on wall and on back of frame.
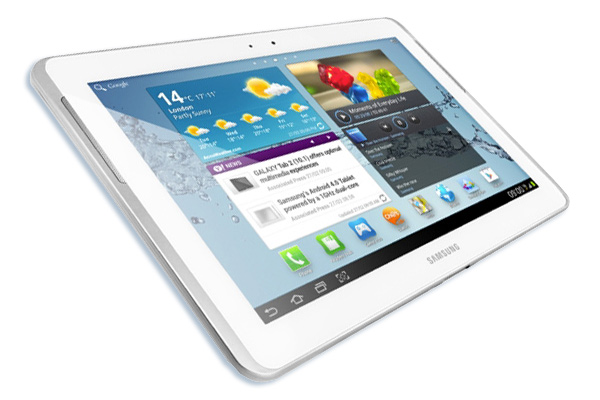
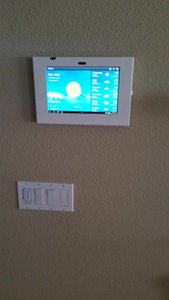
I am done with my latest project installing a wall mounted Galaxy Tab 2 10.1. This was a nightmare project and I had many setbacks but I am finally there and I painted the enclosure in white to match the other house interior.
Here are some pictures and Garrett… AuthomationHD looks awesome on that wall mounted tablet. 😉
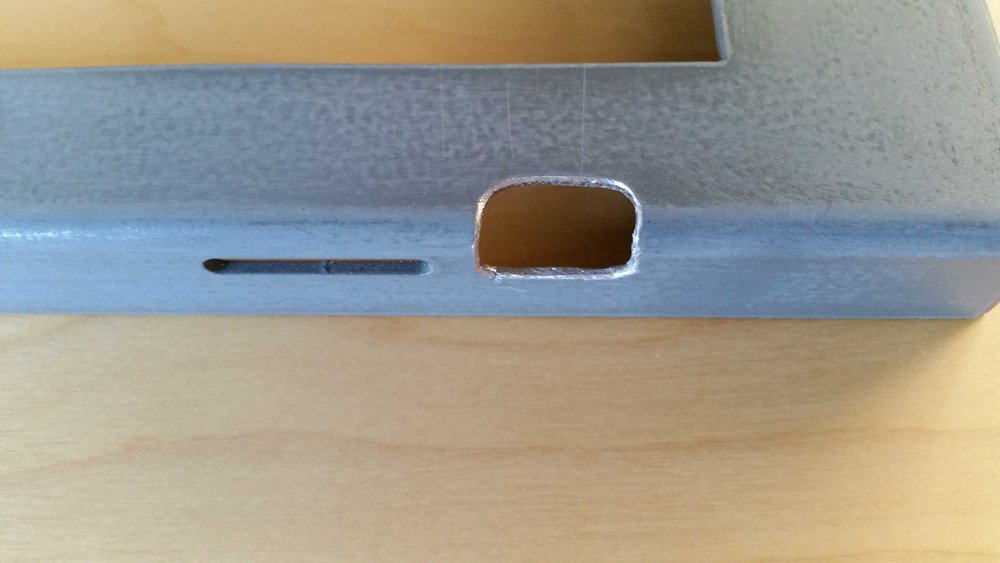
A) The Galaxy enclosure has holes to access the home button, volume rockers, etc. What they don’t tell you that those are only for technicians to access the device if needed. This means that without something tiny fitting into the hole you cannot access the home button. The Galaxy Tab doesn’t power on via screen and you have to use the home button for that, so having no access to the home button was a no-go.
Their online help is a joke and their ticketing system is a fake as nobody ever replies to any of your inquiries. Don’t count on Maclocks aka Galaxy enclosures.
After searching for hours over many days for an enclosure this was the closest one I could find which looks somehow professional so I decided to make that work by expanding the hole for the home button only as I didn’t want to mess around with Android and install software like wake-it, etc as when Android goes to sleep the display is turned off period. See picture of the expanded hole which allows now easy access to the home button. Tools needed: Drill, center punch, round and sided file and I strongly recommend a workbench clamp.
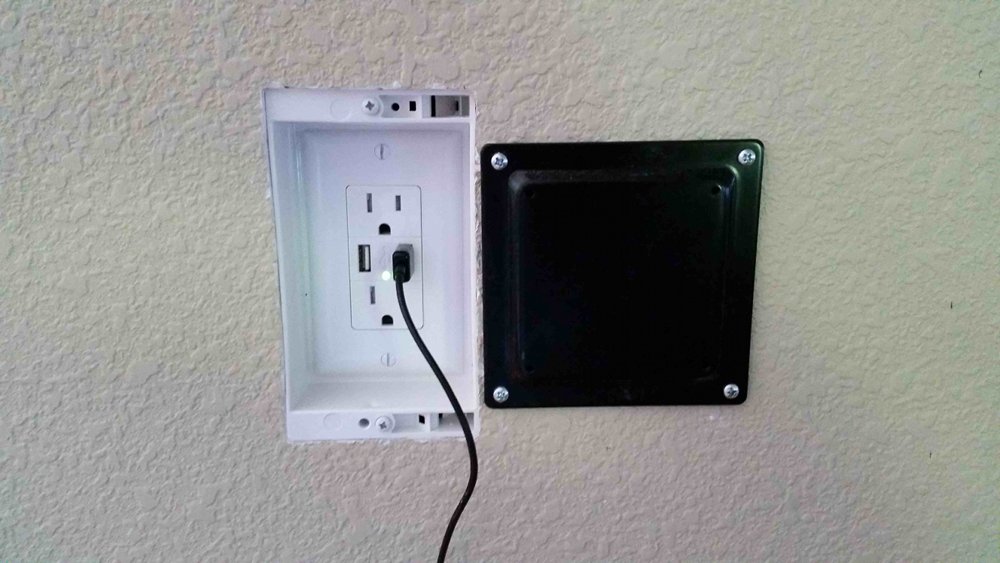
B) Next problem was to find the proper recessed box as I didn’t want this to be visible so I found the Arlington one where I didn’t install the final cover plate as it would show up at the edges behind the enclosure. Then you need to find your spot on the wall and know where you will get your power from. You need to make sure that no stud is in between your new location and the power location unless you want to drill holes into a stud. Use a professional stud finder which includes AC warning so you know where the cables are running behind the wall.
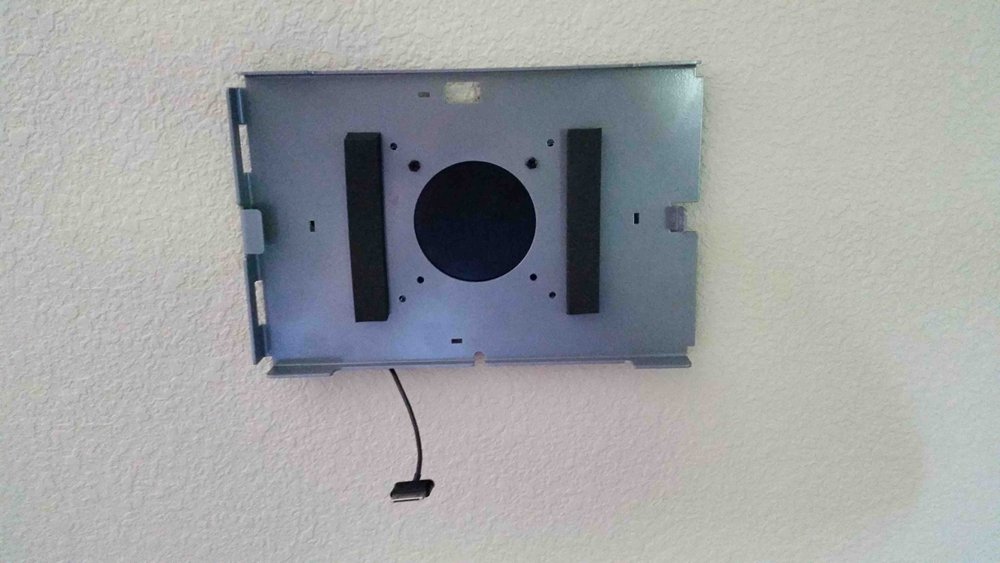
Once you have that figured out, you install the Vesa mount with the anchors. Make sure you level the Vesa mount use a water level tool. Once you have the Vesa mount installed you cut a hole into the wall with a dry wall saw. I strongly recommend to use a hand saw as you are working on a wall with cables behind and you are working very closely next to the anchors you just installed for the Vesa mount. Take your time to carefully cut the hole a quarter inch next to the Vesa mount. I also recommend that you move any isolation material to the left and to the right before you push in your recessed box to ensure a proper fitting.
Before you install the box you need to run the 3 wire cable from your power source to your new location. I suggest you install the USB receptacle in the junction box after you pushed the cable into the wall which means you have to pull out your existing switches where you want to connect to. To be safe don’t forget to power off your breakers of your house or your circuit you are working with. Then you install the box with the already connected USB receptacle, connect the cable to your existing permanent power. Don’t make the mistake of connecting your cable to a light switch cable which gets power AFTER your turn on the light switch. You need to find the hot wire to connect to without the switch being on. Use a power meter from Home Depot to figure that out ($35).
Now everything should be fine but I should point out that the receptacle I chose does NOT provide the proper power to charge the Galaxy. It has the red x which means it is charging but slowly. Not a big deal for me as this tablet is always connected on the wall but if you plan to remove the tablet occasionally, you might want to chose a different USB receptacle. My research showed that I need at least 2A USB ports and this receptacle has 3A for both ports and it does NOT work as expected.
Overall a fun project, many visits to Home Depot, online research, etc.
Lesson learned for me: Despite I hate iPads their home buttons in the front and the endless amount of enclosures you can find online make your life so much easier. I have 3 iPads at home but I am not going to switch to IOS as I am trying to move away from Apple products. With that said I strongly recommend if you use Samsung please take a tablet which has a home button in the front like the Samsung Galaxy Tab 3 or later.