Select Page
New Philips Hue LED multi-color strips for a hefty new price

New Philips Hue LED multi-color strips for a hefty new price

Philips announced today a series of new products ranging from new light strips, Hue Iris, new low-cost white bulbs, etc. 

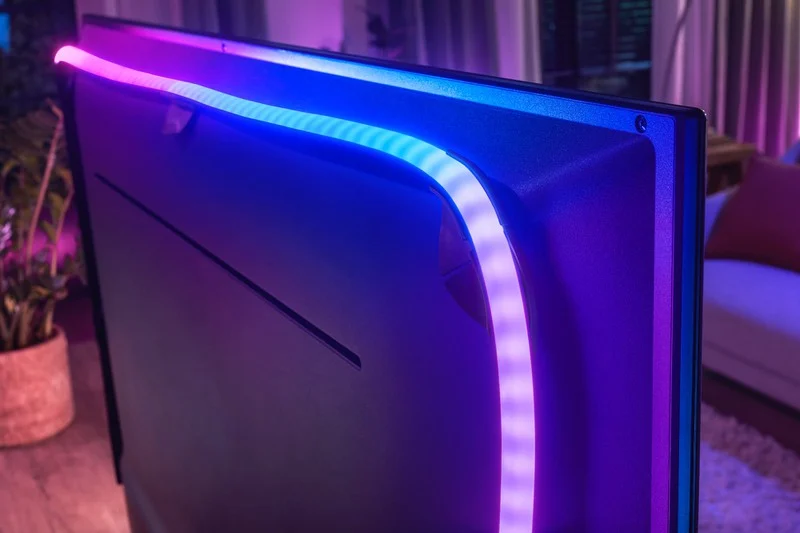
The new Philips Hue Play Gradient Lightstrip is designed to integrate seemlessly with the Philie Hue Play HDMI Sync Box. Any HDMI device will be able to be connected to the new light strip.

This new light strip comes in three lengths, as it was built with TV sets in mind and you will be able to order it in 55 inch, 65 inch and 75 inch.

The previous light strips were limited to a single color and did not support multi-color, which has now been addressed with individually addressable LEDs to provide quote “immerse home theater experience”.

You will be able to order this light strip on October 16th 2020 for a price of $199. Yes, this is correct. Philips is asking for $200 for the 55 inch version, $220 for the 65 inch and $240 for the 75 inch version. This is more than twice the price of the previous light strip version resulting in a 250% price increase. 

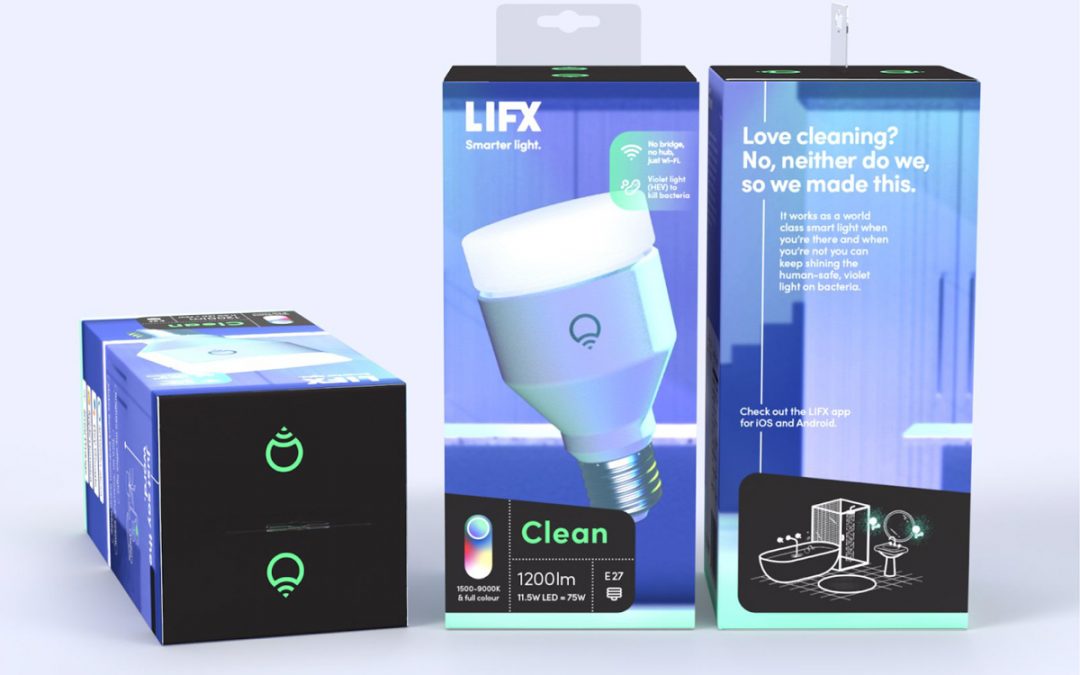
I would like to point out that LIFX has been offering multi-color light strips for under $100 for over 4 years now. But it doesn’t stop there. You will have to pay another $230 for the Hue Play HDMI Sync Box bringing your total price to $430. 

Let’s compare the new light strip with the cheapest version of strip you can find today on Amazon. There are hundreds of TV backlight LED products on Amazon.

The first one I could find supporting music sync without having to use an App on your phone or a remote to run scenes and has a built-in microphone to sync with the TV sound is the one on the right. It is currently priced at $26.59. This is 6.2% of the price for the Hue Strip and HDMI sync box combined.

The lighting experience is certainly not the same as they don’t come with individual addressable LEDs, so if you care about different fading colors at the same time behind the TV, then you could invest $89,99 for the LIFX Z TV strip, which is 21% in comparison to Philips.

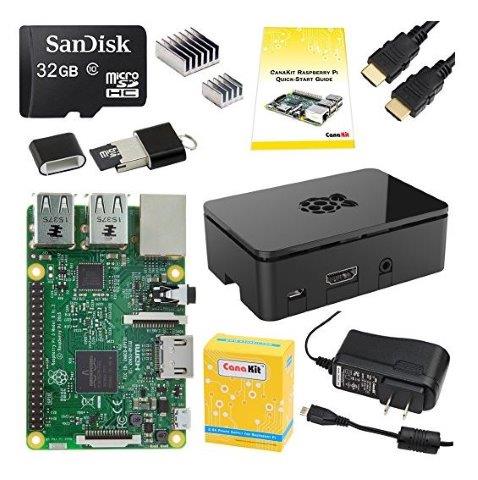
The downside with LIFX Z TV strip is that you will have to use an app on your phone, a raspberry PI running proxy software, or a mac pc running the proxy software to synchronize with the sound of the TV.

Granted, Philips has the most elegant solution with the HDMI sync box and no sound interference from other sources and sound sync in real-time, but that price is simply too high.

Let’s compare value. On the left side you see my installation of 64 feet 16 million colors LED strip with remote control, built-in microphone on the switch and app control on your phone. This setup will cost you on Amazon $48,59. Yes, 64 feet of LEDs for less than $50 and it works in conjunction with your TV sound as long as you have no other sound interference in the room. 

It does not offer the individual addressable LED sections to provide multi-color fading, so you can only face from one color into the other or when the sound changes the colors fade and change, but it is always one color for the strip and in different brightness depending on your sound.

 With that said, the new Philips Hue strip has certainly benefits compared to all the other options outlined here, but the price is not justified. Let’s see how the market will adopt those new LED strips from Hue. Time will tell.

LIFX plans to attack Corona Virus Covid-19 with new “LIFX clean” bulbs

LIFX plans to attack Corona Virus Covid-19 with new “LIFX clean” bulbs

LIFX is planning to help the fight against Corona Virus Covid-19. Buddy Technologies, the mother company of LIFX announced their latest innovation by the name of “LIFX clean”. Those new bulbs are going to be released in Australia, New Zealand and Europe once they passed all safety and regulatory testing. This new product is also already in the Covid-19 testing queue. 

According to LIFX this new bulb is the “world’s first disinfecting anti-bacterial smart light”. The bulb will disinfect surfaces and surrounding air using High Energy Visibile (HEV) light. 

The first phase is scheduled for the 4th quarter of 2020. The second phase will be the launch in USA and Canada, which requires to pass different safety and regulatory requirements. 

With that said, the new bulbs will be priced at $99,99 Australian dollar, so we can expect a similar price range for US. 

Immediate concerns were raised about safety for humans and pets, the potential effects on skin or increasing the risk of cancer, potential impact on human or animal eyes, etc. Buddy Technologies addressed the Australian Share Market with a letter stating:

  • LiFX Clean is a fully functional white + colour smart light that also uses germicidal antibacterial light to disinfect surfaces and surrounding air
  • In a smart lighting world-first, by using 405 nanometre High Energy Visible (HEV) light that is safe for humans, pets and plants, LiFX Clean offers an effortless way to maximise the cleanliness of home environments
  • LiFX Clean has passed efficacy testing in laboratory testing conducted by the Department of Chemistry and Biotechnology at Australia’s Swinburne University of Technology, as well as IEC and safety testing at UL Verification Services in Guangzhou
  • Whilst LIFX Clean is currently in the testing queue for efficacy against the SARS-CoV-2 virus (which can cause the COVID-19 disease), no claim is currently being made that the product is effective in an antiviral capacity of any kind, including on SARS-CoV-2
  • Priced at A$99.99 / US$69.99 / CA$79.99 / €69.99 / £59.99, LIFX Clean is an affordable and accessible new anti-bacterial product, providing broad access to consumers in a time of enormous demand for cleaning products. It is expected to be released to the market in calendar Q4.

In summary… it is great to see that a company is thinking outside the box trying to help with the Corona Virus Covid-19 pandemic. Yes, a lot of tests have to be completed and certainly long-term studies will follow, but during desparate times need any help we can get.

Instead of cleaning all surfaces multiple times per day, having the light bulbs do the work for us and reducing our exposure to harsh chemicals is a good thing. There are so many other use cases for those bulbs ranging from public restrooms, public baths, movie theaters, etc using those bulbs with or without humans in the room.

A potential impact on plants has also been raised by various people and so far there is no indication of any impact on plants, but again time and testing will tell. Go LIFX and fight all bacteria!


Light-Motion combination switch

Light-Motion combination switch

GE/Jasco released a new Z-wave certified switch in Dec 2016, which was made available on Amazon in April 2017. There was no press release or announcement and many people don’t even know that such a switch even exists hence my blog posting here.

The smart hub community quickly jumped on that in Feb 2017 requesting support and given the wide support of GE switches across many smart home hubs, this switch has been integrated rather quickly (Pulse, Trane, Wink, Nexia, Honeywell, HomeSeer, Smart Security, Harmony, Vera, Smartthings and Connect).

What’s the use case for this switch? Before this switch was released you could buy a Z-wave light switch (on/off or dimmer) and then you had to buy a motion sensor separately. As an example you would install this switch in your bathroom/toilet room and then you had to install a motion sensor somewhere in the same room.

Unless you have a power outlet close and a clunky power supply in that outlet to power your motion sensor, you would have to buy a battery operated Z-wave motion sensor or use a USB outlet and wire the motion sensor with a USB cable. Most people went with battery operated motion sensors which have a standard of 4 min timeout setting to preserver battery life.

This setup required you to purchase the light switch and the motion sensor separately which costs anywhere from $35 to $45 for the switch and $20 to $35 for the motion sensor for a total of $55 to $80 dollars.The new GE26933 combination switch is selling for $55 dollars which is a very reasonable price for a combination of both.

The beauty of having such a combination switch is that the motion sensor is not battery operated and the hassle with wakeup and timeout settings doesn’t apply. As a result you can configure this switch on a very granular level and you don’t have to worry about wires coming from your motion sensor to your outlet trying to have a permanently powered motion sensor like the GE 6 in 1 sensor, which is a great product by itself.

You have a single switch combining motion and light switch into one device. In addition it is a dimmer so you can adjust the brightness above and below the actual motion window of the switch. This switch also supports “Last level” which means when you use the dimming function to lower the brightness to e.g. 50% the next time you power on those lights, it will be at 50%.

This switch comes with a variety of options you can configure via Z-wave settings. You have 19 parameter settings you can use to adjust this switch ranging from Timeout duration e.g. 5 min (default) to 30 min or no timeout, motion sensitivity from high to low with medium being the default, Light sensing on or off to the most important parameter which is operation mode with manual, vacancy or occupancy. You can find more details for those parameters here https://products.z-wavealliance.org/products/2108/configs

For smart home hub integration you switch to manual and your smart home hub will detect 2 Z-wave devices. The actual light switch and the motion sensor enabling you to create now scenes or events based on those devices or other devices from your smart home hub.


Most bathroom/toilet rooms have a fan switch right next to the light switch. You can now configure an event where you specify things like

if motion detected

turn on lights and turn on fan

for 5 minutes

and then turn off lights and fan

When you integrate your GE26933 switch into your smart hub system make sure to properly save those parameters e.g. Homeseer settings on the picture. Even before you set those parameters your smart hub system should find 2 devices (switch and motion) but motion will not change status as the default parameter setting for this switch is occupancy with 5 minutes.

The other benefit of having a permanently powered motion sensor is not having to deal with any wakeup and timeout values. You can go as low as 1 minute intervals for this light switch. If your switch is facing the restroom toilet with a setting of 1 minute unless the person sitting on the toilet doesn’t move for 60 seconds, will reset the timeout value continuously but again this is adjustable up to 30 min as needed.

In summary, many smart home owners were requesting for years a combination switch from the vendors and GE finally delivered and hopefully more vendors will follow. This switch can be used in many use cases ranging from garage lighting leveraging the daylight sensor to restrooms with no light or window allowing you to configure your room and lighting what fits your needs the best.

The price is very reasonable and totally justifies switching from two separate devices to a single device with the additional benefit of not having to deal with batteries and wires and two separate devices. Great addition to the Z-wave family of light switches from GE and I hope my blog post sparked some ideas for you on how to improve your smart home even further. Personally I already installed two of those at my home and I am going to add more.

Alexa now supports Multi-room audio

Alexa now supports Multi-room audio

Amazon announced and released today multi-room audio functionality for the Amazon Alexa family devices. This functionality allows you to synchronize music across devices and across rooms by grouping them. Such functionality has been available from other vendors for some time e.g. Sonos.

Amazon also announced the release of their SDK developer tools later this year for speaker companies like Sonos, Bose, Sound United and Samsung. Especially the last vendor will be interesting to watch as they just announced their own smart speaker to come out under the Samsung brand and they announced that it will be unique to differentiate the Samsung smart speaker against Amazon Alexa/Echo and Google Home or even the upcoming Apple Home Pod speaker later to be released this year.


You can now create groups to play music synchronized across multiple echo devices. When you create groups it will shortly stop playing music to synchronize those devices. Any connected Bluetooth speakers should synchronize as well so in theory you could have many speakers playing in total harmony. I will certainly test this functionality.

I am also waiting for the Sonos support for Alexa which now has a date. October 4th 2017 is when the support will be released assuming you accept the new Terms and Conditions from Sonos. That is a story by itself as outraged users express their frustration about privacy violations and Sonos expressing their view of providing clear rules and guidance of what data will get shared and no sensitive data will get shared with any 3rd party partner or vendor.

Anyhow… the good news is that multi-room audio is coming on multiple devices, support for Alexa/Echo is being added to more and more speakers giving the end users the benefit of better audio experiences in their homes.

Alexa enabled Retro-gaming

Alexa enabled Retro-gaming

Many adults remember the times playing Arcade, Nintendo, Gameboy, Atari or Sega games at either at a Arcade game place, on their own console or at their friends house. Some of those games have been ported to Platforms like Xbox or Playstation but only a few games can be found and most certainly not Nintendo games. If you think that the adults are the only ones playing retro-games you should think twice as today’s kids will not miss an opportunity to play any console games – retro or not.

You could go to places like Dave & Busters or Chucke E Cheese for Arcade games but those places have mostly embraced racing simulators and shooting arcades and you won’t find Super Mario Brothers or Legend of Zelda in those places. So unless you visit Japan where Arcade halls are still trendy, you won’t find real retro games.


You can create your own console to play all those game brands listed above. What you need is a Raspberry PI, SD card, HDMI cable, Power adapter, a case and how many controller pads you want. There are 2 popular solutions out there. One is called RetroPie and the other one is called RecalBox. In this blog I am going to post how to create your own console using RecalBox but the same concept applies to RetroPie.


Hardware to purchase

  1. Raspberry PI 3 $30
  2. Raspberry PI Heat sink set $5
  3. SD Card (at least 16GB, recommended 32GB or more) $20
  4. Power Adapter for Raspberry PI 3 $10
  5. Raspberry PI 3 case or custom case (more about this later) $7
  6. HDMI cable $7
  7. Bluetooth/Wired game controller pad(s) $13 for wired $40 for wired and bluetooth combined
  8. Bluetooth keyboard and touchpad (optional) $25

Total cost: $79 + cost of game controllers

You can buy the Raspberry Canakit for $69 on Amazon which includes USB card adapter micro SD card.

I bought the kit and I bought two game controllers with bluetooth and wired, so in case the batteries run out, I can plug them in and continue playing. My total cost was: $160 running 758 NES Games and numerous other games from other consoles

You can buy  the NES Classis bundle for $350 on Amazon which includes 2 controllers or go to Ebay and bid for home made look a likes. In November NES will release again a $59 or $69 version of the NES Classis, which will be sold out immediately and then offered on Amazon and Ebay for hundreds of dollars like last year before Christmas.

So instead of copying the step by step instructions on how to install Recalbox, I will simply put the link here on where to obtain the software and how to install the operating system.

Visit https://www.recalbox.com/diyrecalbox and follow the instructions to get your Raspberry PI running the Recalbox OS. Download the SD Card formatter software and the Recal OS. Extract the ZIP file and then copy the complete contents of that folder onto the SD card. Once that process completes you can power on your retro-gaming console.

Configure your WiFi settings and run the auto updater. Please be patient during the WiFi setup as it will look like the system is hanging. I do recommend to reserve an IP address in our router settings for your Recalbox.

I used my Bluetooth keyboard and the game controller to setup the WiFi settings as typing in password with a game controller is non-trivial. Once you apply the updates the system will tell that it will reboot. You might have to restart the Recalbox yourself if the screen doesn’t come back online and then the system update will start.

Adding Games to your console

The good news is that once your Recalbox joined your WiFi network it will be visible under your Windows Explorer network. It will show up as Recalbox or any other hostname you have given your Recalbox in your settings.

Once you double click that network device it will ask for a login. The username is “root’ and the password is “recalboxroot”. Now you have access to all the folders. You will find a folder called ROMS and within that folder each emulator will have its own folder. Go to the NES folder.

Now it is time to download some games. There are various places to download the ROMs and I will provide one for now. http://www.mediafire.com/file/5pe60avkiglc94r/758NS.rar This package will contain 758 NES games. Extract the folder and copy the content from the NES folder on your PC into the network share from your Recalbox. Once uploaded go into your Recalbox settings under Game settings and refresh the game list or simply reboot your Recalbox. Congrats! Now you have 758 Games to play!


Integration of Recalbox into Alexa

In this scenario I am going to demonstrate how to power on/off the Recalbox via your smart home hub, integrate this into your Logitech Harmony hub and then control the whole setup via Alexa with one simple command.

The first task is to attach the Recalbox power supply to a Z-wave enabled outlet or any outlet which can be controlled by Alexa. The reason why you want this is because you don’t want your Recalbox to run non-stop even if the TV is powered off.

Next task is to go into your Harmony hub (if you don’t have one yet you should buy one for $99 on Amazon) software (Desktop or Cell phone) and create a new scene. Give the scene a name you will recognize easily e.g. “Retrogame scene”. In this scene you define which device should be powered on in which order and to what channels those devices should be configured to.

Example:

  1. Turn on Yahama Surround Sound Receiver
  2. Set Yahama Surround Sound Receiver to HDMI3 (Recalbox is attached to HDMI3)
  3. Turn on Samsung TV
  4. Set Samsung TV to HDMI1 (Yamaha is connected to HDMI1)

Next task is to go into the Amazon Alexa app and discover devices. 2 new things should show up. A) is the new scene from the Harmony Hub and B) is the switch to power on/off the Recalbox. Now create a new group in the Alexa app and call this group “Nintendo”. Add both items to that group (the scene and the device). Et Voila! Congrats. You have now a voice controlled Retro-gaming console with 758 Games!!!

Retro-case for retro-gaming console

To make this experience really “retro” I decided to print a case and replace the Raspberry PI standard case with a Nintendo style casing. I found this https://www.thingiverse.com/thing:1887826 casing online, which is a modified version of the original casing https://www.thingiverse.com/thing:307832. The difference between the original and the one I chose is that you can choose how to install your Raspberry into the case.

I tried the sideways one and I have to say that this was a complete failure as the USB ports are within the case with no access to it. I recommend to use the upside down version of the 3D STL file, which will expose the HDMI, Power, 3.5mm sound jack, all USB and the Ethernet port. You can print it in the original Nintendo colors or chose a different color scheme like I did. To finalize the design I printed the Nintendo logo and glued it on.

x  Powerful Protection for WordPress, from Shield Security
This Site Is Protected By
Shield Security
Verified by ExactMetrics