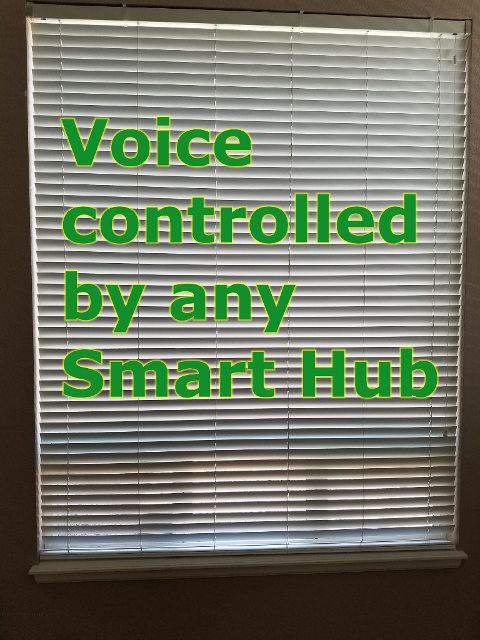
Existing blinds voice automated for any smart home hub
Today’s challenges wanting to automate existing blinds
Automated blinds are in high demand while their price is also very high. In addition it is very hard to find blinds which work with an existing home automation system and several companies have tried to tackle that problem.
The first problem is that not all blinds have the same size. Across the US almost all the blinds are cut to size as home builders are not making each window match each other resulting in additional costs for the home owner.
The second issue is the brand of the blinds and there are only a couple of major brands pre-installed in certain homes and those are all manual controlled for tilt and for raise/lower. There are no upgrade kits from those major brands allowing you to add a simple motor.
The third issue is your goal. Do you want to tilt or lower/raise your blinds. There are only a handful of companies who offer Venetian blinds which can do both. I have made several calls and inquiries to those companies and they all want to sell you new blinds ranging from $500 up to $3.500 per window!!!
The fourth issue is power availability. None of the homes from home builders have any power outlets at every window unless the home was designed from the beginning for wired power blinds and such blinds installed. The good news is that you can buy solar add-ons for new automated blinds, but this is not an option for any existing non-automated blinds. Again, you would have to buy a complete new blind for every window assuming you have power.
Lessons learned from buying new automated blinds
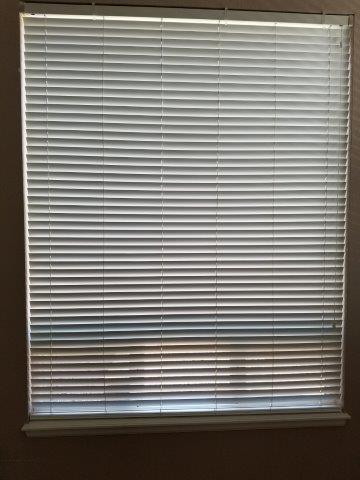
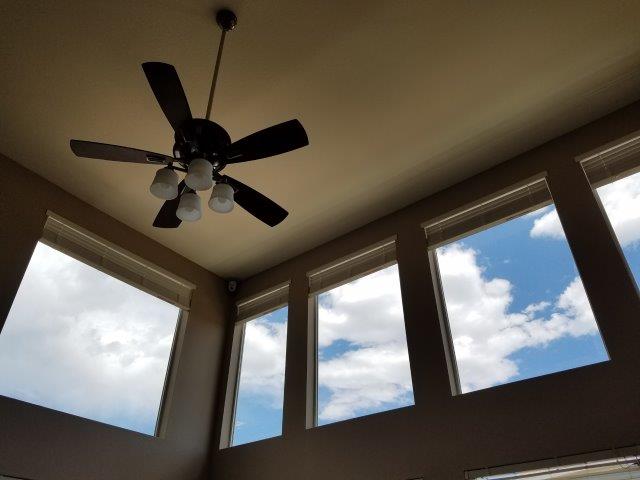
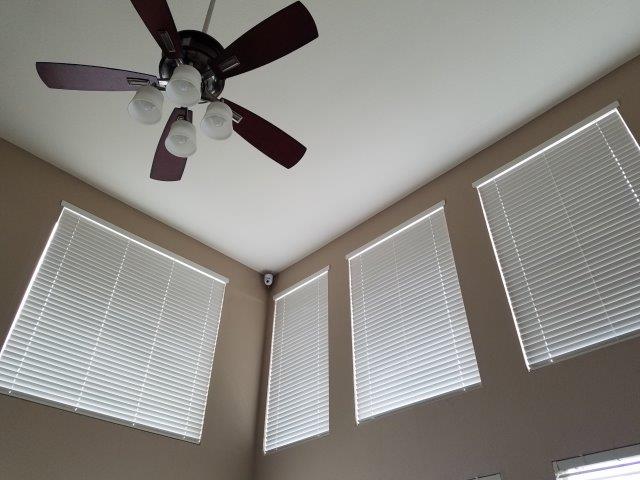
In my case I had large east facing windows in a two story living room and in the summer the raising sun increased the temperature in that living room too much so the air condition was running non-stop.
I did my research to find blinds which work with Z-wave and my specific smart home hub which was Vera at that time. I found Somfy but again they couldn’t tilt and raise/lower as it was either or. I worked with a custom blind company in Colorado to develop a solution which could do both and I had an electrician run power to all the upper blinds and lower blinds (in case I want to add lower blinds later).
The result of this exercise was Somfy controlled blinds using RF between the blinds and the Somfy Z-wave module and this Z-wave module did create 5 blinds in Vera (max is 16 blinds in Somfy Z-wave module) at a cost of over $10.000. This cost included the custom blinds, Z-wave module and install. It did not include the Z-wave integration into Vera as those vendors are only obligated to pair the Somfy blinds to the Somfy Z-wave module and anything after that is not their responsibility.
I have additional 19 windows in my home I would like to automate and the cost for pulling power to those windows would be enormous not to mention the cost for each blind. We are talking north of $30.000 dollars hence this new project of mine trying to tackle affordable voice automated blinds for existing blinds and the ability to integrate those with any smart home hub supporting Alexa and/or Google Home.
Raspberry PI + RC motor + smart home integration + voice control
There are many solutions out there on how to automate existing blinds using either RC motors or step motors as the engine to tilt the blinds. Some of them also include blinds motors for raise/lower but now we are talking about hundreds of dollars again and most of those motors are proprietary so you would be better of buying the complete solution from those vendors.
The second aspect of the solution is the brains within each blind. Again many solutions are out there using Arduino or Raspberry PIs. Some of the published solutions are really neat while others are a complete mess with wires everywhere or bulky attachments on the wall controlling the existing blind cords. None of those were an option for me as my goal was to not see any hardware while the blinds should be automated.
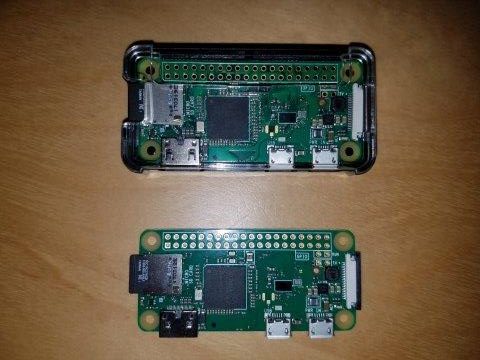
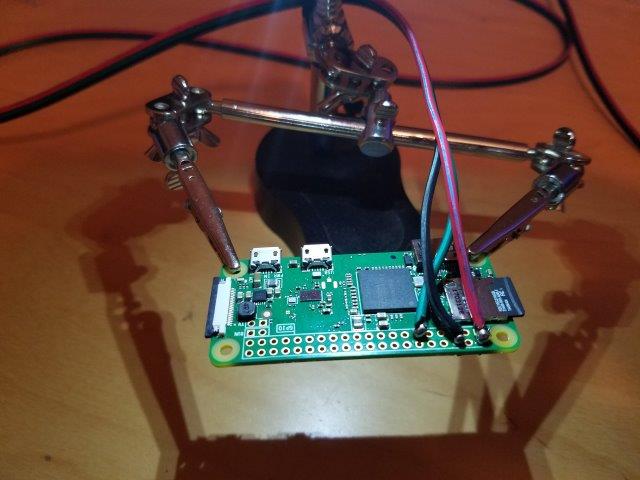
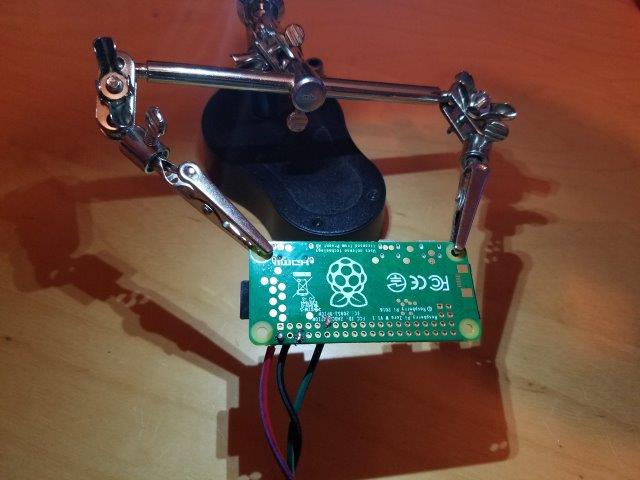
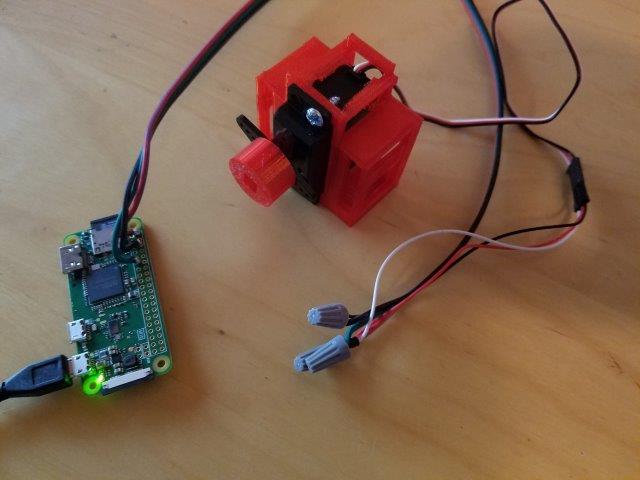
The choice I made was Raspberry PI Zero W + RC Motor Futaba. The reason for Raspberry PI Zero W was simple. $10 for a Raspberry PI including WiFi and Bluetooth having Linux at my fingertips and the reason for an RC motor was the simplicity of connecting this straight to the Raspberry PI without any additional regulator hardware or special power considerations. The only consideration was the torque of the RC motor to be able to tilt even large blinds and that’s why I chose the Futaba S3003.

Customization for any blinds brand make or model
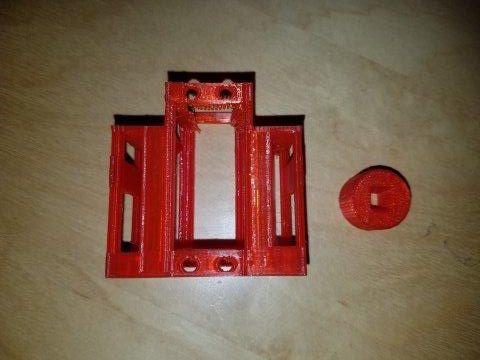
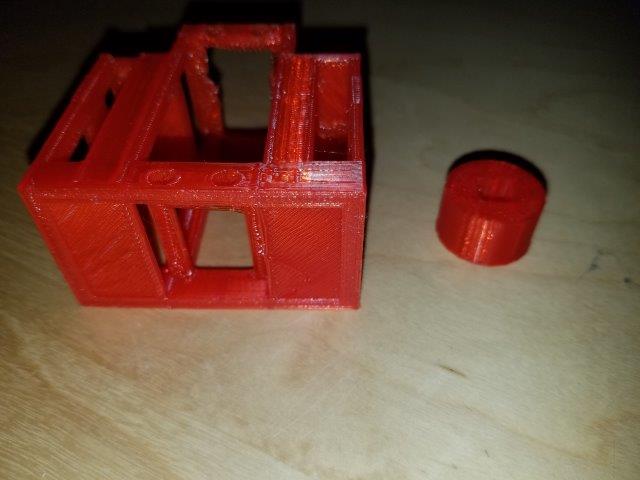
The next challenge was to be able to attach the RC motor to the existing rod of my blinds. This was a bigger undertaking than expected as my blinds are using a 1/4 x 1/4 inch square rod while most blinds have either a D-shaped or hexagon shaped rod. After several weeks of emailing, calling companies and researching to find an adapter for square rods (also known as coupler) I gave up. I decided to design and 3D print the adapter myself.
My first attempt was to design the SLT print file fitting my specific blind channel and fit the square rod and then take this design to a 3D print shop (even UPS now offers 3D prints for affordable prices). I used this opportunity to actually buy a 3D printer and print them myself. I like having new toys 🙂
The next challenge was to attach the RC motor to the channel providing a stable base to actually tilt the blinds. Again, depending on your blind and your rod your channel might be 2 or 2 1/2 inches. I found a 3D design online for a futaba base which I modified to fit my channel and have the rod fit.
By choosing this approach I am flexible enough to create any adapter and any base for any blind and print it myself or go to any 3D print shop and let them print those for me.
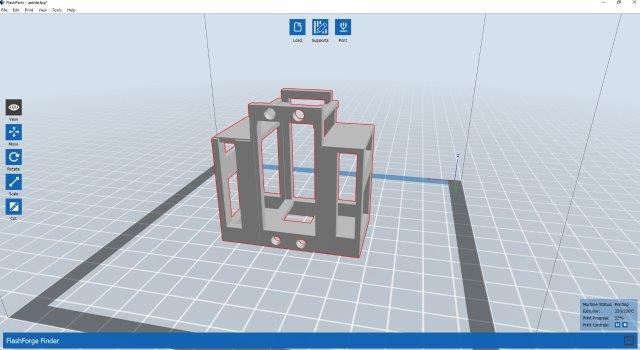
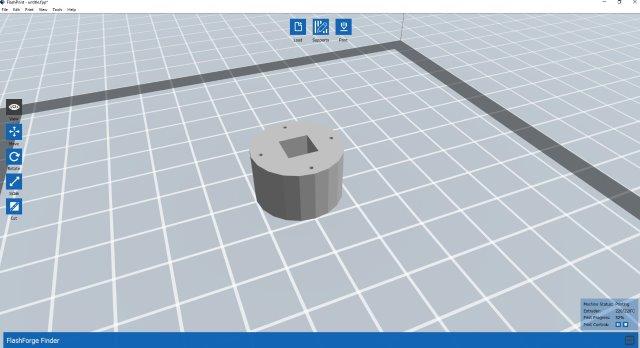
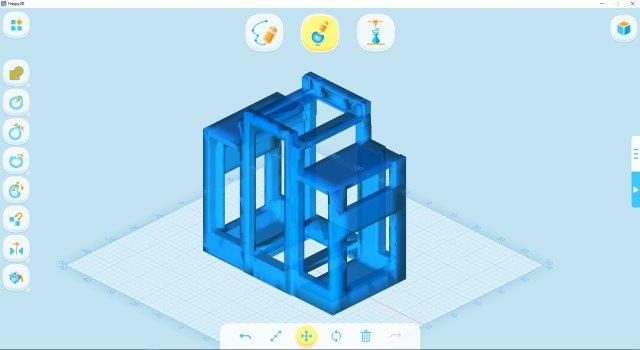
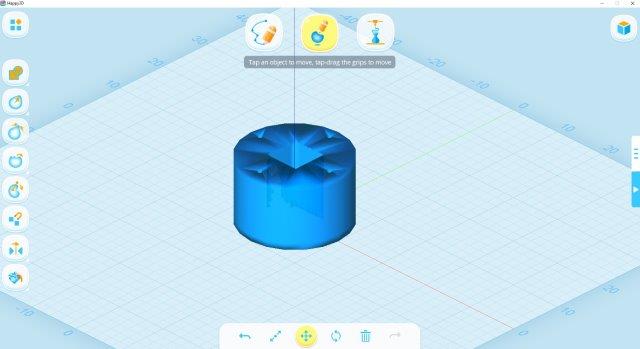
3D Software to create models
Having had no experience with 3D printing there are a variety of software options out there ranging from beginner level to very advanced and from free to very expensive. Some come with a 3D printer and others don’t. Some only come if you buy their printer and only works with their printer.
I am not going to judge which software is the best as this is very subjective and I will simply share that I used for my first steps the “Happy 3D” software from Flashforge and the FlashPrint from Flashforge after having tried additional 5 different 3D modelling software solutions.
Raspberry PI operating system configuration
Every Raspberry requires an SD card to host the operating system. You can go as low as 8GB but I do recommend at least 16GB. Once you have the SD card you have to upload the operating system.
First download the latest Raspberry OS from https://www.raspberrypi.org/downloads/raspbian/ You can choose between a graphical user interface Desktop which also support VNC remote desktop or the lite OS which is command line online. For my first one I chose the Desktop version to start developing my solution in an easier way.
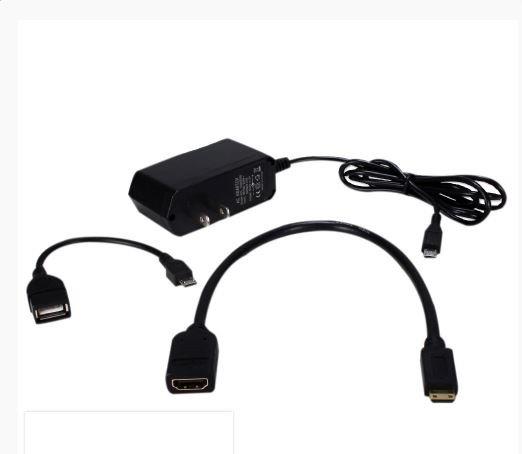
To do this I also purchased the power supply combo which includes an HDMI adapter and USB connector cable and a Bluetooth keyboard and touch pad to configure the Raspberry. You can chose to have an external powered USB hub and attach a USB mouse and keyboard but I chose that model as it combines mouse and keyboard in one device.


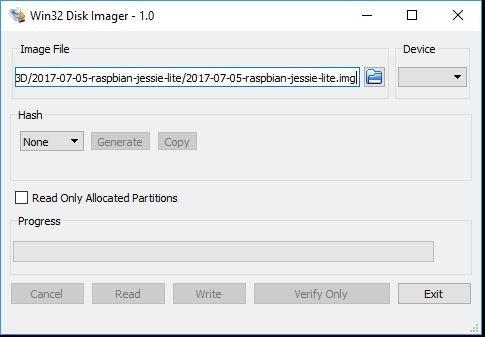
To get the OS onto the SD card I used Win32 Disk Imager where you select the OS image and your USB port of the SD card to load the OS. Once loaded you put the SD card into your Raspberry and boot it up.
The final OS deployed on all my Raspberry PI Zero Ws is the lite version reducing power consumption and I even went as far as disabling the HDMI output circuits to save some power because if you’re running a headless Raspberry Pi, there’s no need to power the display circuitry by running /usr/bin/tvservice -o (-p to re-enable). Add the line to /etc/rc.local to disable HDMI on boot.
Once booted up you need to perform some initial settings:
Configure WiFi and join your home network:
pi@raspberry: ~$ sudo nano /etc/wpa_supplicant/wpa_supplicant.conf
Go to the bottom of the file and add:
network={
    ssid="Your WiFi Network Name "
    psk="Your WiFi Password"
}
Note: I do recommend to configure a reserved IP address for each of your raspberry devices on your router once they join the network. It will make your life much easier going forward.
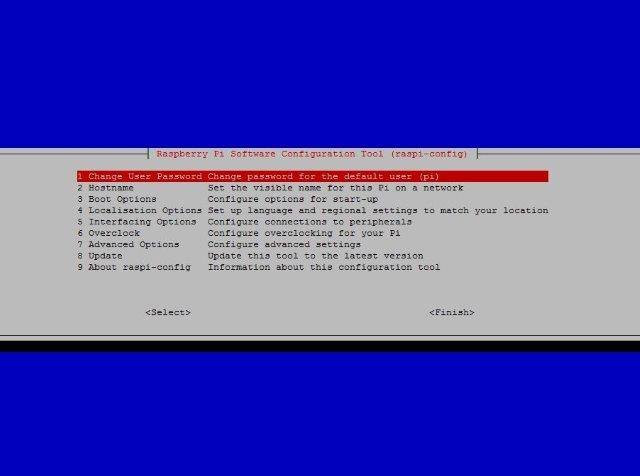
Configure timezone, services, hostname and password:
pi@raspberry: ~$ sudo raspi-config
Let’s walk through the most important changes:
- change the default password from “raspberry” to something else to have at least some increased security
- change your hostname which will make it easier dealing with multiple blinds
- Change the boot options to Desktop or CLI (as mentioned before I recommend the final deployment on the lite OS)
- Localization to adjust to country US, keyboard, timezone, etc
- Interfacing options to enable SSH (remote shell) and/or VNC (remote Desktop) at your liking
Controlling the RC motor with the Raspberry Hardware
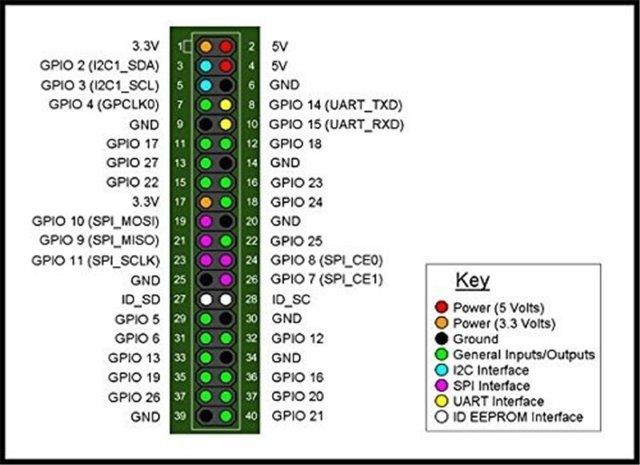
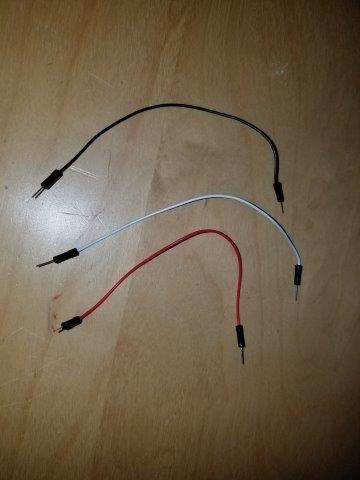
To control the RC motor you will need to attach the 3 wires from the Futaba S3003 to 3 pins on the raspberry PI.
- Power to PIN 2 (5V)
- Ground to PIN 6
- Data to PIN 11 (GPIO 17)
Controlling the RC motor with the Raspberry Software
To control the RC motor you will need to create two scripts. One to open and one to close the blinds. Future versions will include more granular control of the blinds but for now open/close is sufficient.
Make sure you are in your home folder with the “pwd” command. Then run the following command to install the Domoticz Home Automation software. This software will be used to receive JSON commands to open and close the blinds from any smart home hub. This was the main reason why I chose this implementation method. The software is for free and it is fairly easy to configure.
pi@raspberry: ~$ sudo curl -L install.domoticz.com | bash
This will install the software and run auto update and auto upgrade on your raspberry PI as well.
Then go into the subfolder domotics/script to create the two python scripts mentioned above.
pi@raspberry: ~$ cd ./domoticz/scripts
Cut and paste the following into your editor to create the two scripts. One for opening the blinds and one for closing the blinds.
pi@raspberry: ~$ sudo nano servo_tilt_on.py
#!/usr/bin/python

import RPi.GPIO as GPIO
import time
GPIO.setmode(GPIO.BOARD)
servoPin=11
GPIO.setup(servoPin, GPIO.OUT)
pwm=GPIO.PWM(servoPin,50)
pwm.start(7)
for i in range(0,180):
 DC=2./45.*(i)+2
 pwm.ChangeDutyCycle(DC)
 time.sleep( .01)
pwm.stop()
GPIO.cleanup()
Press Control + O to save and then Control + X to exit.
pi@raspberry: ~$ sudo nano servo_tilt_off.py
#!/usr/bin/python

import RPi.GPIO as GPIO
import time
GPIO.setmode(GPIO.BOARD)
servoPin=11
GPIO.setup(servoPin, GPIO.OUT)
pwm=GPIO.PWM(servoPin,50)
pwm.start(7)
for i in range(180,0,-1):
 DC=2./45.*(i)+2
 pwm.ChangeDutyCycle(DC)
 time.sleep( .01)
pwm.stop()
GPIO.cleanup()
Press Control + O to save and then Control + X to exit.
Now you have to make both scripts executable:
pi@raspberry: ~$ sudo chmod +x servo_tilt_on.py
pi@raspberry: ~$ sudo chmod +x servo_tilt_off.py
Controlling the RC motor with the Domoticz Software
To control the RC motor you will need to control the two scripts created above with one virtual device. You can access the control panel of the domoticz software via the IP address of your raspberry PI. http://YOUR_IP:8080/ and this will bring you to the dashboard. Click on hardware to create a new virtual dummy device and then create a switch controlling the blinds.
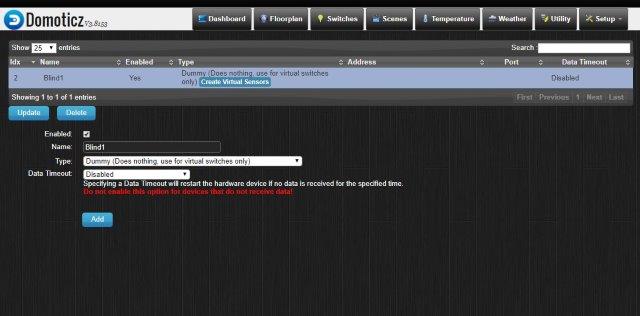
Select Enabled and define the name of your device e.g. Blind1. Select Type “Dummy” and Data Timeout “Disabled”.
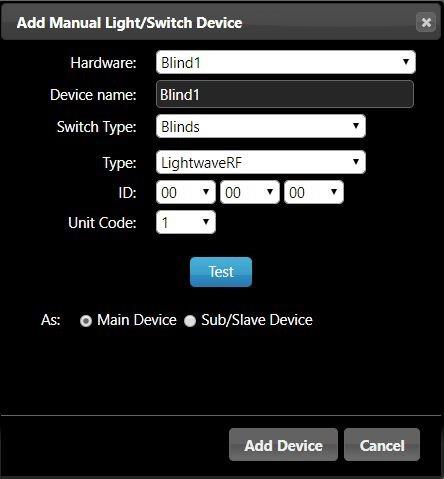
Then go to switches and add a manual switch. The hardware option should show you e.g. Blind1 already. Now you have to name your actual switch e.g. Blind1 switch. Switch type “Blinds” and Type pick e.g. “Lightwave RF” as this doesn’t matter given that we will call the two scripts created earlier.
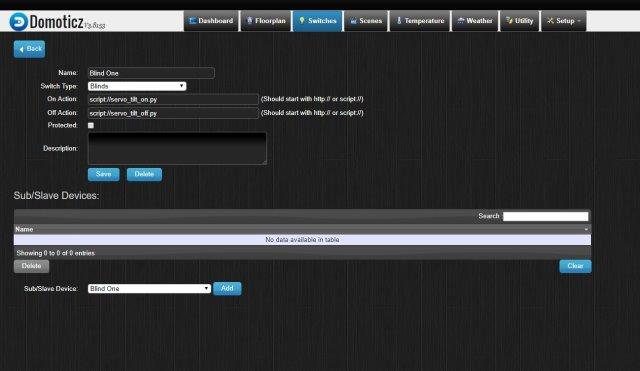
Selecting the new switch you just created allows you to configure the details.
Enter into the “On Action” field the following line:
script://servo_tilt_on.py
Enter into the “Off Action” field the following line:
script://servo_tilt_off.py
Click on Save.
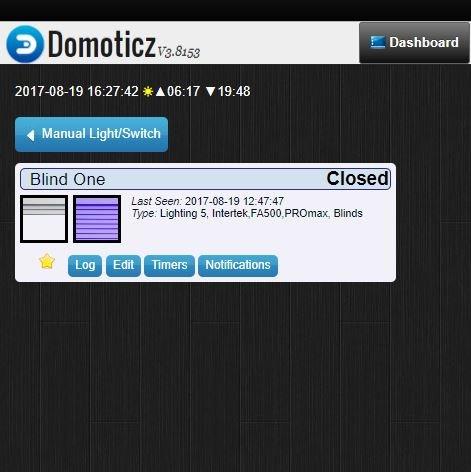
Last but not least click on the STAR icon which will make the blind switch appear on your dashboard every time you login.
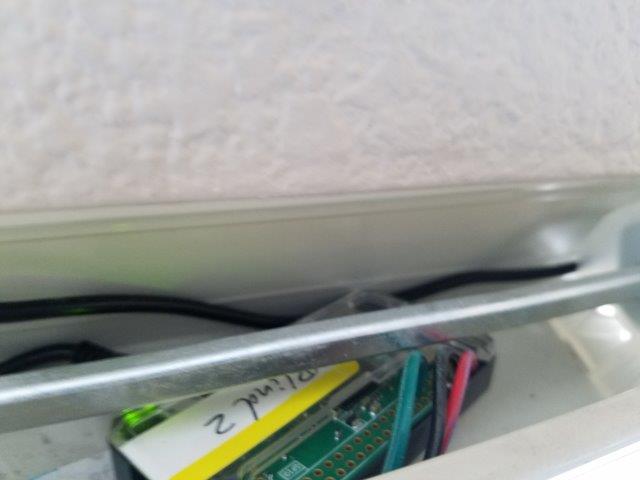
Hardware assembly for first test run
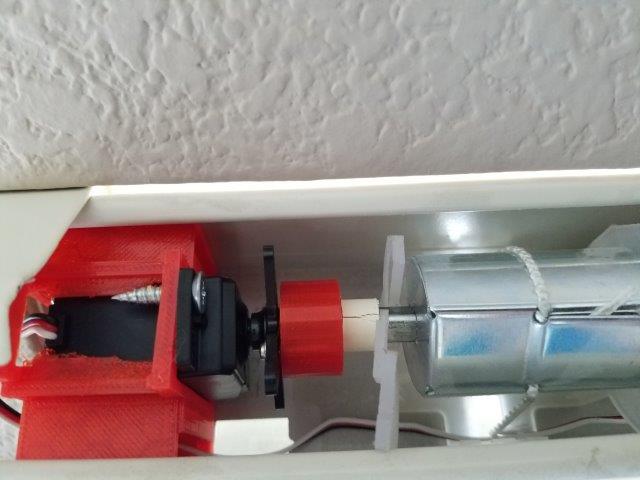
After removing the screw on the Futaba S3003 holding the wheel in place, you can start attaching the rod adapter 3D printed earlier to the servo wheel via 2 screws. I do recommend NOT to put the center screw for the wheel back on, until you have put the RC motor into the final position within the blind channel and adjusted. Most likely you will have to come back and adjust the wheel turning it by a couple of teeth to fit your blind setting in terms of closed or open.

Test to control the components
Here are a couple of tests you should perform to verify your installation and configuration before moving onto embedding the solution into your blind channel.
- run each script manually in your shell or remote shell to open and close the blind
- pi@raspberry: ~$ sudo python /domoticz/script/servo_tilt_on.py
- pi@raspberry: ~$ sudo python /domoticz/script/servo_tilt_on.py
- run JSON commands to see if the domoticz software properly controls the RC motor from your Web Browser:
- http://YOUR_IP_ADDRESS:8080/json.htm?type=command¶m=switchlight&idx=1&switchcmd=On
- http://YOUR_IP_ADDRESS:8080/json.htm?type=command¶m=switchlight&idx=1&switchcmd=Off
In all 4 cases above the RC motor should turn. If it doesn’t turn via command line, then you most likely have your wiring wrong between the raspberry PI and the RC motor or you have an issue with your software e.g. Python not properly installed, etc.
If the Web browser commands to turn the RC motor but the command line, then you need to go back and check your settings in domoticz especially the part where you enter the scripts names to execute. Easy to make a typo there.
Integration into Smart Home Hub
Now that we have a Raspberry PI Zero W, configured with Domoticz software to receive JSON commands to open and close blinds, it is time to integrate this solution into your smart home hub. In my case it is Homeseer right now but I could have taken one of my Veras or my Smartthings hubs.
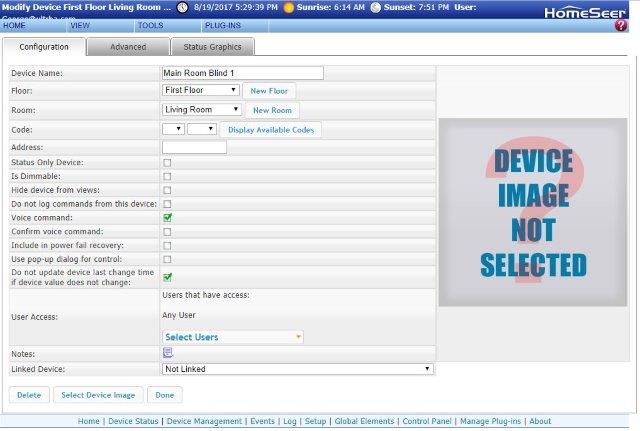
Device Management:
- Log into Homeseer and create a new virtual device e.g. Blind 1
- Enable Voice Control for that new virtual device for Alexa to find it.
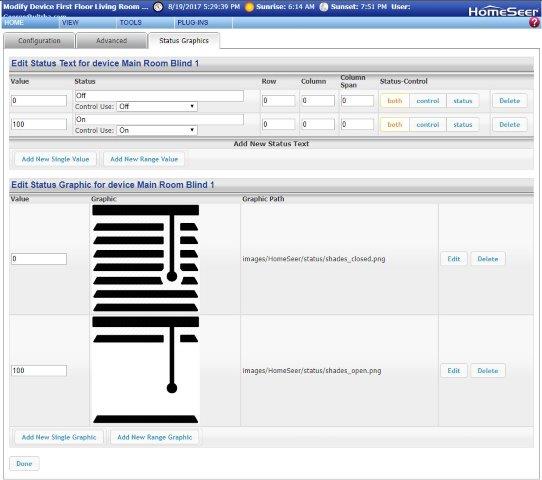
- Under Status graphics replace the on and off graphics with blind open and close graphics (optional task)
Events:
On Event
- Create a new event named Blind 1 ON
- If condition is when your virtual device you just created above changes state with “If Blind 1 changes and becomes ON“
- Chose “Run a Script“
- Check box “Execute immediate script command“
- Enter the URL to your Raspberry PI JSON command under the Homeseer call URL command &hs.URLAction(“http://YOUR_IP_ADDRESS:8080/json.htm?type=command¶m=switchlight&idx=1&switchcmd=On”,”GET”, “”, “”)
Off Event
- Create a new event named Blind 1 OFF
- If condition is when your virtual device you just created above changes state with “If Blind 1 changes and becomes OFF“
- Chose “Run a Script“
- Check box “Execute immediate script command”
- Enter the URL to your Raspberry PI JSON command under the Homeseer call URL command &hs.URLAction(“http://YOUR_IP_ADDRESS:8080/json.htm?type=command¶m=switchlight&idx=1&switchcmd=Off”,”GET”, “”, “”)
Powering the solution
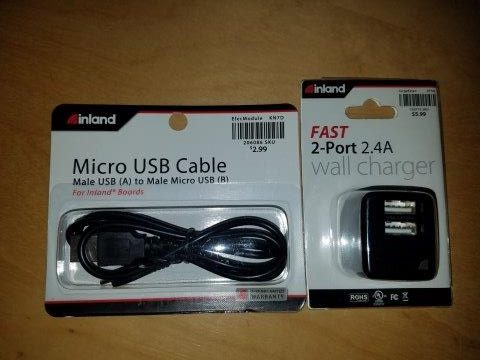
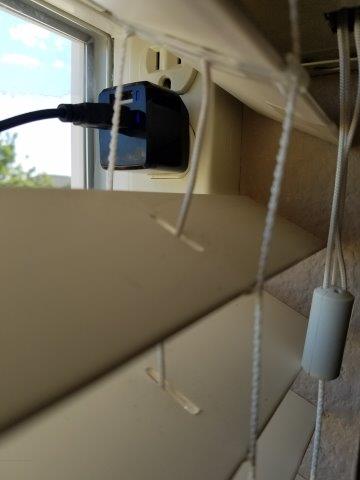
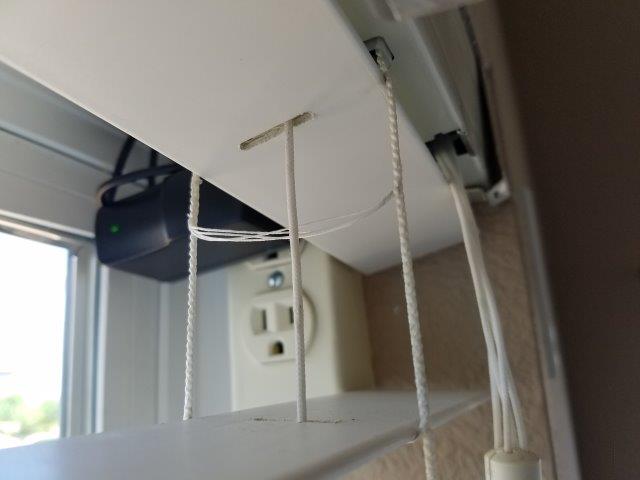
To make it easier to attach I chose a USB charger and USB micro cables to connect the Raspberry PI Zero W to the power outlet in the window. The good news is that it works with the 2.4A USB adapter for smaller blinds. The bad news is that you need a more powerful adapter for larger blinds.
Also please consider how your outlets are windows for all windows as in some homes all outlets are attached to a single 15A breaker. Attaching 7 x 2.4A USB chargers will trip your breaker so you will have to find the right balance of enough power to turn your blinds or replace your breaker and go for 20A. Most outlets can handle 15A and 20A but let your electrician do this job for you.
Total solution assembled and functional
Last steps are to embed the Raspberry PI and the RC motor into the channel of each blind, attach the USB cable from the Raspberry PI into the corresponding Power adapter and then go into your Alexa app and run Device Discovery and then say “Alexa, turn on Blind 1”.
Once you have all blinds installed and discovered by Alexa, you can group them in the Alexa app to e.g. “Living Room blinds” and then say “Alexa, turn on Living Room blinds”. ENJOY!

Total cost and components:
- Raspberry PI Zero W = $10
- Raspberry PI Zero case = $5 (optional but highly recommended to avoid contact with blind channel)
- USB charger = $8
- USB Micro cable = $3
- Futaba S3003 RC motor = $12
- Various wires and small screws = $3
- 3D print (cost of goods doing it yourself $2 for rod adapter and base)
Total cost per blind to voice control and integrate into existing smart home hub: $43
Additional one time charge used across all blinds:
- Power supply kit with HDMI and USB adapter $20
- Canakit USB keyboard and touchpad $25
- 3D Printer $300 – $3,000 (optional) in my case Flashforge Finder for $500
Tools needed:
- Soldering Iron
- Solder wire wick
- 3D printer (your own or from 3rd party shop)
- Screw drivers (small and large Philips)
- Filament for 3D printer (my printer came with one and I didn’t have to buy any filament for this project)
Total cost for my project automating 5 blinds and owning a new 3D Printer: $760

Additional note on security
I strongly suggest to give security some special thought. Here are some areas to consider and some of them are already mentioned above while others are not. Change the login and the password for your Raspberry PI
- Chose passwords at least 8 characters or more with lower and upper case and special characters (note: be careful as the Raspberry comes with UK keyboard enabled in most cases and your special characters might not be where you think they are)
- Enable security on Domoticz for the dashboard login for each Raspberry PI
- Enable authentication on Domoticz for your JSON commands via setup settings in Domoticz
- Use HTTPS wherever possible instead of HTTP to encrypt your JSON commands from your smart home hub
- Restrict SSH access on your Raspberry PI to IP addresses only within your home network or install a firewall on your Raspberry PI
- etc