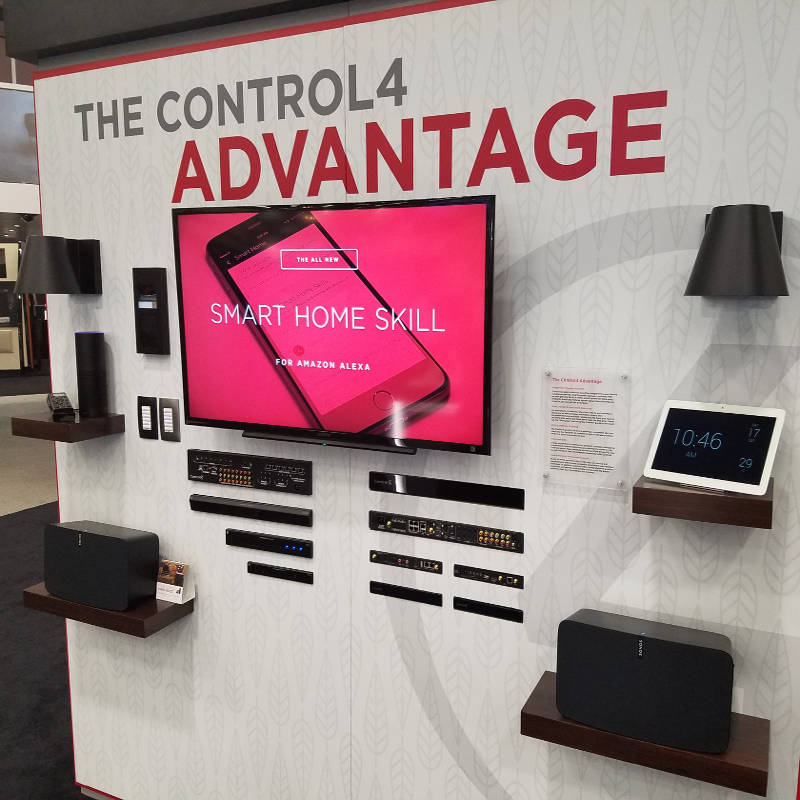
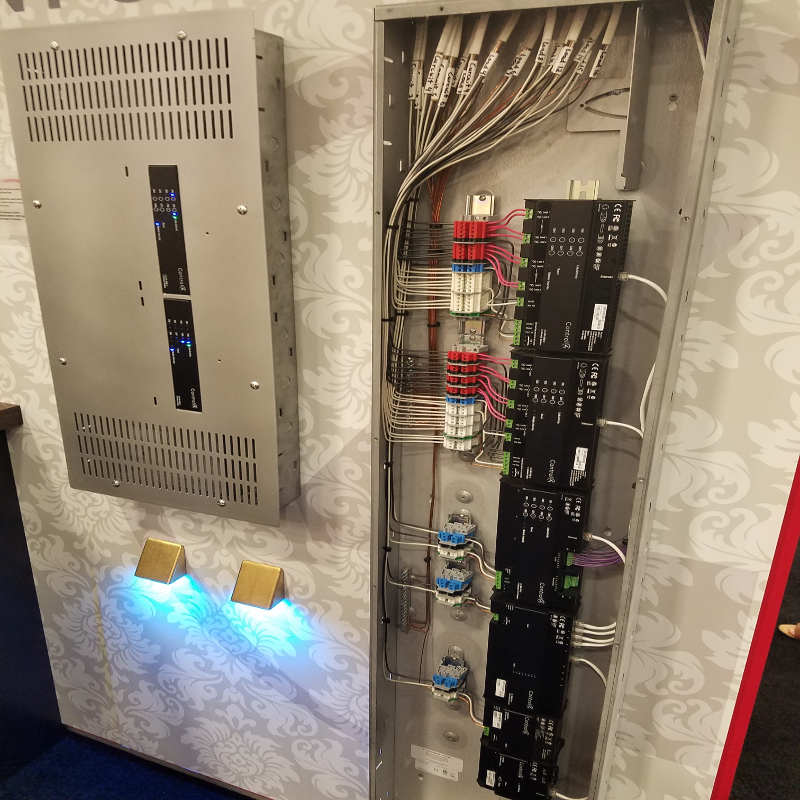
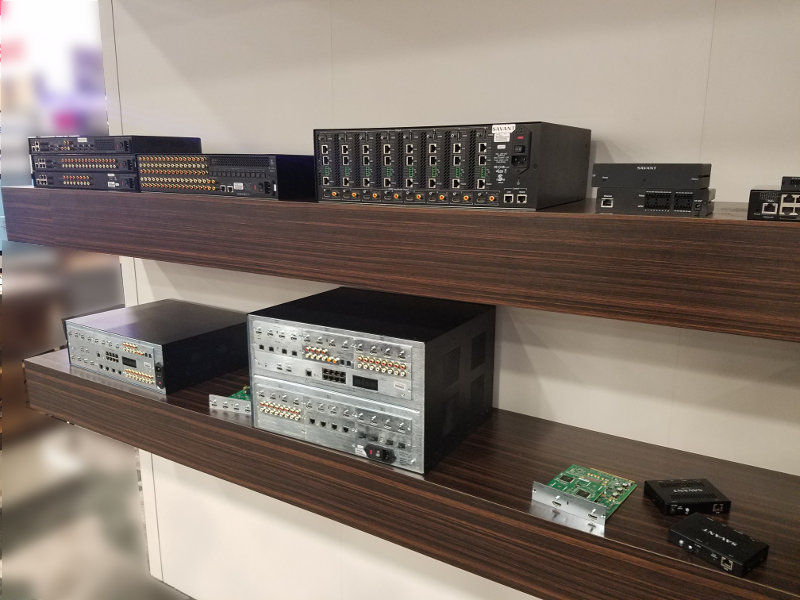
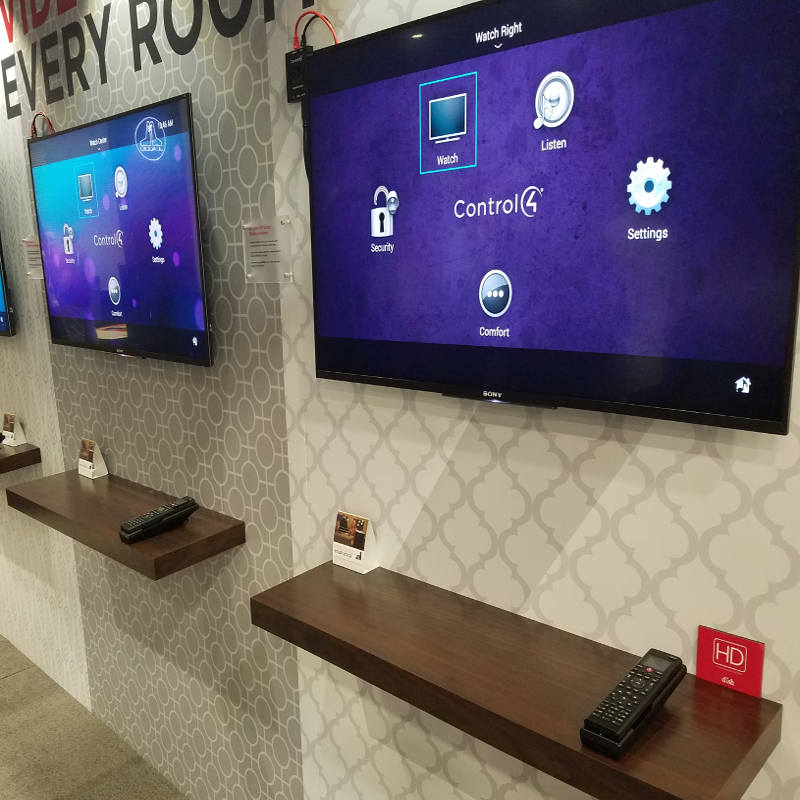
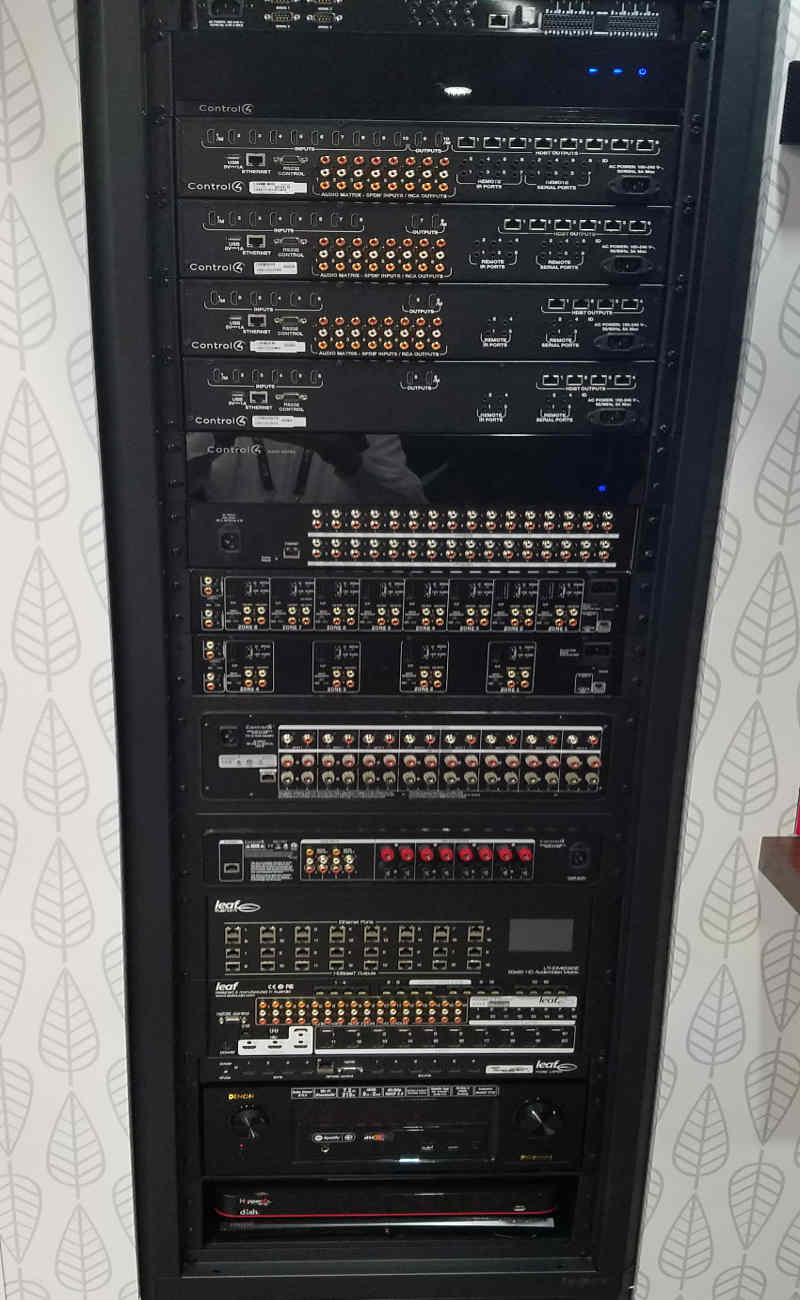
(On the left) Control 4 had by far the largest exhibitor area at Cedia 2016 but also by far the biggest ego. Making statements like “Our system never fails didn’t go well with integrators”.
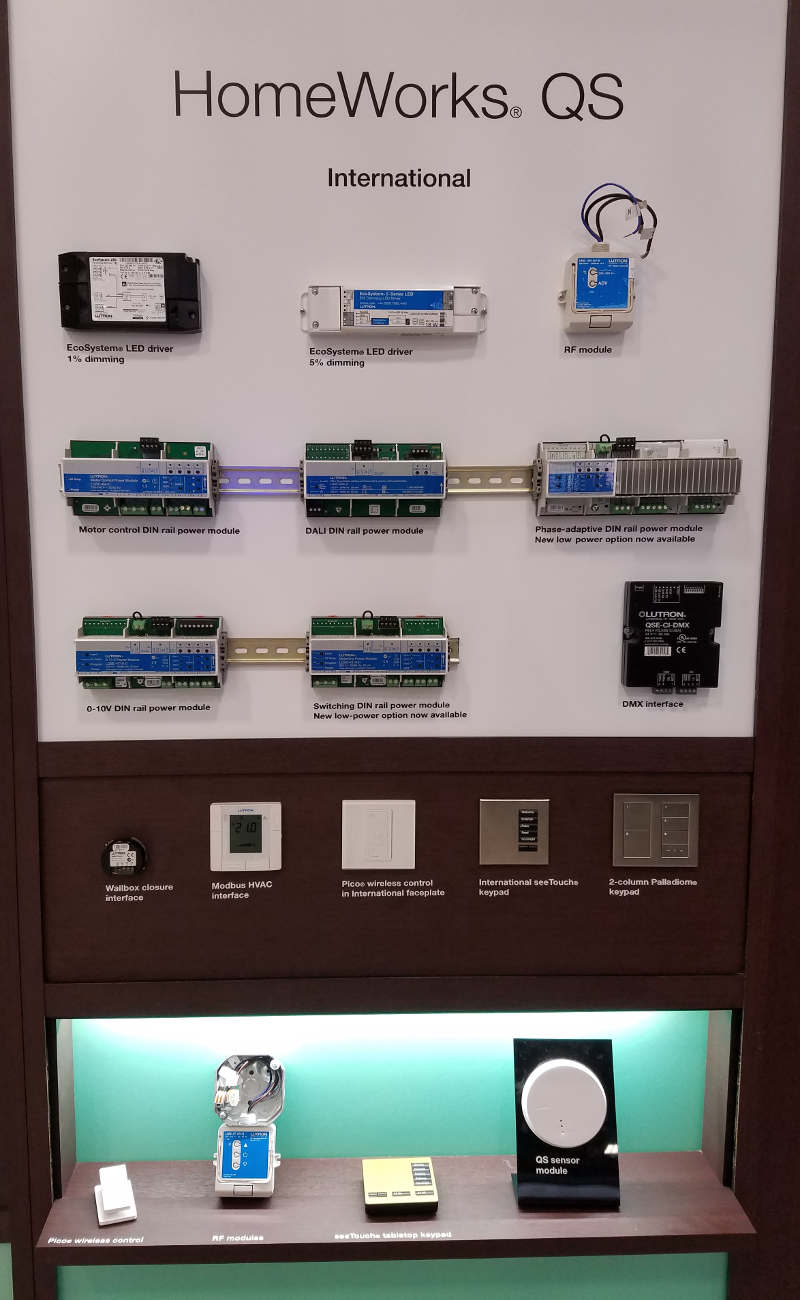
(On the right) Lutron was with Savant right behind in terms of size of booth and demo area. Lutron showcased their many home automation solutions.
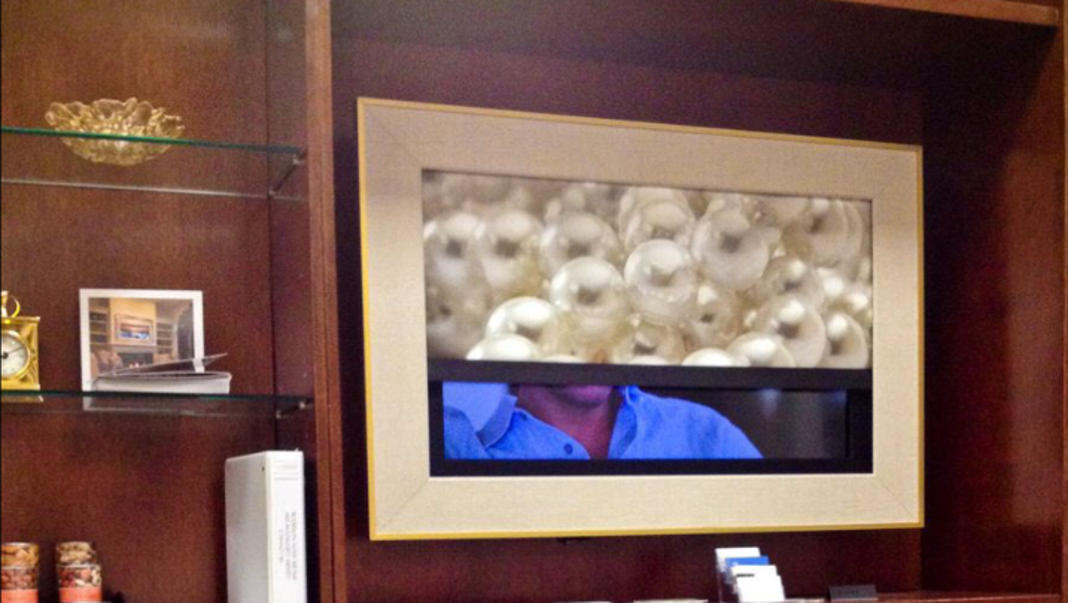
Another eye catcher were companies like Hidden Vision and FrameMyTV. Below is the video for a hidden weapon framed picture. Their motors are very quiet and the speed is also acceptable. They also have smaller applications for their picture frames for handheld weapons, safe storage, etc.
Watch the video below!
FrameMyTV had a smaller booth and their main attraction for integrators was their upcoming shop integration. This will allow integrators to resell the solutions under the integrator’s brand. They are even coming up with co-labelled and un-labelled material for integrators to give to potential customers.
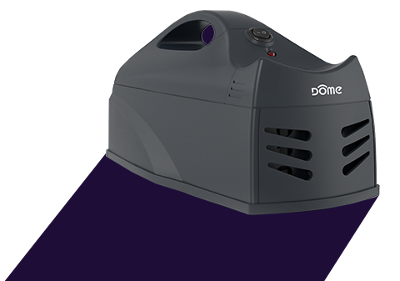
The star of the Cedia 2016 show was something completely different and unexpected. Dome HA showcased the first ever Z-wave enabled Mouse trap. Yes, you read correctly. A mouse trap, which notifies you after the critter has been caught in that trap. Very bizarre use case and not everybody will jump on this offering.
However,this shows that there are endless possibilities for Home Automation and there will be more to come. Cedia was great and looking forward to see you guys at Cedia 2017 in San Diego.
Internet of Things World 2016 was the 3rd annual event hosted at the Convention Center in Santa Clara CA. With over 10.000 attendees and over 200 exhibitors you were able to attend a total of 15 dedicated tracks around IoT ranging from manufacturing to smart cities, connected cars, the smart home, healthcare, energy & agriculture, supply chain & logistics plus much more. This is the second and final post of a two part report focusing on “The Smart Home” track from this event.
This report will cover new upcoming technologies, expert opinions shared at panels from various industry experts and interesting startups to look out for in the coming near future. This second part will focus on new innovations and enhancements of smart home devices.
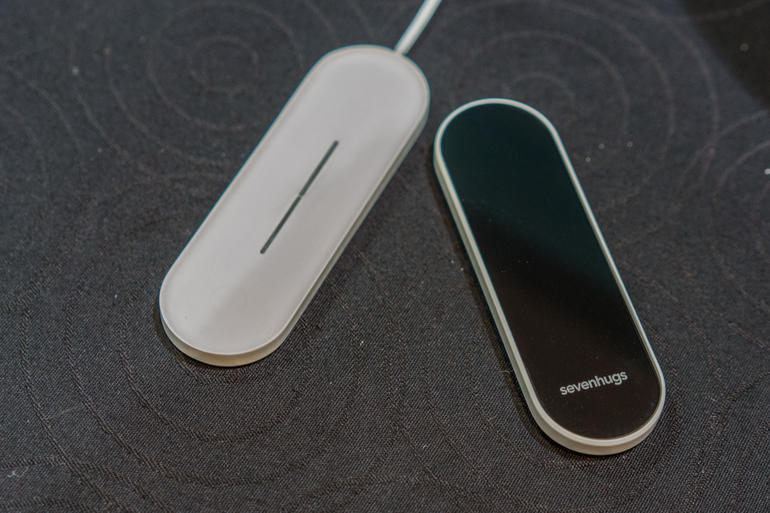
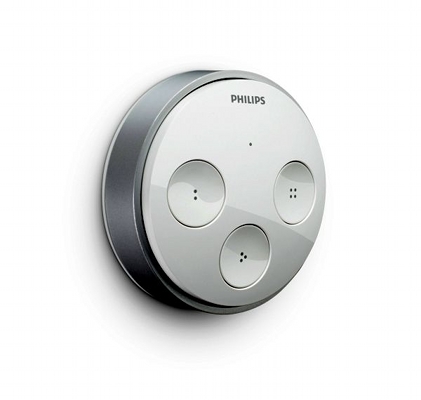
One of the most innovative products at this IoT event relevant to smart homes is the Sevenhugs “Smart Remote Control”. This touch remote adjusts to the device you are pointing at. In other words, you point at your Nest thermostat it will offer you a slider to adjust temperature up and down but when you point at your Philips Hue bulb it will change the menu to turn on/off and dim the light bulbs.
Talking to the Sevenhugs crew gave me some very good ideas as this remote is able to run HTTP/HTTPs commands. This could make the integration into Vera a breeze but I don’t want to judge until I can get one of those devices into my hands.
This device is not available today and they are aiming towards the end of this year to release that product to consumers. More information about this device can be found under http://remote.sevenhugs.com/
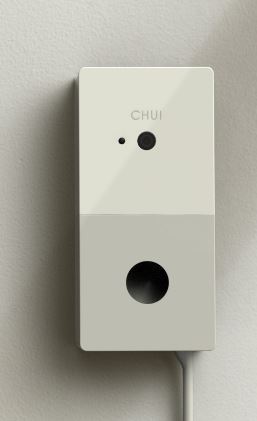
Another very interesting product called “Chui” got my attention. There are a variety of smart door bells out there already and more coming out. You can buy today Skybell, Ring, etc and soon you can buy a product called Remobell. They are almost the same in terms of features and functions while their designs might differ.
However, Chui is different. Chui is face recognition combined with your door bell. It will be able to perform certain tasks mapped to each user profile. As I outlined in my part 1 of my report Role Based Access Control (RBAC) is something which is desperately needed in conjunction with voice control and voice authentication but in this case RBAC is part of the product by mapping scene or tasks to a specific user e.g. Dad comes home and the door unlocks, the temperature goes to 74 degrees, the lights go on and dim to 50%.
Another benefit of Chui applies to the use case of dog walkers, cleaning lady or babysitters who need temporary access to your home at certain times. With smart locks using a key, you have to give them a key which defeats the purpose of having a smart lock. With smart locks using a code, you give them a code which can be used by anybody if they get their hands or eyes on that code. With face recognition user pictures will be stored and authenticated and then mapped to their user profile.
Very interesting concept and sounds very promising. Talking to their CEO he confirmed that they have taken a different approach and that they are taking security very serious. More details and pre-orders can be placed under https://www.getchui.com/
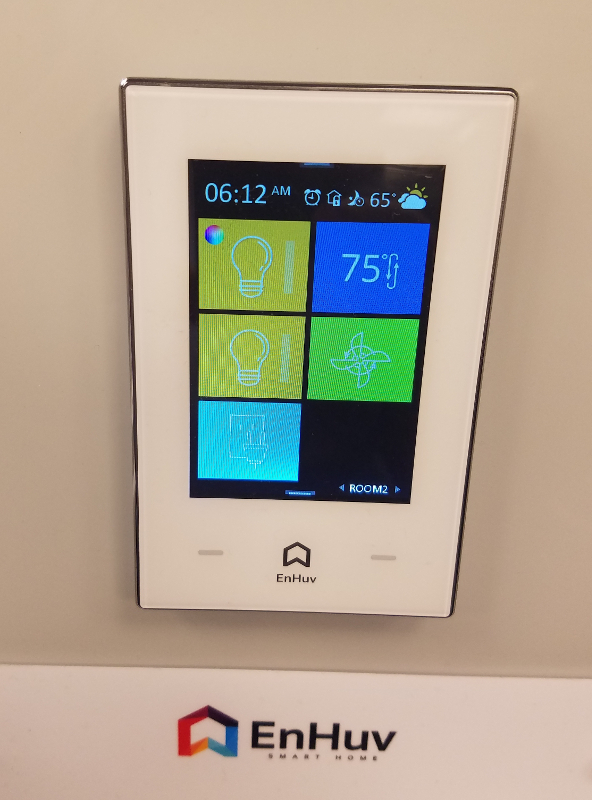
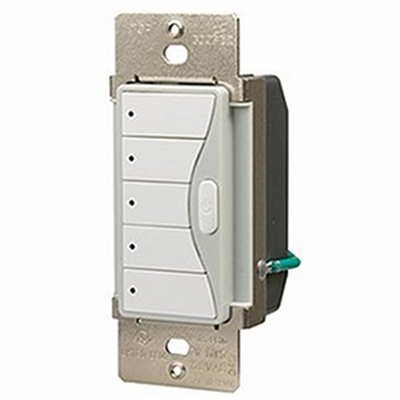
Changing from security to the lighting world. This product showcased in the startup arena of the IoT event got my attention. The sleek look and simple functionality while offering a wide variety of functions and compatibility made me take a deeper look at their product. The EnHuv light switch replaces single, two or 4 gang switches.
They are targeting $99 for the single and $179 for the 2-4 gang switch as their end consumer price. This is double the price of e.g. a Z-wave switch. However, a Z-wave switch is able to power on/off your lights or dim those lights. If you are using smart bulbs you have to use your cell phone app to start a specific scene or change the color of the lights.
This switch is a sleek looking and powerful device allowing you to control your lights from Philips, Wemo, etc and power on/off, dim, change colors in a simple interface which everybody understands. Talking to the team it became obvious that they have experience in that space from previous jobs and they are using that knowledge for this product development. I did ask what protocols they are or will support with that light switch and their answer was Z-wave, ZigBee, WiFi and Bluetooth.
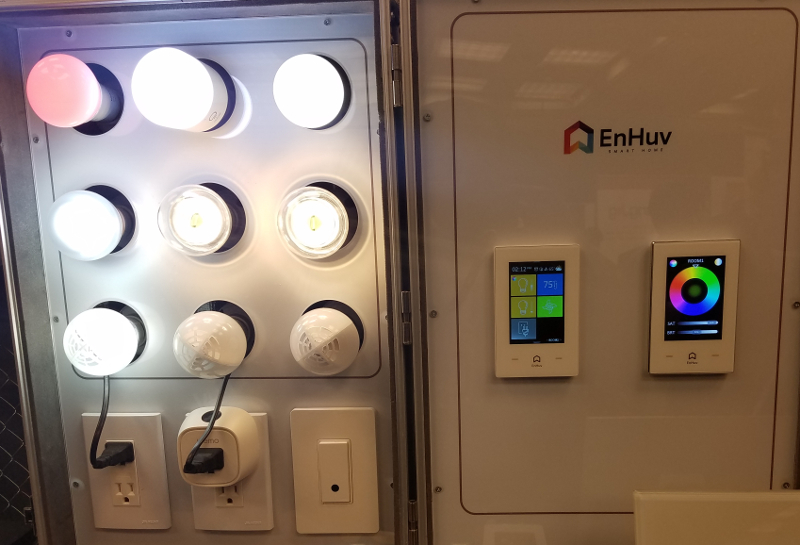
This product is not available today and no exact date was given to me but when I pushed they said that they should launch this year. That product can be compared with the Aeotec Touch Panel light switch which requires a Z-wave module behind it. This EnHuv light switch product has A) more functionality in terms of functions to apply B) more protocols Wifi, ZigBee, Z-wave, etc and C) a much higher price.
Time will tell if people are willing to invest double the price of a Z-wave switch/dimmer to obtain better and more functionality with a sleek design or if they will stick to their cell phone apps or pre-saved scenes of their home automation controller.
I also verified if their product requires an e.g. Philips Hue Bridge to work and their answer was that they don’t but if you do use the Philips Hue bridge, you would have much more functionality to choose from so they recommend using that bridge.
Having the ability to utilize existing scenes stored on the Philips Hue bridge would allow everybody to have consistent scenes on their cell phone app, their home automation controller and the EnHuv light switch. Their website is still in development but more detail can be found under https://enhuv.com/
Being on the subject of scenes I visited the booth of Greenwave systems. That company received one CES award in 2015 and I was curious about their product offerings and their portfolio. I have to say that I was amazed about their concept and their implementation.
Greenwave systems has taken scenes to a whole different level. Their product allows interaction with Amazon Echo aka Alexa and use natural language like speaking to a person instead of predefined commands. But this is not the only thing they can do. They allow the end user to create “tags” and map smart devices to those tags.
Example would be to create a tag called “Living room” and add devices like Sonos, Lights, Motion sensors, etc to that tag. The end user can then trigger that tag. On top of that the end user can create scenes on the fly e.g. he tells Alexa to create a scene called “Movie” and then record in order certain tasks e.g. 1) dim lights to 50% by using the earlier created tag, turn on TV, set thermostat to 76 degrees and then save this scene called “Movie”. The user can then run that scene by triggering it via Alexa. Modification of any scene is a breeze as the end user can simply add kitchen lights to the tag “Living Room” by adding e.g. a table lamp to the tag “Living Room”.
In a nutshell the Greenwave system solution enables scene management via voice control. I would classify this as dynamic scenes of Greenwave Systems vs static scenes from your home automation controller. Unfortunately Greenwave systems only works business to business and not business to consumer. More company details can be found under http://www.greenwavesystems.com/
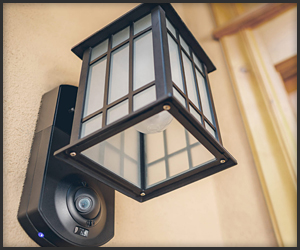
A different approach has been taken by the company Kuna. Kuna released last year an outdoor light with a camera and two way audio communication. People have been asking for an open API to integrate that product into their home automation controller systems. Talking to a Kuna representative he explained that they are consider their product a security system which is why they embedded a siren into their product and cloud features to enable recording and historical view for the end user and other features to support their endeavor.
Sounds like a video doorbell system but it isn’t. They are considering their product a secure ecosystem and opening that up could weaken that security concept. They didn’t say no to an open API but given the latest news on e.g. Smarthings hub security vulnerabilities from 2 weeks ago and the gmail exploit on the Samsung fridge from Aug 2015 feeds the argument not to open up their product to other ecosystems.
I also want to raise awareness of a new initiative between Pirch and Innit. They are launching on May 19th a showroom just like the Target smart home demo location in San Francisco ( http://openhouse.target.com/ ) but the main difference here will be that they will be showcasing smart appliances combined with the Pirch concept of having famous cooks working and demoing those appliances and their value add.
I am looking forward to some more details on this as Kitchen Home Automation use cases are limited today and more education is needed.
Last but not least I would like to share some data points shared by industry experts during panel discussions. One interesting study was performed last year where a test was conducted on 10.000 people where some articles were labelled with “Connected” to see if this would change their buying behavior.
The results were very interesting. Only 5% of the 10.000 people actually looked at the higher priced product. Of those 5% only 5% actually looked and read the “Connected” spending more time with the product.
My personal opinion is that most people didn’t even understand what “Connected” means. If I would see e.g. a crockpot saying “Connected” I would not assume that this product has WiFi or other connectivity. On the other hand the word “Smart” has already been used so many times over so many years that putting the word “Smart” into the list of features wouldn’t help either to identify a “smart product” which integrates into a smart home. Calling any product “IoT enabled” would make things worse as no average consumer would even understand what IoT means.
Overall a very interesting and educational event and I am looking forward to the Smart Home Summit in Nov 2016 in Palo Alto CA.
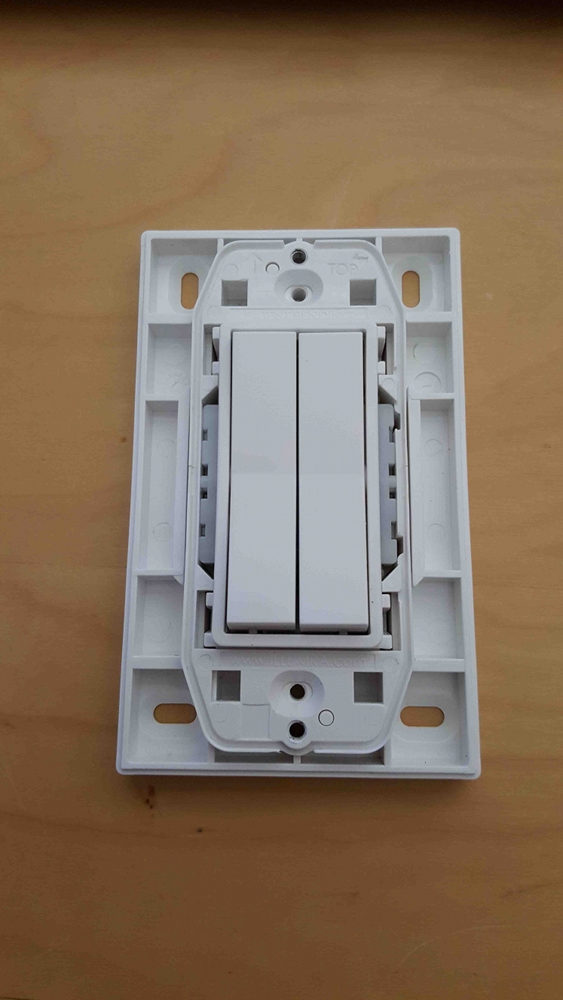
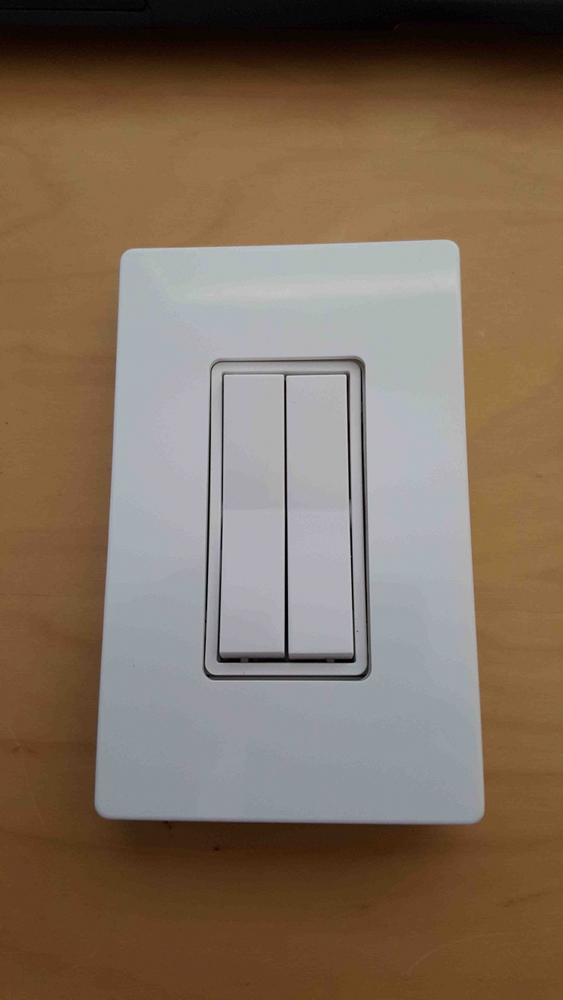
after having seen this video on Youtube https://www.youtube.com/watch?v=5bNSFaS2as8 , I started looking around and contacting a couple of companies. With the help from Enocean and their distributors I purchased the following switches on Amazon
The good news:
The Philips Hue Tap and this switch are using the same energy harvesting module housing. I was able to transfer the Hue Tap into this light switch by removing the existing energy harvesting module.
The bad news:
The Illumra and the Leviton switch (I bought both) are using PTM modules but the models don’t match the Hue Tap.
Leviton uses PTM210C
Illumra uses PTM210U
HueTap uses PTM215Z
I tested all those modules with the Hue bridge and only the 215Z works with the bridge.
This is the reason why those light switches are so expensive. They include those energy harvesting modules. If I could purchase the light switch without the module, I could simply use the HueTap module.
Other way around. If I could buy the light switch with the 215Z module, I wouldn’t have to buy the HueTap and I would be happy to pay 30 to 40 bucks more.
Currently I paid $60 for HueTap and $100 for the Illumra. Would I do this again? Not for that price.
After having read what options are available and people saying that some of those wired scene controllers are not easy to setup… I thought that this could not be rocket science but I was wrong.
I spent one whole morning with reading, research, verbose logging, try and error to finally get this working and before somebody else faces the same dilemma I am going to share on how to get this going. If this is the best approach… I don’t know but it meets my requirements now.
Setup:
– Philips Hue Lights with ethernet attached light hub controller
– Vera Light with Philips Hue Plugin installed
– working scenes applied to lights (5 scenes)
Goal:
– Not having to use the Vera GUI
– Not having to use the cell phone
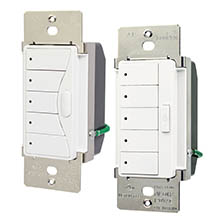
– Use a wired Scene Controller to enable those 5 scenes
Steps to start ingration:
1) provide power to Cooper controller
2) Pair controller with Vera (procedure is documented in many places)
3) Scene Controller will show up in Vera as “Scene Contr”
First dilemma:
1) The settings of this scene controller are not intuitive and very misleading
2) This was never designed to trigger Vera scenes as it was designed to communicate directly with other Z-wave devices
3) You will not find any place where you can define the buttons of the controller and/or which scene to trigger
4) You will NOT be able to select the Scene Controller for any scene creation when you define what your scenes should do (red x)
5) Whatever you do, you will not see any scene data/information in your scene controller settings (Control, Advanced or Scenes) until you created what is described below and after that you will only see your scenes under Control and under Advanced in the line scenes but you will see nothing under the tab Scenes.
Logic to get this working:
1) You have to understand that you have to define your scenes first without any involvement of this scene controller
2) Those scenes should be able to run without any settings or integration of the scene controller and you should check them via your Vera GUI if those scenes do what they are supposed to do BEFORE you start messing around with the scene controller
3) Once if you have your scenes working you have to add triggers to those scenes which means your scene controller complements your scenes by acting as a trigger and not via the settings of the device in your Vera GUI
Programming the scene controller:
1) Pick your first scene in my case “Lights Relaxed” (this scene should already exist and should be working) and then click on triggers and add a new trigger.
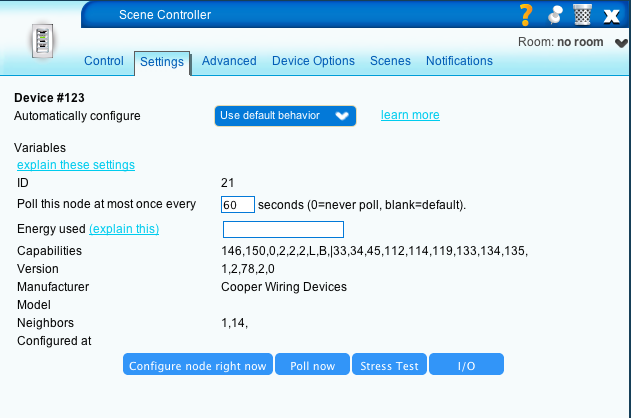
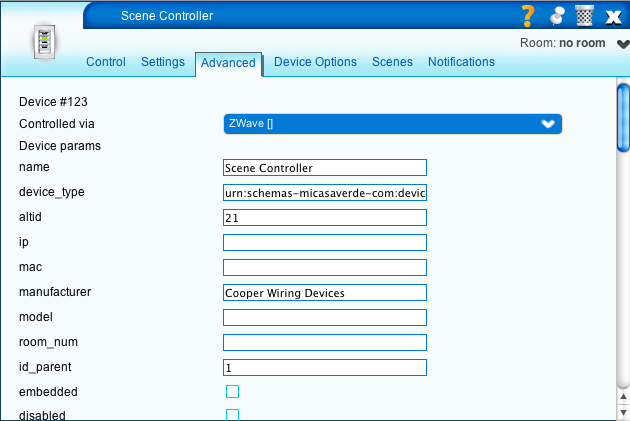
2) Select the scene controller (in my case ID123 see screenshots below with settings and trigger)
3) Select “A scene is activated” and this is the ONLY option you will need for any scenario
4) Give it any name you want
5) Where is says “Scene” you have to enter a number between 1 to 5 which represents the buttons on the Scene controller in my case 1 (see screenshot)
Repeat those steps for all 5 scenes until you have all buttons assigned.
Here comes another tricky part now…
Powering off lights failures:
1) There is the “All off” button on the scene controller and I could not get this to work despite all the workarounds I could research on the web and in this forum but I found a different way to address this
2) If you don’t have a way to power off the lights, any button you press wills start the scene and the scene will stay on and the blue LED on the scene controller will go on and off as you press the button but nothing will change
3) You can even press the different buttons on the scene controller and change between scene but assigning a scene where you power off the lights will not work. This is extremely frustrating.
Working solution:
1) You create a new scene which is “All Lights OFF” and you test this scene BEFORE you integrate the scene controller
2) Once you have your scene, edit the scene and do the exact same procedure as above where you assign a button to it but instead of picking a number between 1 and 5, you assign the number “0” and counter intuitive you have to select again “When a scene gets activated” instead of what logically would be “When a scene gets deactivated”.
Result:
1) When you press button 1, Lights relaxed scene gets executed, the blue LED goes ON
2) When you press button 1 again, Lights OFF will get executed, the blue LED goes OFF
3) When you press button 1, Lights relaxed scene gets executed, then you press button 2, Lights Night gets executed and you will see 2 blue LEDs ON but as soon as you press one of the two executed buttons/scene, the Lights OFF scene gets executed
4) I don’t need the “All OFF” button at all and it doesn’t even do anything
Additional troubleshooting note:
For whatever reason sometimes when you do all this trigger creation stuff and you don’t save after every step, you might end up with some of the buttons not working as they should despite all the settings showing up correctly. I had this twice. When this happens don’t try to modify around but go straight into the trigger section of your non-working scene controller button, remove the trigger and add a new trigger even if the settings you enter will be the exact same ones you can read on your screen. Sounds very weird but I had this 3 times until I get all my 5 buttons working as they should.
I hope this summary helps other people saving hours of time trying to integrate the cooper wired scene controller into their Vera network.
Additional recommendation to plugin developers:
Cooper Industries released a very sophisticated document about their hardware and settings and conditions which should be a great foundation for a proper plugin for Vera because I am sure that my implementation is not how it should be done and it doesn’t even use all the features and functions that product could provide. Take a look here…