Select Page
Switchbot vision pro lock setup

Switchbot vision pro lock setup

Switchbot lock vision pro setup

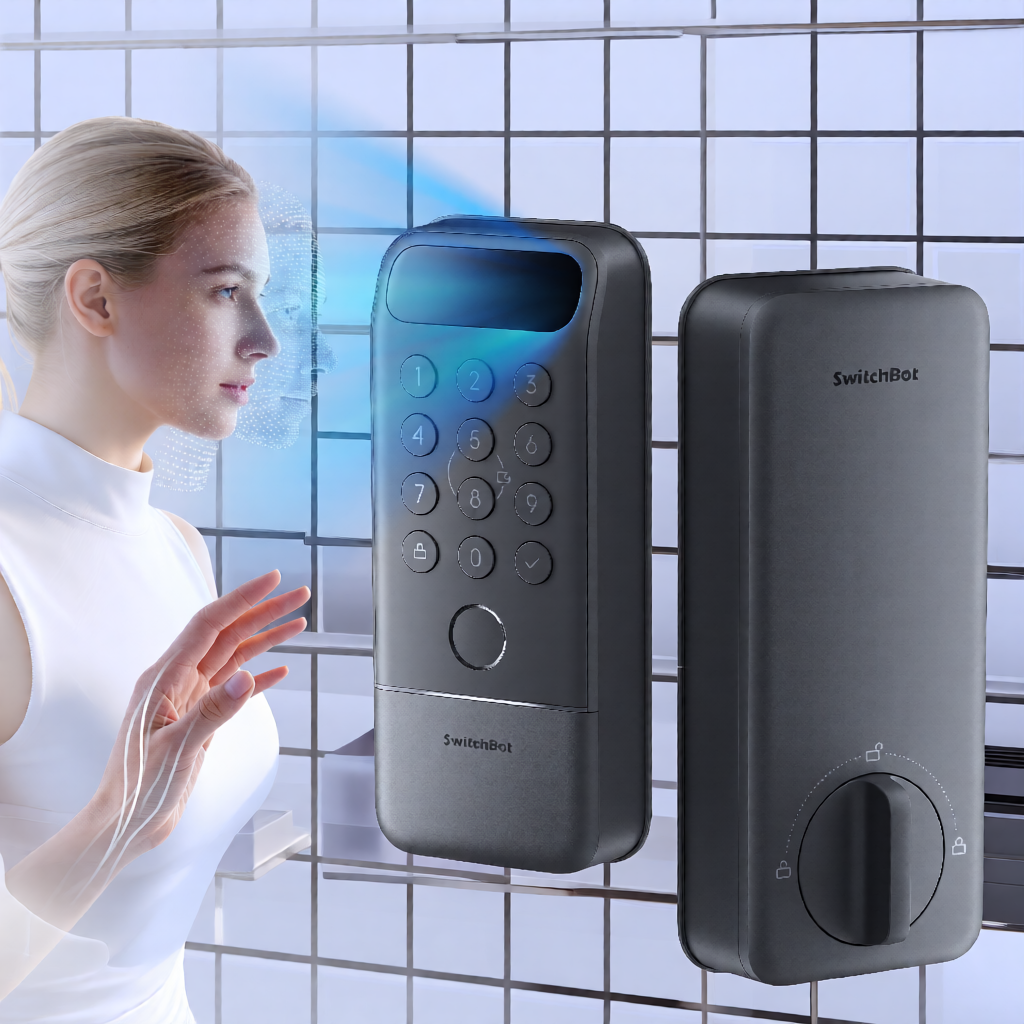
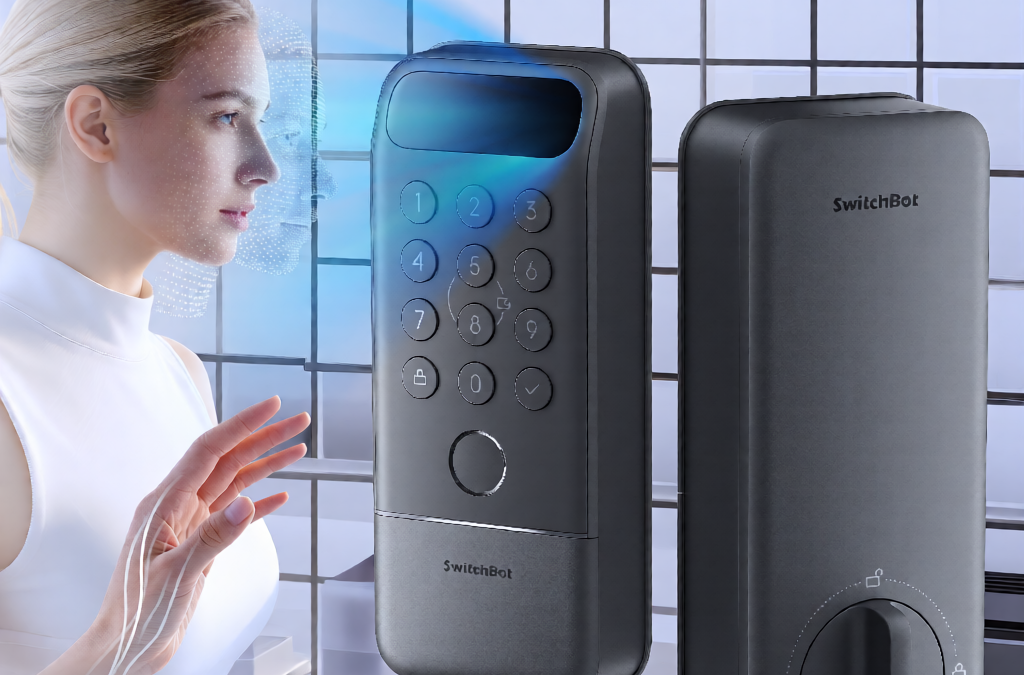
I recently installed the SwitchBot Lock Vision Pro at my home. As with any smart home addition, the goal was seamless integration into my existing ecosystem, specifically Home Assistant. The physical installation was straightforward, but the digital onboarding presented a specific hurdle that I want to detail here to save others the same confusion. This is not a review of the hardware’s features, but a report on the setup process, specifically the transition from a standalone device to a fully integrated Matter node.

Before diving into the steps, it is worth noting that I have covered various lock integrations in the past, such as my experience with the Yale door lock. Each manufacturer approaches connectivity differently, and SwitchBot’s approach via the app-first model has its own quirks. If you are following this guide, assume you have already purchased the device and completed the physical mounting. The focus here is the software handshake between the lock, your phone, and your hub.

Physical Fitment and Installation

The installation process began with the physical components. The Lock Vision Pro comes with several parts, including the main lock body, the keypad, and a specific plastic piece designed to interface with the outer door frame. This is where I encountered the only friction during the physical setup. The plastic piece that goes into the outer door frame was way too big to fit into the hole that was already there. It is a physical fit issue, not a manufacturing defect in the traditional sense, but a compatibility gap between the provided hardware and the existing door structure.

Once I resolved the fitment issue by adjusting the mounting point, the rest of the physical installation proceeded as expected. The alignment of the deadbolt mechanism and the keypad panel is standard. However, it is worth mentioning that if your door frame has a pre-existing cutout, you should measure the SwitchBot plastic insert before you start drilling or modifying the frame. I did not need to drill new holes, but the size mismatch required a different approach than the standard tutorial videos suggest.

Physical installation is only half the job. The lock is not smart until it is paired. I wanted to highlight this step because many users move straight to the app, assuming the physical mount guarantees functionality. In my case, the physical fit was the variable, not the procedure.

Initial Pairing via Bluetooth

After securing the lock to the door, I opened the SwitchBot app on my phone to initialize the device. The first step is always Bluetooth pairing. I held the pairing button on the lock until it entered discovery mode, then selected it in the app. This process is standard for most Bluetooth Low Energy (BLE) devices and did not present any issues. The connection was stable, and the app recognized the lock immediately.

At this stage, the lock is fully functional within the SwitchBot ecosystem. You can lock and unlock it, and trigger events. However, it is not yet integrated with other platforms. I have found that many users, including myself, overlook the next step.

My next step was to pair the lock with Home Assistant. I navigated to the Matter integration in Home Assistant and initiated the pairing process. I waited. Nothing happened. The lock was not showing up in the list of available Matter devices. I checked my Wi-Fi signal, my Matter bridge, and the lock’s power. Everything seemed correct, yet the device remained invisible to the hub.

I realized that I had assumed the lock was automatically broadcasting its Matter identity after the initial Bluetooth setup. This is a common misconception. Many manufacturers assume that once a device is set up in their app, it is discoverable by other platforms. In reality, the SwitchBot Lock Vision Pro requires you to explicitly enable pairing mode for Matter discovery from within the SwitchBot app. Nobody told me this. The onboarding guide in the app does not clearly state that you must return to the app to initiate this specific state before another platform can find the device.

I found this step online, in community forums and support documents that were not part of SwitchBot’s own onboarding flow. The solution was simple once I knew it existed. I had to open the SwitchBot app, navigate to the lock’s settings, and find the option to put the device into pairing mode for new controllers. This is distinct from the initial Bluetooth pairing mode. It is a specific state that tells the device, “I am ready to be discovered by a Matter controller.”

This is a critical detail. If you are following this guide, do not skip the Bluetooth setup. You must complete the initial configuration in the SwitchBot app. Then, to make it discoverable to Home Assistant (or any other Matter controller), you must go back into that same app and trigger the Matter pairing mode. The device acts as a Matter bridge, and the pairing mode allows the external hub to discover it on the local network.

Once I initiated this pairing mode from the SwitchBot app, I returned to Home Assistant and retried the discovery. This time, the lock appeared. The difference was not in my Home Assistant configuration, but in the state of the lock itself. It was waiting for a signal that it was authorized to be discovered by a new controller.

Switchbot lock vision pro setup

Joining via Matter over Wi-Fi

With the lock in pairing mode, I was able to use my cell phone and the Home Assistant companion app to join the lock to Home Assistant via the Matter over Wi-Fi protocol. The companion app is useful here because it allows you to manage the Matter pairing process directly from a mobile device, which can be more convenient if your main hub is running on a headless server or a device without a touchscreen.

The process of adding the device via Matter over Wi-Fi involved entering the Wi-Fi credentials for the lock. This is a crucial step. The lock needs to connect directly to your Wi-Fi network to function as a Matter node. It does not rely on the phone’s internet connection for this. You are essentially telling the lock, “Here are the network credentials, and here is the Matter commissioning payload. Connect and register.”

Once the lock connected to Wi-Fi and completed the Matter commissioning, it was visible in Home Assistant. The integration was clean. I could see the lock state, lock it, unlock it, and trigger events. The latency was comparable to other Wi-Fi-enabled devices, and the reliability has been consistent in my testing.

It is important to note that this setup allows the lock to be controlled locally through Home Assistant’s Matter integration. While the initial setup required the cloud (the SwitchBot app) to put the device in pairing mode, the ongoing operation is handled through the Matter protocol on your local network. This provides a level of privacy and speed that is often lacking in purely cloud-dependent devices.

Practical Insights and Next Steps

The key takeaway from this process is the importance of the “pairing mode” step in the SwitchBot app. If you find that Home Assistant cannot see your SwitchBot lock, this is the most likely culprit. The device is not broken, and your Matter configuration is likely correct. The lock is simply not broadcasting its presence to new controllers.

I have integrated other devices that require similar steps, such as the Z-Wave doorbell integration, where the pairing process is distinct from the initial setup. The principle is similar: the device must be in a specific state to be discovered. For the SwitchBot Lock Vision Pro, that state is managed within the proprietary app.

For those considering this lock for their own setup, I would recommend verifying that your Wi-Fi network is robust. Matter over Wi-Fi devices can be sensitive to signal strength. Since the lock is on a door, the distance to your router might be significant. I placed my router in a central location, but I would advise testing the signal strength at the door location before finalizing the installation.

In summary, the physical fitment of the outer frame piece was a minor hiccup, but the software setup required a specific, non-obvious step in the SwitchBot app to enable Matter discovery. Once that was done, the integration with Home Assistant via Matter over Wi-Fi was smooth. If you are looking for a lock that can fit into a modern, Matter-based smart home ecosystem, the SwitchBot Lock Vision Pro is a viable option, provided you are willing to navigate the initial app-based configuration. I hope this helps clarify the process. 

Unleash your full Unify Dream machine Wifi 6 Speeds

Unleash your full Unify Dream machine Wifi 6 Speeds

With Wifi 6 and Wifi 6e and the just announced Wifi 7 standards rolling out, you want to ensure that you have the latest and greatest speeds at your home. 

There are some gotchas on the path to achieve the highest performance and I will also address the most economical vs the “Unify ONLY” method.

With the release of the Wifi 6 Access Points of Ubiquity you will notice the speed requirements of 2.5Gb/E POE to ensure the optimal performance for your network.


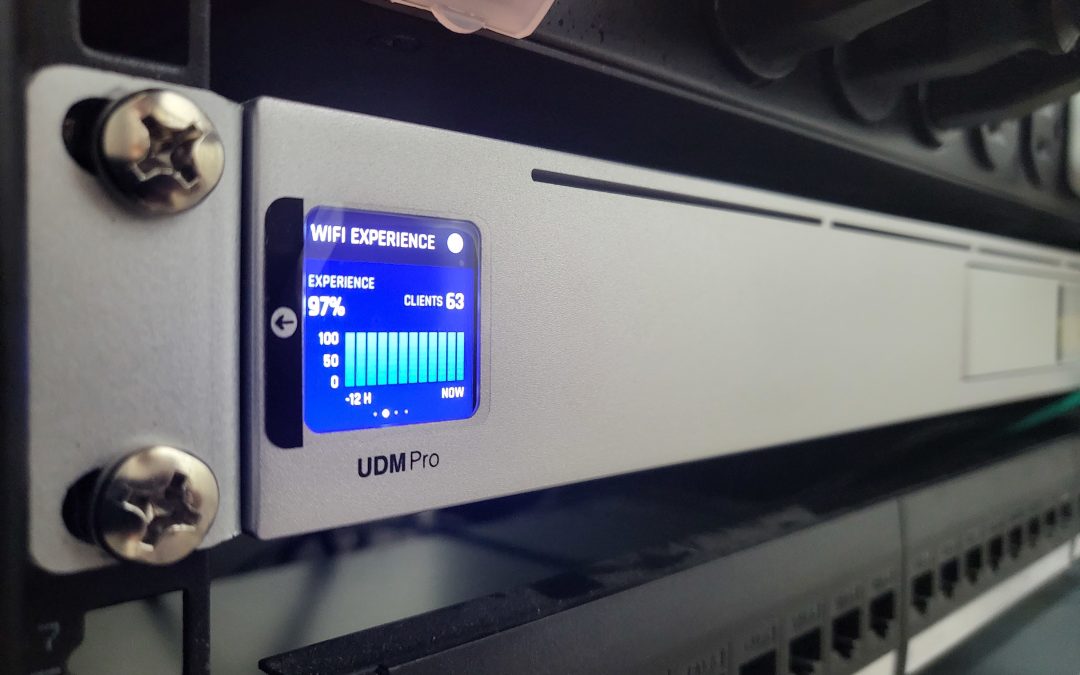
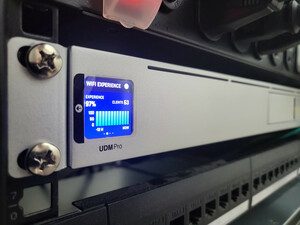
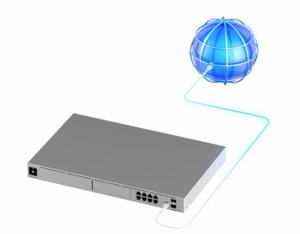
The UDM-Pro Dream Machine is a great device but if you look closely you will find 2 x 10G SFP+ ports, 1 x 1G RJ45 WAN and 8 x 1G RJ45 ports for a total of 11 ports. 

The first scenario is using the 1G RJ45 WAN port connected to your Xfinity, ATT, etc modem/router (hopefully is pass-through mode), which leaves 2 x 10G SFP+ ports to connect to your new Wifi 6 Access Points.

You would have enough ports to direct connect them to your UDM-Pro but you don’t get POE assuming you want to connect 2 Access points for redundancy reasons.


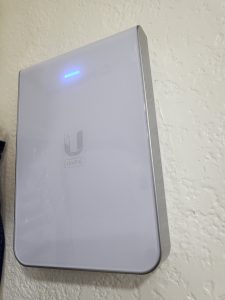
The new U6-IW Access Point, which is an In Wall Access Point powered by POE. The Access Point has additional network ports at the bottom and you will need to power this access point with POE+, if you want to have POE out.

POE+ is not required but recommended as this access point and the U6-LR (Long Range) consume about 15W on average. 

The challenge comes with the POE+ part. You have to purchase a switch with POE+, which also support 2.5Gb/E or you use the existing 10G SFP+ ports but then you need a POE injector.

You can go with the Ubiquity POE adapters or buy no-name POE adapters, but the best path of action would also be the priciest path as Ubiquity recommends their enterprise 24 Port POE+ switch for $800 all the way to their enterprise 48 Port POE+ switch for $1,600.  


With those prices for those POE+ switches the POE injectors look suddenly much more attractive than before!

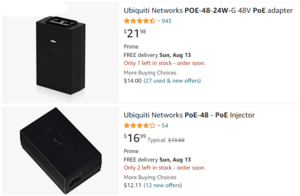
With that said, you need to be careful as not all POE injectors support the speeds you need. Some of them only support 10/100, while others support gigabit speeds which you can recognize in their part number with the G at the end.

If you go with the cheaper model like you see here on Amazon with only 10/100 saving $5, you will get a message in your Unify dashboard stating “Poor Ethernet Link Speed Try replacing your AP’s cable”. It is obviously not the cable as it is the POE injector slowing you down assuming you have the proper CAT cable for your Access Points.


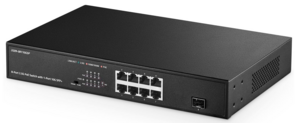
The most economical way of achieving the overall goal of best performance would be a switch. In this case an unmanaged switch which supports POE+ for 2.5Gb/E ports and has a 10G SFP+ port. There are some affordable models on Amazon and I tried 3 of them.

The first one from Yanley did not work as advertised and actually died during the install and there was no mention of that model on the manufacturer website and the manual was the wrong manual. I sent that switch back for a full refund.

The second one got delayed during shipment from China, so I ended up with the Binardata switch. 

This switch comes with 8 x 2.5Gb/E ports POE+ and 1 x 10 SFP+ port. You connect this switch using a 1M SFP+ DAC cable and you connect your access points directly to the POE+ powered ports.

What nobody tells you though is that once you introduce a 3rd party switch into an ubiquity network, you will lose your ability to look at your topology map to see your Wifi clients. Given that all your Wifi clients will be connected to both or more of your access points, you will not see a single client in your topology map.

I emailed Ubiquity about that issue and their response was that 3rd party vendors incorrectly forward LLDP traffic causing this.

After emailing Binardata, they replied that this is an unmanaged switch and they don’t have a way to block LLDP forwarding. 

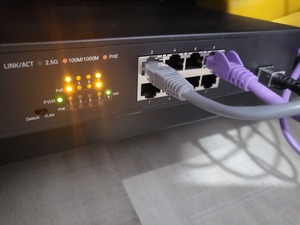
If you look carefully though, you will see a dip switch for VLAN support and what this dip switch does, it forces all communication from all 2.5Gb/E ports to the 10G SFP+ port blocking all communications between the 2.5Gb/E ports and this includes forwarding of all LLDP traffic. 

As a result, once you flip that dip switch your topology map will start working again and you will see your access points directly connected to your UDM-Pro and given that this is an unmanaged switch, this is totally acceptable.

Now you have a switch with 8 x 2.5Gb/E ports allowing you to connect up to 8 access points with up to 150W of total POE+ power.  


Another reason why it makes sense to use 1 of the two 10G SFP+ ports to connect to one unmanaged switch is that you most likely won’t have more than 4 x 2.5Gb/E access points in your home and given that you use the 1G port for WAN connectivity you have one more 10G SFP+ port left, which in my case talks to my Synology RS1221+ model hosting VMs, network shares, BlueIris and Home Assistant. Having one dedicated 10G ethernet connection to that device is more than appropriate. 

In summary, you can upgrade your UDM-Pro from Wifi 5 to Wifi 6 or Wifi 6e by either investing in the proper Ubiquity POE+ switch family, which will cost you at least $800 and you will get 24 POE ports while you might only need 2 or 3 of them…

or….

You purchase this affordable unmanaged switch no-name brand on Amazon Link  for $166 (and I want to make it clear that I have zero affiliation with that company and I found them on Amazon and I purchased that device at the full price).

Use the dip switch for VLAN isolating and blocking LLDP traffic giving you the ability to scale your access points with POE+ to up to 8 at a very affordable price unlocking the full speed in your home network.

I hope you found this article helpful and you will be able to break out and join the high speed highway.

Light-Motion combination switch

Light-Motion combination switch

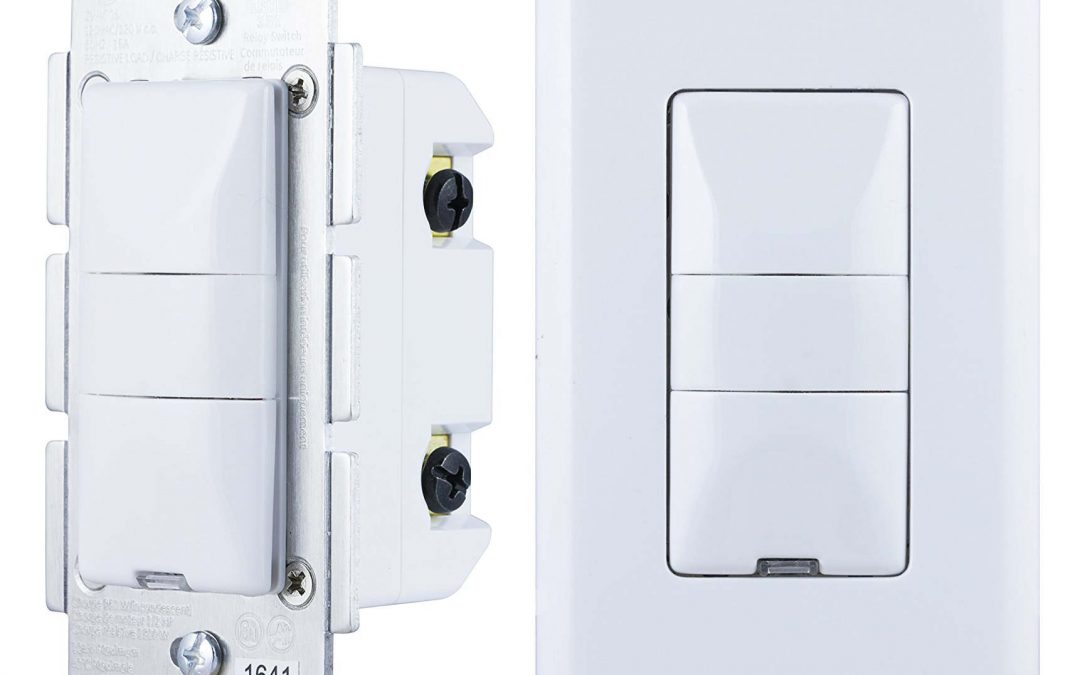
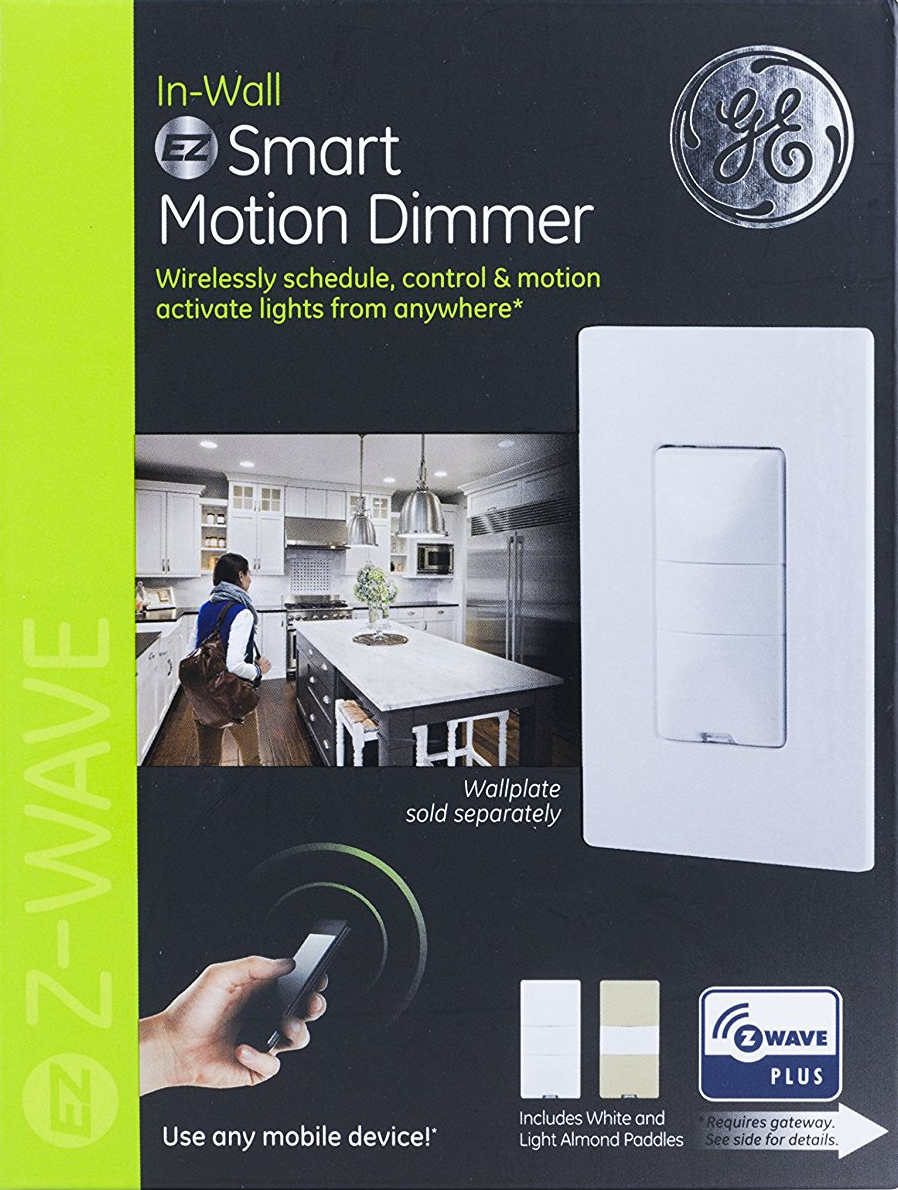
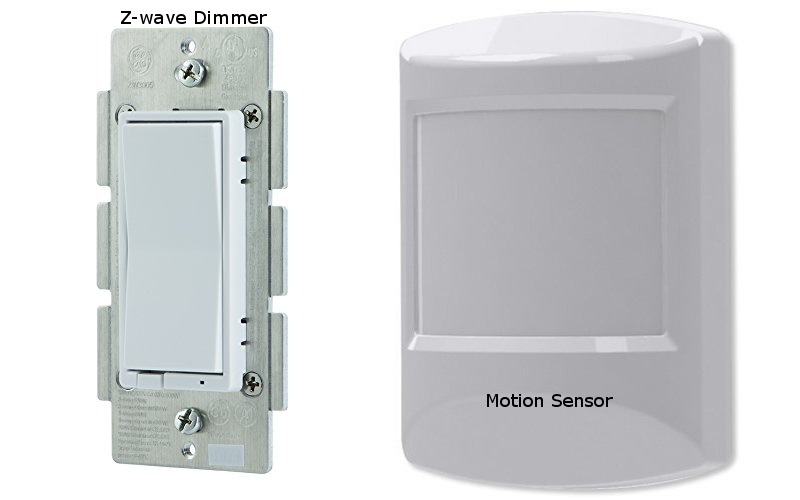
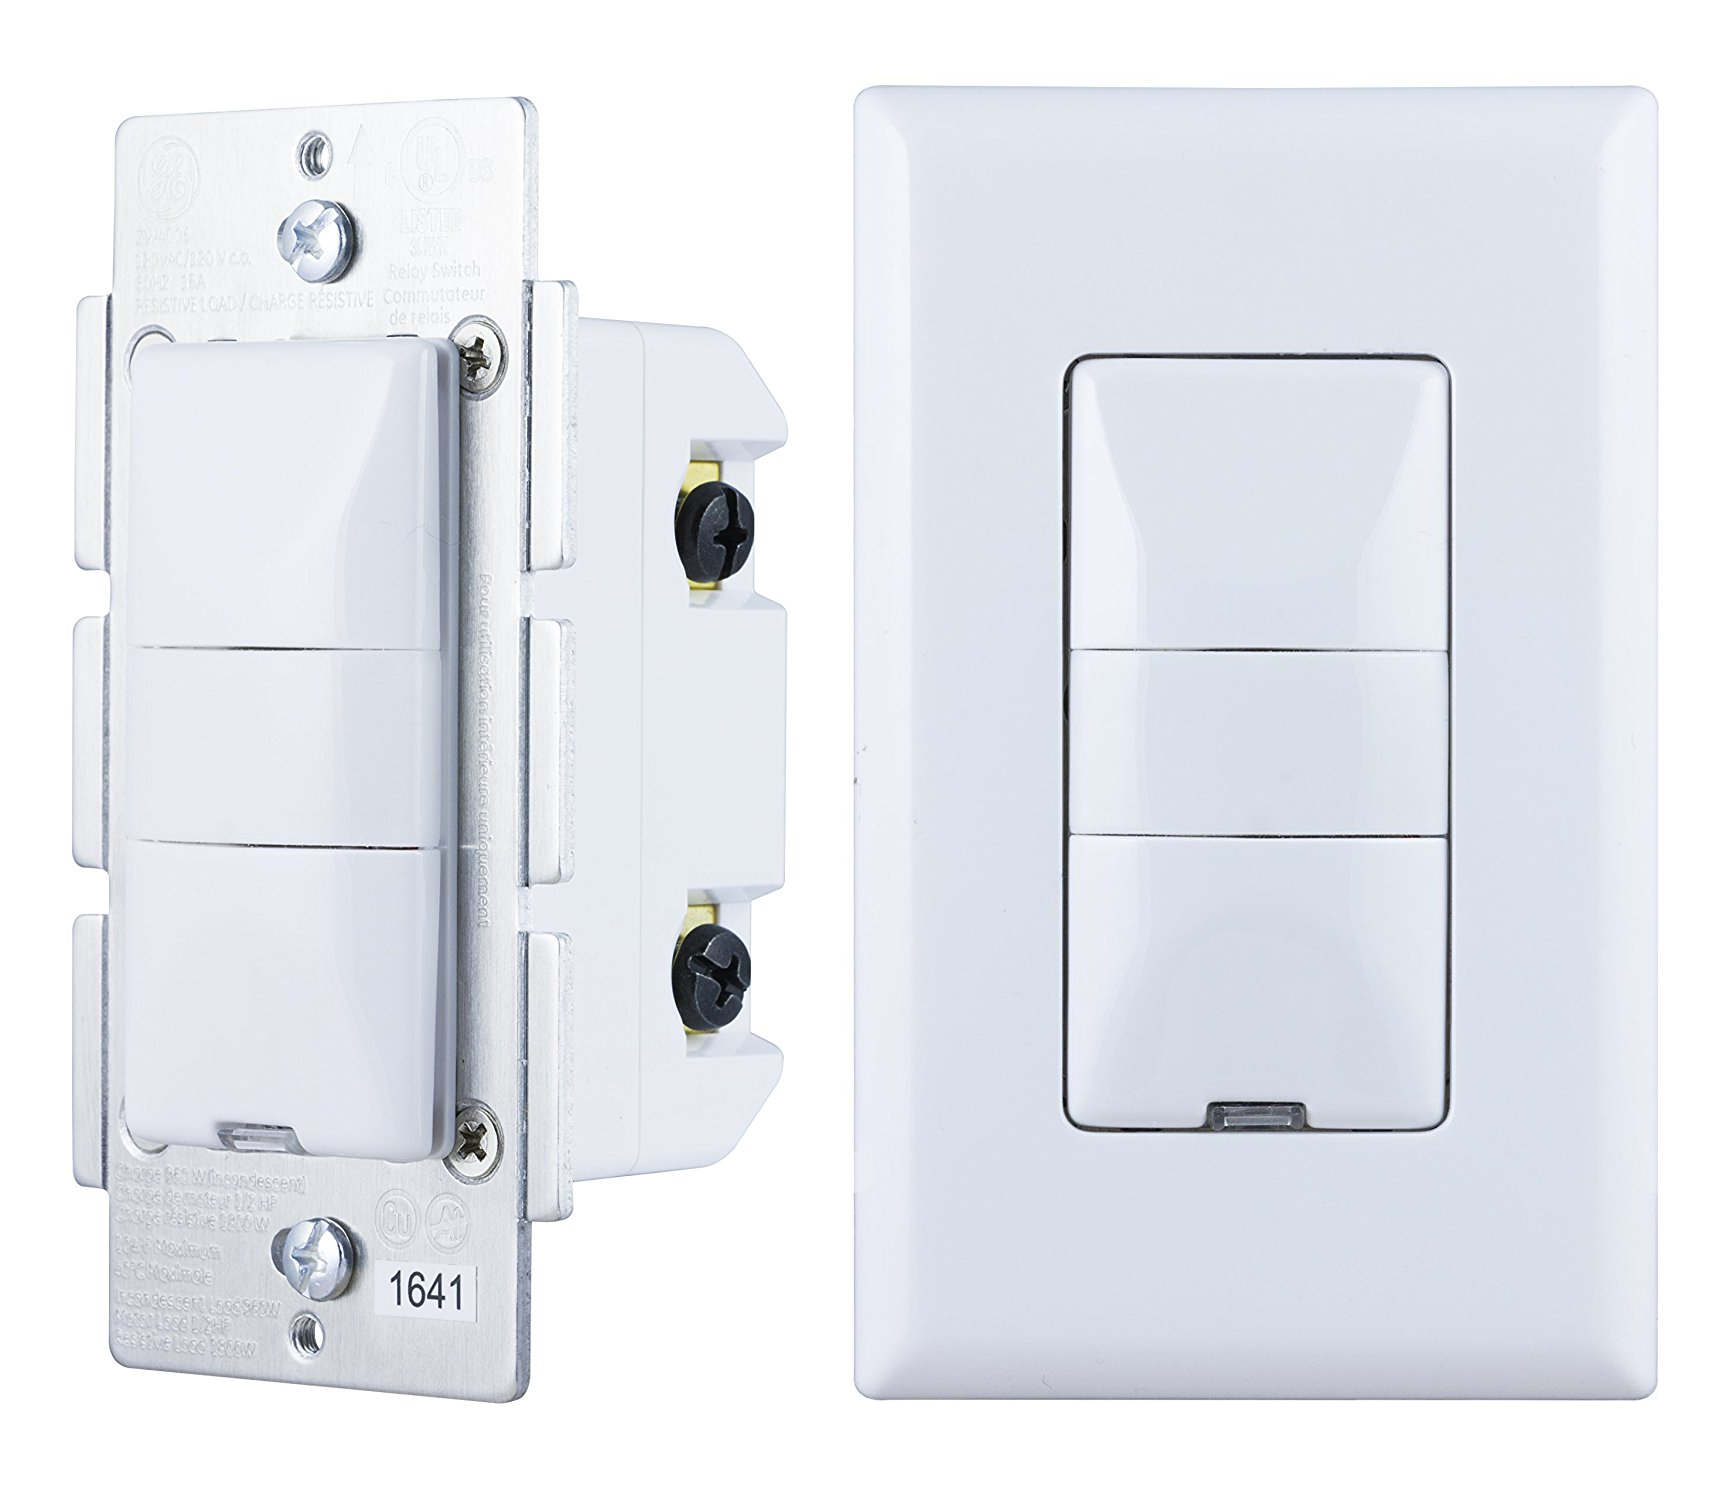
GE/Jasco released a new Z-wave certified switch in Dec 2016, which was made available on Amazon in April 2017. There was no press release or announcement and many people don’t even know that such a switch even exists hence my blog posting here.

The smart hub community quickly jumped on that in Feb 2017 requesting support and given the wide support of GE switches across many smart home hubs, this switch has been integrated rather quickly (Pulse, Trane, Wink, Nexia, Honeywell, HomeSeer, Smart Security, Harmony, Vera, Smartthings and Connect).

What’s the use case for this switch? Before this switch was released you could buy a Z-wave light switch (on/off or dimmer) and then you had to buy a motion sensor separately. As an example you would install this switch in your bathroom/toilet room and then you had to install a motion sensor somewhere in the same room.

Unless you have a power outlet close and a clunky power supply in that outlet to power your motion sensor, you would have to buy a battery operated Z-wave motion sensor or use a USB outlet and wire the motion sensor with a USB cable. Most people went with battery operated motion sensors which have a standard of 4 min timeout setting to preserver battery life.

This setup required you to purchase the light switch and the motion sensor separately which costs anywhere from $35 to $45 for the switch and $20 to $35 for the motion sensor for a total of $55 to $80 dollars.The new GE26933 combination switch is selling for $55 dollars which is a very reasonable price for a combination of both.

The beauty of having such a combination switch is that the motion sensor is not battery operated and the hassle with wakeup and timeout settings doesn’t apply. As a result you can configure this switch on a very granular level and you don’t have to worry about wires coming from your motion sensor to your outlet trying to have a permanently powered motion sensor like the GE 6 in 1 sensor, which is a great product by itself.

You have a single switch combining motion and light switch into one device. In addition it is a dimmer so you can adjust the brightness above and below the actual motion window of the switch. This switch also supports “Last level” which means when you use the dimming function to lower the brightness to e.g. 50% the next time you power on those lights, it will be at 50%.

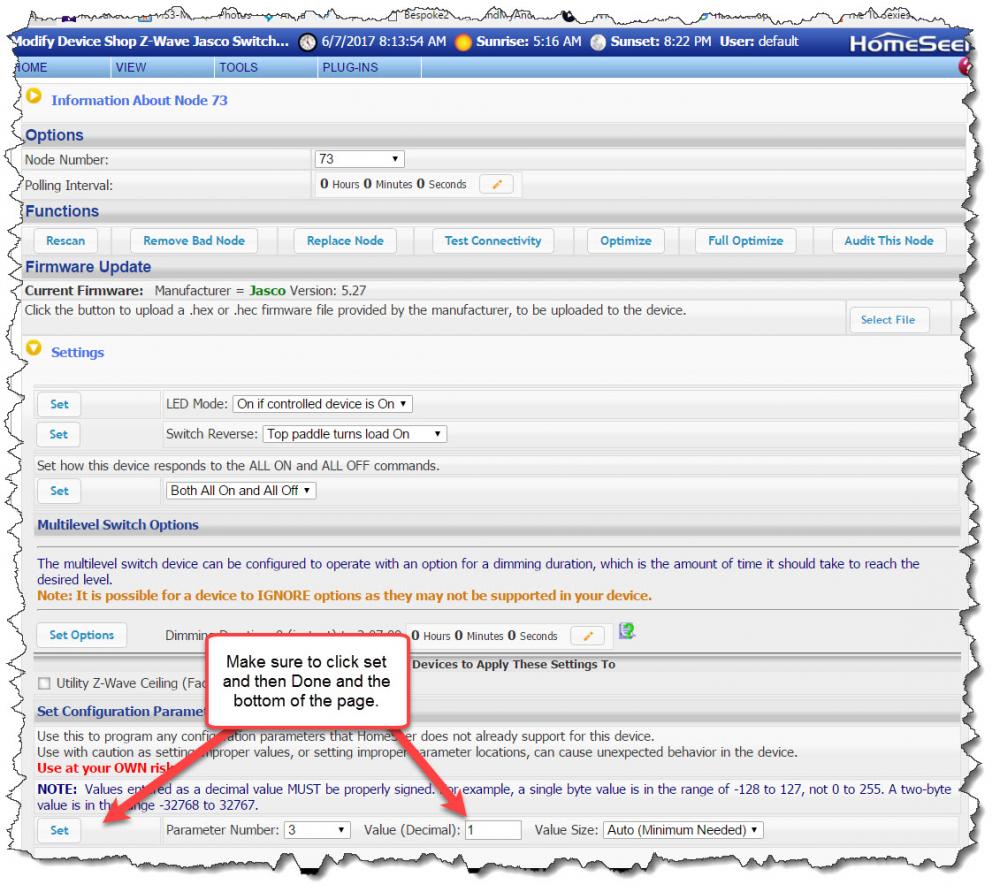
This switch comes with a variety of options you can configure via Z-wave settings. You have 19 parameter settings you can use to adjust this switch ranging from Timeout duration e.g. 5 min (default) to 30 min or no timeout, motion sensitivity from high to low with medium being the default, Light sensing on or off to the most important parameter which is operation mode with manual, vacancy or occupancy. You can find more details for those parameters here https://products.z-wavealliance.org/products/2108/configs

For smart home hub integration you switch to manual and your smart home hub will detect 2 Z-wave devices. The actual light switch and the motion sensor enabling you to create now scenes or events based on those devices or other devices from your smart home hub.


Most bathroom/toilet rooms have a fan switch right next to the light switch. You can now configure an event where you specify things like

if motion detected

turn on lights and turn on fan

for 5 minutes

and then turn off lights and fan

When you integrate your GE26933 switch into your smart hub system make sure to properly save those parameters e.g. Homeseer settings on the picture. Even before you set those parameters your smart hub system should find 2 devices (switch and motion) but motion will not change status as the default parameter setting for this switch is occupancy with 5 minutes.

The other benefit of having a permanently powered motion sensor is not having to deal with any wakeup and timeout values. You can go as low as 1 minute intervals for this light switch. If your switch is facing the restroom toilet with a setting of 1 minute unless the person sitting on the toilet doesn’t move for 60 seconds, will reset the timeout value continuously but again this is adjustable up to 30 min as needed.

In summary, many smart home owners were requesting for years a combination switch from the vendors and GE finally delivered and hopefully more vendors will follow. This switch can be used in many use cases ranging from garage lighting leveraging the daylight sensor to restrooms with no light or window allowing you to configure your room and lighting what fits your needs the best.

The price is very reasonable and totally justifies switching from two separate devices to a single device with the additional benefit of not having to deal with batteries and wires and two separate devices. Great addition to the Z-wave family of light switches from GE and I hope my blog post sparked some ideas for you on how to improve your smart home even further. Personally I already installed two of those at my home and I am going to add more.

Connected Home vs Smart Home

Connected Home vs Smart Home

People believe “smart homes” and “connected homes” are the same. You might even see terms like “true smart home”, where companies try to bring their point across of having a home, which is more than an assembly of connected devices. Let’s look into those terms and define, what a “smart home” really is.

Let’s start with the official definition outlined by Wikipedia. Smart House on Wikipedia refers to Home Automation. Within Home Automation you will find the following definition.

“Home automation or smart home (also known as domotics or domotica) is the residential extension of building automation. It involves the control and automation of lighting, heating (such as smart thermostats), ventilation, air conditioning (HVAC), and security, as well as home appliances such as washer/dryers, ovens or refrigerators/freezers. They use Wi-Fi for remote monitoring and are a part of the Internet of things. Modern systems generally consist of switches and sensors connected to a central hub sometimes called a “gateway” from which the system is controlled with a user interface that is interacted either with a wall-mounted terminal, mobile phone software, tablet computer or a web interface, often but not always via internet cloud services.“

The key word here is “automation”. Putting so called “smart devices” into a home doesn’t make the home smart. The industry is using the term “smart” for devices, which can be controlled by a smart phone, tablet or nowadays voice control devices like Amazon Echo or Google Home. Another example would be the trend of smart doorbells. Just because a doorbell will notify you on your cell phone, emails or texts you or allows you to speak to your visitor from your cell phone with two-way audio, doesn’t mean you have a smart home.

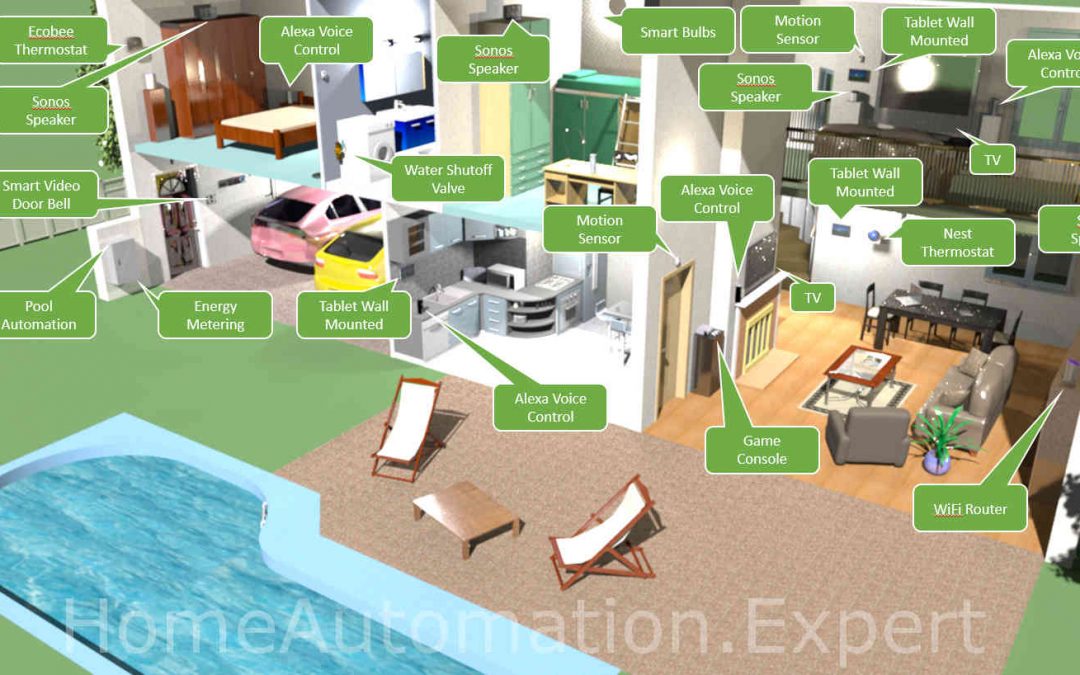
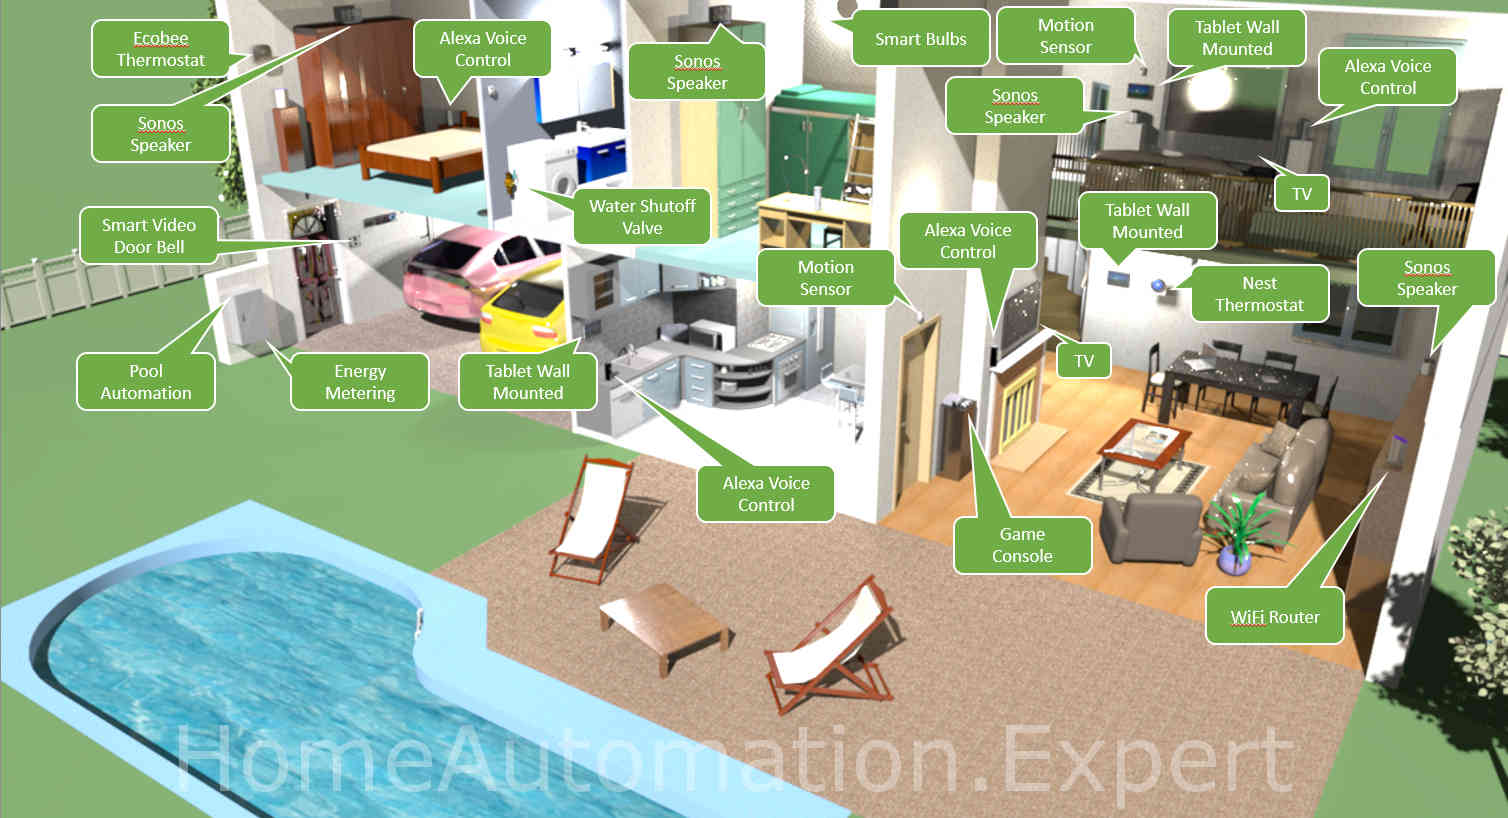
I created the following picture to demonstrate one example home with smart devices and then I will go into the details with real life use cases/examples of what would make this home a “smart home”.

Smart Home

You can see a lot of devices within this “smart home” ranging from thermostats, speakers, media and entertainment, etc. Most or all of those devices can be controlled from a smart phone, tablet or Alex Echo / Google Home with individual apps or skills (as Amazon calls them). They don’t have to be necessarily have to controlled by a single home automation hub/controller/gateway.

With that said, let’s provide some examples, where the true benefit of having a home automation hub/controller/gateway will showcase, what a “smart home” should look like, otherwise this home would simply be a “connected home”.

Geo Fencing

The most common use case is GEO fencing. GEO fencing is the term for location aware reaction of your home automation system.

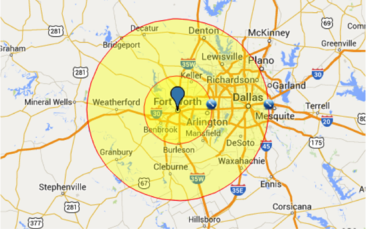
geo fence In this example you create either one or two virtual fences around your home. The first fence is very close proximity e.g. 100 to 200 feet to capture if you leave your home. The second fence could be a couple of miles.

Most people go with one fence only but others go with a second one to e.g. set the temperature of the home to a more comfortable setting so by the time they get home, the house is nice and cool or warm and cozy and if it is night, turn on the lights in certain areas of your home and open the garage door, when you approach the inner perimeter.

Yes, you could use your cell phone and open your Nest or Ecobee app, while you are driving, and set the temperature to the desired level. You could press the button in your car to open the garage door, when you are in front of it. The Geo fencing feature does all that for you based on logic you defined and if any delay occurs like traffic jam on the highway, you wouldn’t have to worry about opening your app and changing states of your smart devices.

Disaster Prevention

Less known, but very efficient and effective example is the combination of water shut-off valves and water leak sensors. In the old days you could buy a system, which connected to a telephone line and if the water leak sensor detected a leak, it called out and notified specific people. Those systems were expensive in up front cost and in some cases they charged monthly fees for that service.

In addition to that, the sensors were limited in terms of how many of those sensors could be installed and how long those wires could have been. Those costs and limitations prohibited a wide deployment of such notification systems.

With today’s technology, the picture has changed drastically and situations like on the picture should be a thing of the past. As many wireless water leak sensors you need communicating with your central hub/controller/gateway and in case of a flood the “smart home” will take action, which can be a simply notification via email or text, announcement within the house over all speakers, alarm sirens, etc the options of actions is very long.

This example doesn’t prevent any flooding, but it will take action at the slightest amount of water reaching the water leak sensors, which can prevent coming home to a completely flooded basement. Those costs will run in the thousands of dollars and the best of this whole example is: “Insurance companies will give you a discount, if you install water leak detection systems in your home”. Simply ask your insurance and they will tell you what discount you will receive, if you chose to implement this example.

This applies to home owners and landlords. The investment of having such a system implemented can be recovered after several months or years. Example would be a 10% discount for a home owner insurance of $1,500 per year. Those savings of $150/year would give you a break even point from your investment of 2 or 3 years, not to mention the cost savings of not having to repair a flooded basement or laundry room, which typically range in the area of $3,000 to $5,000 or more.

Energy Control

Another example would be energy control of your home. You could have remote controlled blinds, fans and thermostats in your home. You could use your cell phone, smart tablet or voice to turn those “connected devices” on as needed. A true “smart home” would do the following and this is just one example, which can be adjusted to any need or location…

IF summer AND IF morning AND IF temperature reaches 75 degrees –> THEN lower blinds

IF summer AND IF morning AND IF temperature reaches 75 degrees AND blinds lowered –> THEN turn on ceiling fan

IF summer AND IF morning AND IF temperature reaches 75 degrees AND blinds lowered AND ceiling fan is ON –> THEN power on air condition

In simplified text, this logic does the following. In the morning, when the sun rises, the temperature in your house rises as well. Most households have their thermostat set to a certain temperature, before the air condition kicks in. Even if they have smart thermostats, they will get trigger by a certain temperature.

The example logic above delays the air conditioning kicking in by using the alternative methods of blocking out sun or using ceiling fans first before the more power hungry and costly air conditioning system kicks in. The “smart home” will try to block the sun first by lowering the blinds. If the temperature still rises, then the “smart home” will turn on the ceiling fan. Only if all that isn’t enough, then it will turn on the air condition.

Security and Fire Alarm

The top rated reason for people adopting “smart home technology” is security. The security industry has been around for many years and alarm systems have evolved in many directions over the years. Security systems today include not only window/door sensors, glass break and motion sensors, but also fire alarm detectors and cameras with motion alarm.

Having those notifications going to a service provider, who will call the authorities is a good thing. However, nobody has thought about the actual home owner in those situations. To be more specific, image a fire alarm going off in your home. The sirens will go off, you might get a call from your service provider and the whole family will be up in no time. What is not considered is, how to make this situation easier and less stressful.

Imagine the same scenario, but in this case once the alarm goes off, the lights in the whole house will go on or change color to e.g. red, the blinds will open allowing a clear view from the outside into the house for the firemen, the alarm system will disarm after the authorities have been notified (last thing you need is your alarm system sirens going off just because you or your family opened the door and you forgot to enter the code to disarm the alarm system), the door locks will unlock allowing easy exit of the house, the speakers throughout the whole will announce that there is fire and with the right equipment it can also announce, where in the house fire has been detected. If nobody is home, the home owner will get notified via email, text or phone call from the service provider and from the smart home and having the doors unlocked will allow easy entry into the home for the firemen.

In summary, there is nothing wrong with having a “connected home”. As a matter of fact a connected home is the first step towards a smart home. Yes, it requires some adjustment and logic to be put in place, before a connected home becomes a smart home. The time is worthwhile investing, as the return of the investment will be worth it.

The additional cost of making a connected home to become a smart is much lower compared to making a regular home to become a connected home or smart home. The only challenge with this transformation from connected home to smart home will be the interoperability between the smart devices and the hub/controller/gateway, as not all vendors will support all smart devices.

In some cases workarounds are available and yes, you could use something like IFTTT (If this then that) to create logic for your connected home. IFTTT has a wide variety of supported devices (channels), but you should consider always the worst case, which is when your home might not have any internet connection. Some home automation hub/controller/gateway vendors require an internet connection to be available to conduct any actions in your home, which might not be a good thing in some of the use cases and examples outlined above including IFTTT.

The smart home adoption is at an all-time high and I encourage everybody to invest the time to find the most suitable technology for their homes and families and aim for a true “smart home”.


Hinge Pin vs Strips for Door sensors?

Hinge Pin vs Strips for Door sensors?

Two new Z-Wave Plus Door sensors have recently hit the market.

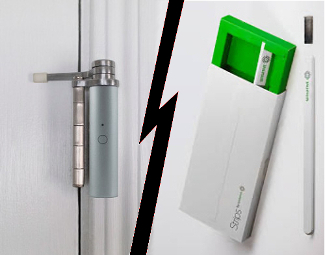
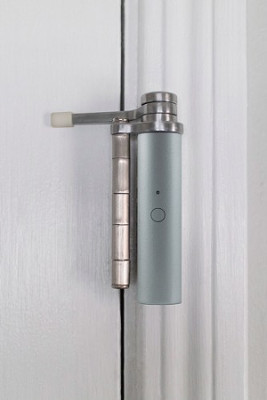
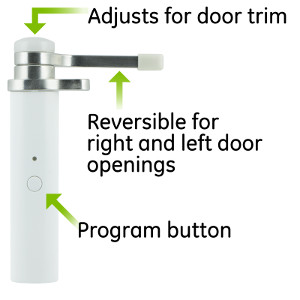
The GE Hinge Pin Smart Door Sensor is the latest. But, is it the greatest? It looks like a door hinge, and attaches like one too making it discreet. It has remote monitoring that will alert your smart phone or tablet if door is opened or closed. Scenes can also be set up to turn the lights on or off. For example, if the door is opened turn on the lights. It really is a nice feature to come home to.

Door Hinge
Strips

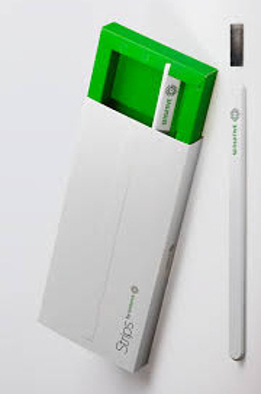
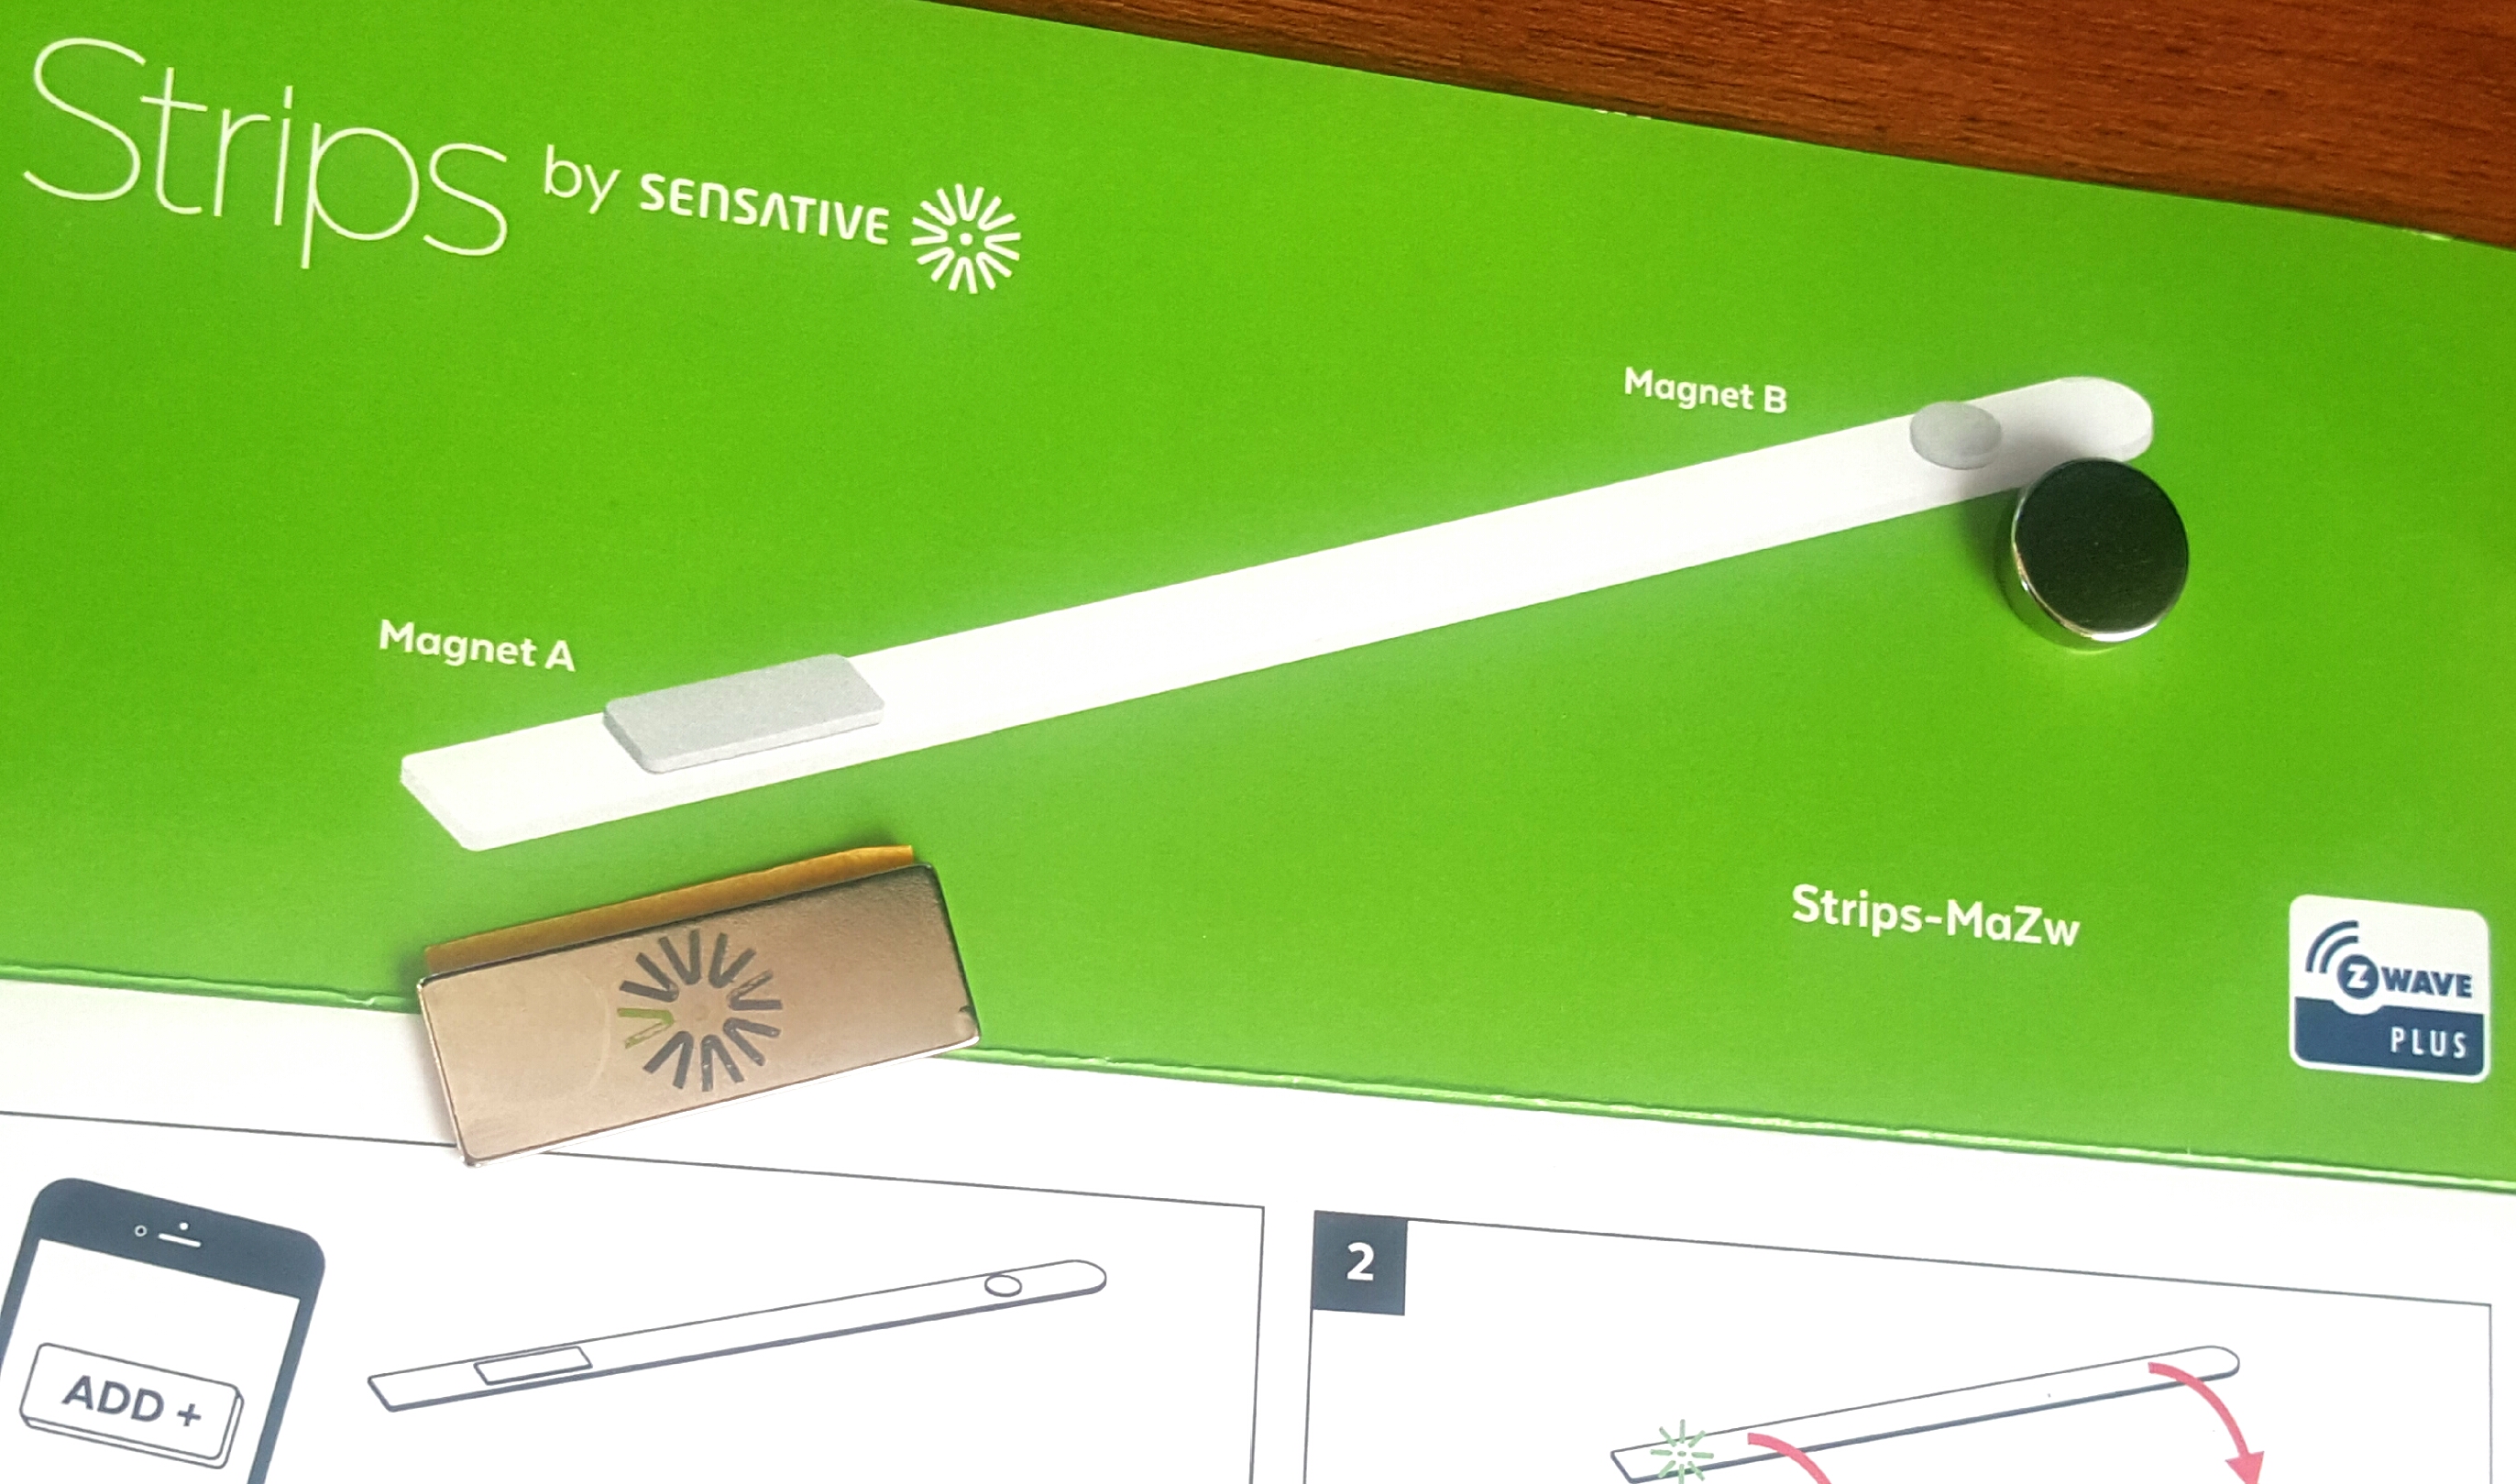
Strips by Sensative is the other new Z-Wave Plus door sensor on the market. It’s a white strip about a half and inch wide and about as long as a pencil that is placed on the door or window. It works with magnets to trigger if opened or closed.

Strips can do everything the Hinge Pin can do and more, but have a different look, so it really depends on personal preference. One advantage Strips have over the Hinge Pin is it can be used to monitor windows as well as doors. The Hinge Pin is a door only device.

Strips also claims to have a 10 year battery life compared to the Hinge Pin’s relatively short 2 year battery life. However, it is important to note the Hinge Pin’s battery can be changed after 2 years. There is no way to get into Strips to change the battery, so after 10 years when the battery stops working it has to be thrown away and replaced.

So, how does the GE Z-Wave Plus Hinge Pin Smart Door Sensor Compare with Z-Wave Plus Strips by Sensative?

Both the Hinge Pin and Strips are winners depending on individual preference and need. However, while the Hinge Pin may have a slight aesthetic advantage over Strips, Strips definitely wins the prize for utility and longevity. A 10 year battery life is pretty impressive. And, Strips are weatherproof!  The Hinge Pin has limits, but is a tad less expensive.

Below is a comparison chart comparing the two feature to feature.

There are many reasons someone might want to monitor door and window activity in their home. The top reason is, of course, security. It’s important to make sure the kids aren’t snooping in your bedroom, or simply to know when someone has entered your home, through a door or window if there are no cameras in place. Even with cameras, the added security, piece of mind and use possibilities these devices add to our lives make them welcomed and valued new members of the Z-Wave Plus family.


Smart Homes at IoT World (Part 2 of 2)

Smart Homes at IoT World (Part 2 of 2)

IoT World

Internet of Things World 2016 was the 3rd annual event hosted at the Convention Center in Santa Clara CA. With over 10.000 attendees and over 200 exhibitors you were able to attend a total of 15 dedicated tracks around IoT ranging from manufacturing to smart cities, connected cars, the smart home, healthcare, energy & agriculture, supply chain & logistics plus much more. This is the second and final post of a two part report focusing on “The Smart Home” track from this event.

This report will cover new upcoming technologies, expert opinions shared at panels from various industry experts and interesting startups to look out for in the coming near future. This second part will focus on new innovations and enhancements of smart home devices.

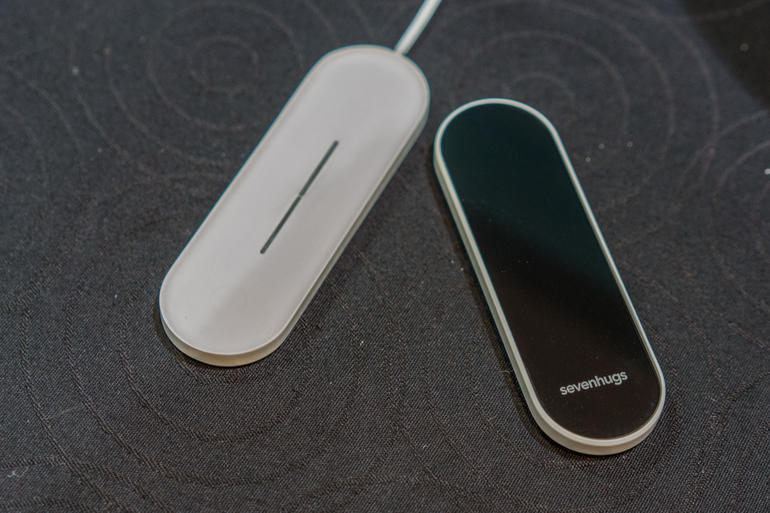
sevenhugs-smart-remote-05219One of the most innovative products at this IoT event relevant to smart homes is the Sevenhugs “Smart Remote Control”. This touch remote adjusts to the device you are pointing at. In other words, you point at your Nest thermostat it will offer you a slider to adjust temperature up and down but when you point at your Philips Hue bulb it will change the menu to turn on/off and dim the light bulbs.

Talking to the Sevenhugs crew gave me some very good ideas as this remote is able to run HTTP/HTTPs commands. This could make the integration into Vera a breeze but I don’t want to judge until I can get one of those devices into my hands.

This device is not available today and they are aiming towards the end of this year to release that product to consumers. More information about this device can be found under http://remote.sevenhugs.com/

Chui

Another very interesting product called “Chui” got my attention. There are a variety of smart door bells out there already and more coming out. You can buy today Skybell, Ring, etc and soon you can buy a product called Remobell. They are almost the same in terms of features and functions while their designs might differ.

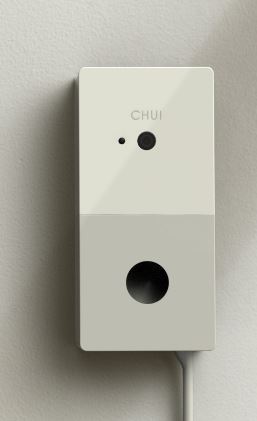
However, Chui is different. Chui is face recognition combined with your door bell. It will be able to perform certain tasks mapped to each user profile. As I outlined in my part 1 of my report Role Based Access Control (RBAC) is something which is desperately needed in conjunction with voice control and voice authentication but in this case RBAC is part of the product by mapping scene or tasks to a specific user e.g. Dad comes home and the door unlocks, the temperature goes to 74 degrees, the lights go on and dim to 50%.

Another benefit of Chui applies to the use case of dog walkers, cleaning lady or babysitters who need temporary access to your home at certain times. With smart locks using a key, you have to give them a key which defeats the purpose of having a smart lock. With smart locks using a code, you give them a code which can be used by anybody if they get their hands or eyes on that code. With face recognition user pictures will be stored and authenticated and then mapped to their user profile.

Very interesting concept and sounds very promising. Talking to their CEO he confirmed that they have taken a different approach and that they are taking security very serious. More details and pre-orders can be placed under https://www.getchui.com/

EnHuv_switch

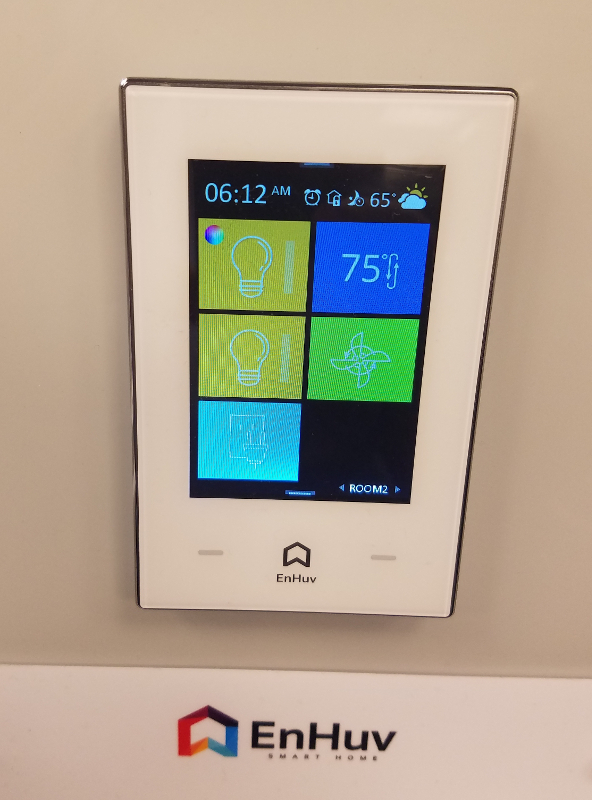
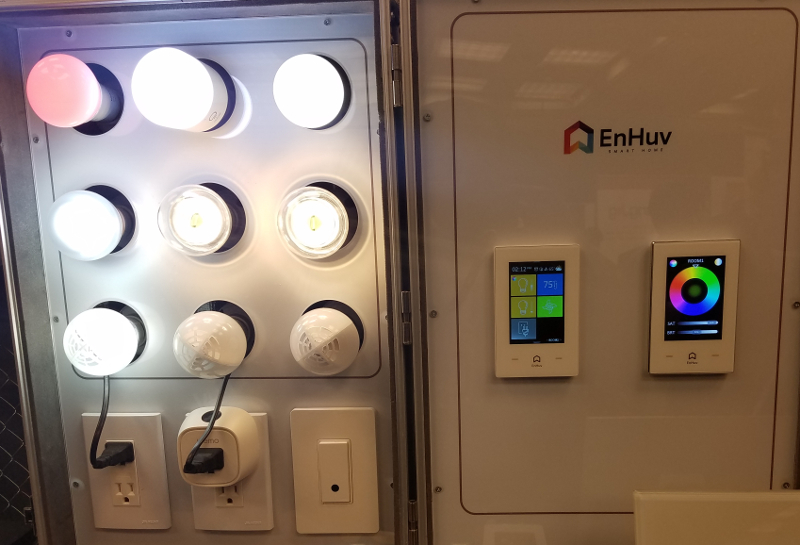
Changing from security to the lighting world. This product showcased in the startup arena of the IoT event got my attention. The sleek look and simple functionality while offering a wide variety of functions and compatibility made me take a deeper look at their product. The EnHuv light switch replaces single, two or 4 gang switches.

They are targeting $99 for the single and $179 for the 2-4 gang switch as their end consumer price. This is double the price of e.g. a Z-wave switch. However, a Z-wave switch is able to power on/off your lights or dim those lights. If you are using smart bulbs you have to use your cell phone app to start a specific scene or change the color of the lights.

This switch is a sleek looking and powerful device allowing you to control your lights from Philips, Wemo, etc and power on/off, dim, change colors in a simple interface which everybody understands. Talking to the team it became obvious that they have experience in that space from previous jobs and they are using that knowledge for this product development. I did ask what protocols they are or will support with that light switch and their answer was Z-wave, ZigBee, WiFi and Bluetooth.

ThisEnHuv_Setup product is not available today and no exact date was given to me but when I pushed they said that they should launch this year. That product can be compared with the Aeotec Touch Panel light switch which requires a Z-wave module behind it. This EnHuv light switch product has A) more functionality in terms of functions to apply B) more protocols Wifi, ZigBee, Z-wave, etc and C)  a much higher price.

Time will tell if people are willing to invest double the price of a Z-wave switch/dimmer to obtain better and more functionality with a sleek design or if they will stick to their cell phone apps or pre-saved scenes of their home automation controller.

I also verified if their product requires an e.g. Philips Hue Bridge to work and their answer was that they don’t but if you do use the Philips Hue bridge, you would have much more functionality to choose from so they recommend using that bridge.

Having the ability to utilize existing scenes stored on the Philips Hue bridge would allow everybody to have consistent scenes on their cell phone app, their home automation controller and the EnHuv light switch. Their website is still in development but more detail can be found under https://enhuv.com/

GreenWave

Being on the subject of scenes I visited the booth of Greenwave systems. That company received one CES award in 2015 and I was curious about their product offerings and their portfolio. I have to say that I was amazed about their concept and their implementation.

Greenwave systems has taken scenes to a whole different level. Their product allows interaction with Amazon Echo aka Alexa and use natural language like speaking to a person instead of predefined commands. But this is not the only thing they can do. They allow the end user to create “tags” and map smart devices to those tags.

Example would be to create a tag called “Living room” and add devices like Sonos, Lights, Motion sensors, etc to that tag. The end user can then trigger that tag. On top of that the end user can create scenes on the fly e.g. he tells Alexa to create a scene called “Movie” and then record in order certain tasks e.g. 1) dim lights to 50% by using the earlier created tag, turn on TV, set thermostat to 76 degrees and then save this scene called “Movie”. The user can then run that scene by triggering it via Alexa. Modification of any scene is a breeze as the end user can simply add kitchen lights to the tag “Living Room” by adding e.g. a table lamp to the tag “Living Room”.

In a nutshell the Greenwave system solution enables scene management via voice control. I would classify this as dynamic scenes of Greenwave Systems vs static scenes from your home automation controller. Unfortunately Greenwave systems only works business to business and not business to consumer. More company details can be found under http://www.greenwavesystems.com/

kuna_outdoor_security_light_t

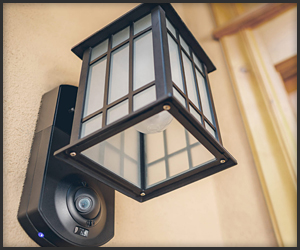
A different approach has been taken by the company Kuna. Kuna released last year an outdoor light with a camera and two way audio communication. People have been asking for an open API to integrate that product into their home automation controller systems. Talking to a Kuna representative he explained that they are consider their product a security system which is why they embedded a siren into their product and cloud features to enable recording and historical view for the end user and other features to support their endeavor.

Sounds like a video doorbell system but it isn’t. They are considering their product a secure ecosystem and opening that up could weaken that security concept. They didn’t say no to an open API but given the latest news on e.g. Smarthings hub security vulnerabilities from 2 weeks ago and the gmail exploit on the Samsung fridge from Aug 2015 feeds the argument not to open up their product to other ecosystems.

More information on Kuna can be found here https://www.getkuna.com/

Connected Food

I also want to raise awareness of a new initiative between Pirch and Innit. They are launching on May 19th a showroom just like the Target smart home demo location in San Francisco ( http://openhouse.target.com/ ) but the main difference here will be that they will be showcasing smart appliances combined with the Pirch concept of having famous cooks working and demoing those appliances and their value add.

I am looking forward to some more details on this as Kitchen Home Automation use cases are limited today and more education is needed.

shopping

Last but not least I would like to share some data points shared by industry experts during panel discussions. One interesting study was performed last year where a test was conducted on 10.000 people where some articles were labelled with “Connected” to see if this would change their buying behavior.

The results were very interesting. Only 5% of the 10.000 people actually looked at the higher priced product. Of those 5% only 5% actually looked and read the “Connected” spending more time with the product.

My personal opinion is that most people didn’t even understand what “Connected” means. If I would see e.g. a crockpot saying “Connected” I would not assume that this product has WiFi or other connectivity. On the other hand the word “Smart” has already been used so many times over so many years that putting the word “Smart” into the list of features wouldn’t help either to identify a “smart product” which integrates into a smart home. Calling any product “IoT enabled” would make things worse as no average consumer would even understand what IoT means.

Overall a very interesting and educational event and I am looking forward to the Smart Home Summit in Nov 2016 in Palo Alto CA.

Protected By
Shield Security
Verified by ExactMetrics