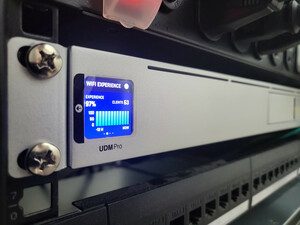
With Wifi 6 and Wifi 6e and the just announced Wifi 7 standards rolling out, you want to ensure that you have the latest and greatest speeds at your home.
There are some gotchas on the path to achieve the highest performance and I will also address the most economical vs the “Unify ONLY” method.
With the release of the Wifi 6 Access Points of Ubiquity you will notice the speed requirements of 2.5Gb/E POE to ensure the optimal performance for your network.
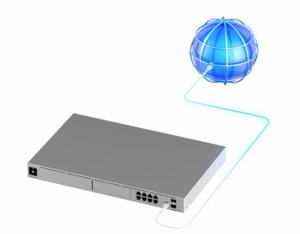
The UDM-Pro Dream Machine is a great device but if you look closely you will find 2 x 10G SFP+ ports, 1 x 1G RJ45 WAN and 8 x 1G RJ45 ports for a total of 11 ports.
The first scenario is using the 1G RJ45 WAN port connected to your Xfinity, ATT, etc modem/router (hopefully is pass-through mode), which leaves 2 x 10G SFP+ ports to connect to your new Wifi 6 Access Points.
You would have enough ports to direct connect them to your UDM-Pro but you don’t get POE assuming you want to connect 2 Access points for redundancy reasons.
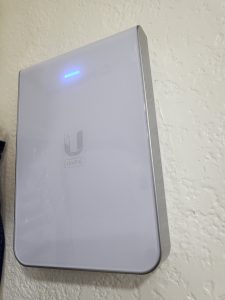
The new U6-IW Access Point, which is an In Wall Access Point powered by POE. The Access Point has additional network ports at the bottom and you will need to power this access point with POE+, if you want to have POE out.
POE+ is not required but recommended as this access point and the U6-LR (Long Range) consume about 15W on average.
The challenge comes with the POE+ part. You have to purchase a switch with POE+, which also support 2.5Gb/E or you use the existing 10G SFP+ ports but then you need a POE injector.
You can go with the Ubiquity POE adapters or buy no-name POE adapters, but the best path of action would also be the priciest path as Ubiquity recommends their enterprise 24 Port POE+ switch for $800 all the way to their enterprise 48 Port POE+ switch for $1,600.
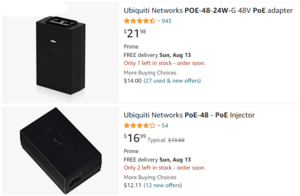
With those prices for those POE+ switches the POE injectors look suddenly much more attractive than before!
With that said, you need to be careful as not all POE injectors support the speeds you need. Some of them only support 10/100, while others support gigabit speeds which you can recognize in their part number with the G at the end.
If you go with the cheaper model like you see here on Amazon with only 10/100 saving $5, you will get a message in your Unify dashboard stating “Poor Ethernet Link Speed Try replacing your AP’s cable”. It is obviously not the cable as it is the POE injector slowing you down assuming you have the proper CAT cable for your Access Points.
The most economical way of achieving the overall goal of best performance would be a switch. In this case an unmanaged switch which supports POE+ for 2.5Gb/E ports and has a 10G SFP+ port. There are some affordable models on Amazon and I tried 3 of them.
The first one from Yanley did not work as advertised and actually died during the install and there was no mention of that model on the manufacturer website and the manual was the wrong manual. I sent that switch back for a full refund.
The second one got delayed during shipment from China, so I ended up with the Binardata switch.
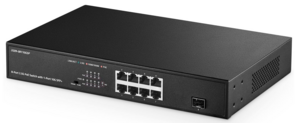
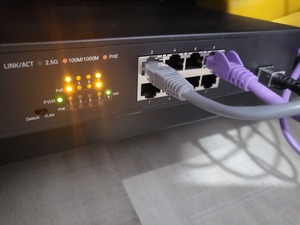
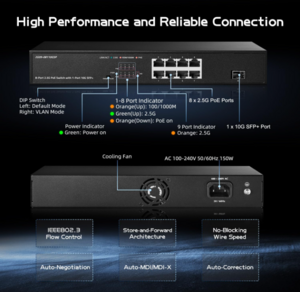
This switch comes with 8 x 2.5Gb/E ports POE+ and 1 x 10 SFP+ port. You connect this switch using a 1M SFP+ DAC cable and you connect your access points directly to the POE+ powered ports.
What nobody tells you though is that once you introduce a 3rd party switch into an ubiquity network, you will lose your ability to look at your topology map to see your Wifi clients. Given that all your Wifi clients will be connected to both or more of your access points, you will not see a single client in your topology map.
I emailed Ubiquity about that issue and their response was that 3rd party vendors incorrectly forward LLDP traffic causing this.
After emailing Binardata, they replied that this is an unmanaged switch and they don’t have a way to block LLDP forwarding.
If you look carefully though, you will see a dip switch for VLAN support and what this dip switch does, it forces all communication from all 2.5Gb/E ports to the 10G SFP+ port blocking all communications between the 2.5Gb/E ports and this includes forwarding of all LLDP traffic.
As a result, once you flip that dip switch your topology map will start working again and you will see your access points directly connected to your UDM-Pro and given that this is an unmanaged switch, this is totally acceptable.
Now you have a switch with 8 x 2.5Gb/E ports allowing you to connect up to 8 access points with up to 150W of total POE+ power.

Another reason why it makes sense to use 1 of the two 10G SFP+ ports to connect to one unmanaged switch is that you most likely won’t have more than 4 x 2.5Gb/E access points in your home and given that you use the 1G port for WAN connectivity you have one more 10G SFP+ port left, which in my case talks to my Synology RS1221+ model hosting VMs, network shares, BlueIris and Home Assistant. Having one dedicated 10G ethernet connection to that device is more than appropriate.
In summary, you can upgrade your UDM-Pro from Wifi 5 to Wifi 6 or Wifi 6e by either investing in the proper Ubiquity POE+ switch family, which will cost you at least $800 and you will get 24 POE ports while you might only need 2 or 3 of them…
or….
You purchase this affordable unmanaged switch no-name brand on Amazon Link for $166 (and I want to make it clear that I have zero affiliation with that company and I found them on Amazon and I purchased that device at the full price).
Use the dip switch for VLAN isolating and blocking LLDP traffic giving you the ability to scale your access points with POE+ to up to 8 at a very affordable price unlocking the full speed in your home network.
I hope you found this article helpful and you will be able to break out and join the high speed highway.

