Select Page
New Philips Hue LED multi-color strips for a hefty new price

New Philips Hue LED multi-color strips for a hefty new price

Philips announced today a series of new products ranging from new light strips, Hue Iris, new low-cost white bulbs, etc. 

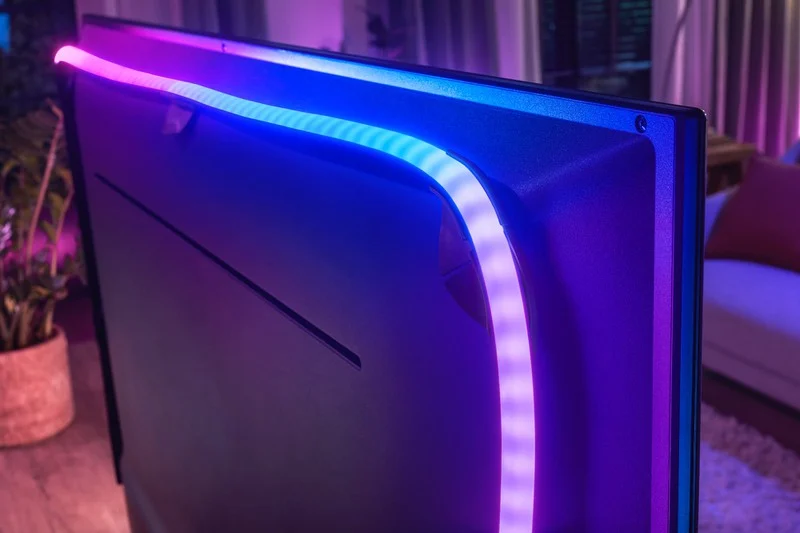
The new Philips Hue Play Gradient Lightstrip is designed to integrate seemlessly with the Philie Hue Play HDMI Sync Box. Any HDMI device will be able to be connected to the new light strip.

This new light strip comes in three lengths, as it was built with TV sets in mind and you will be able to order it in 55 inch, 65 inch and 75 inch.

The previous light strips were limited to a single color and did not support multi-color, which has now been addressed with individually addressable LEDs to provide quote “immerse home theater experience”.

You will be able to order this light strip on October 16th 2020 for a price of $199. Yes, this is correct. Philips is asking for $200 for the 55 inch version, $220 for the 65 inch and $240 for the 75 inch version. This is more than twice the price of the previous light strip version resulting in a 250% price increase. 

I would like to point out that LIFX has been offering multi-color light strips for under $100 for over 4 years now. But it doesn’t stop there. You will have to pay another $230 for the Hue Play HDMI Sync Box bringing your total price to $430. 

Let’s compare the new light strip with the cheapest version of strip you can find today on Amazon. There are hundreds of TV backlight LED products on Amazon.

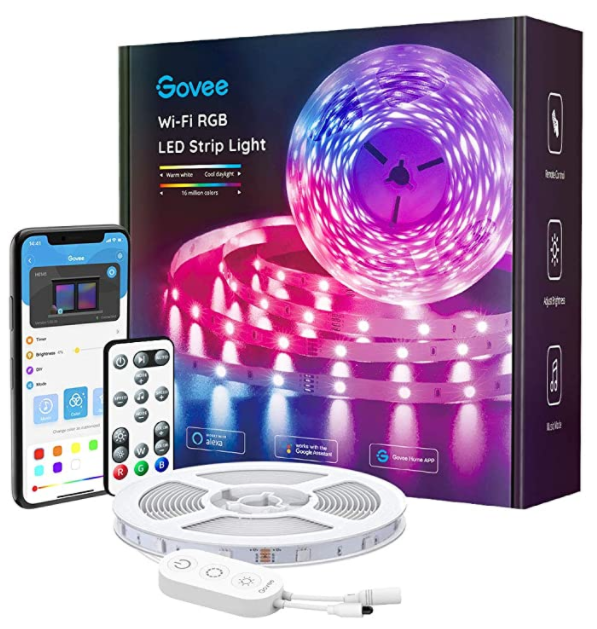
The first one I could find supporting music sync without having to use an App on your phone or a remote to run scenes and has a built-in microphone to sync with the TV sound is the one on the right. It is currently priced at $26.59. This is 6.2% of the price for the Hue Strip and HDMI sync box combined.

The lighting experience is certainly not the same as they don’t come with individual addressable LEDs, so if you care about different fading colors at the same time behind the TV, then you could invest $89,99 for the LIFX Z TV strip, which is 21% in comparison to Philips.

The downside with LIFX Z TV strip is that you will have to use an app on your phone, a raspberry PI running proxy software, or a mac pc running the proxy software to synchronize with the sound of the TV.

Granted, Philips has the most elegant solution with the HDMI sync box and no sound interference from other sources and sound sync in real-time, but that price is simply too high.
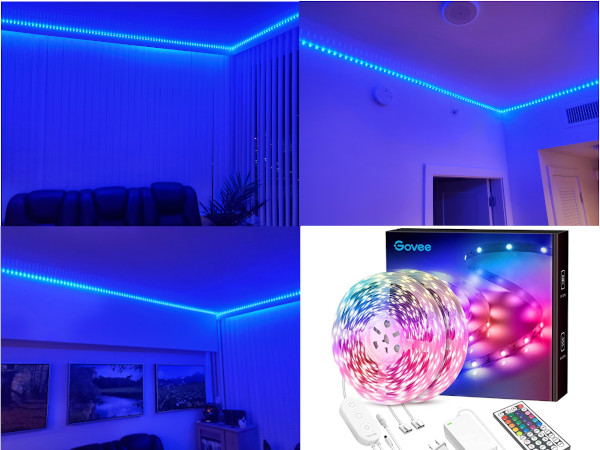
Let’s compare value. On the left side you see my installation of 64 feet 16 million colors LED strip with remote control, built-in microphone on the switch and app control on your phone. This setup will cost you on Amazon $48,59. Yes, 64 feet of LEDs for less than $50 and it works in conjunction with your TV sound as long as you have no other sound interference in the room. 

It does not offer the individual addressable LED sections to provide multi-color fading, so you can only face from one color into the other or when the sound changes the colors fade and change, but it is always one color for the strip and in different brightness depending on your sound.

 With that said, the new Philips Hue strip has certainly benefits compared to all the other options outlined here, but the price is not justified. Let’s see how the market will adopt those new LED strips from Hue. Time will tell.
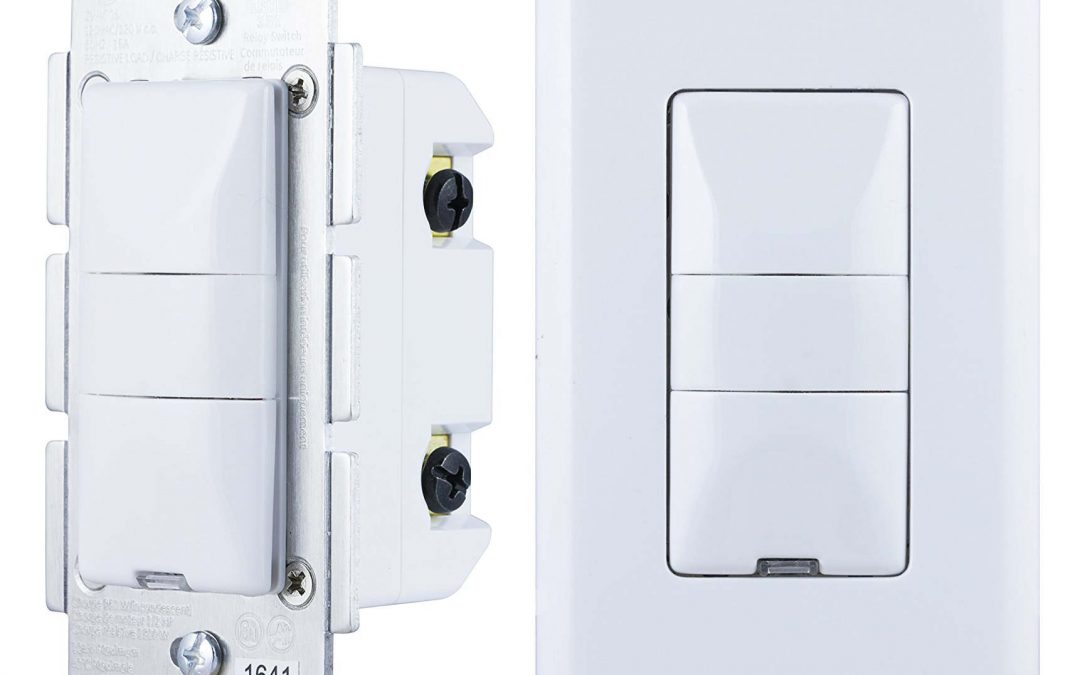
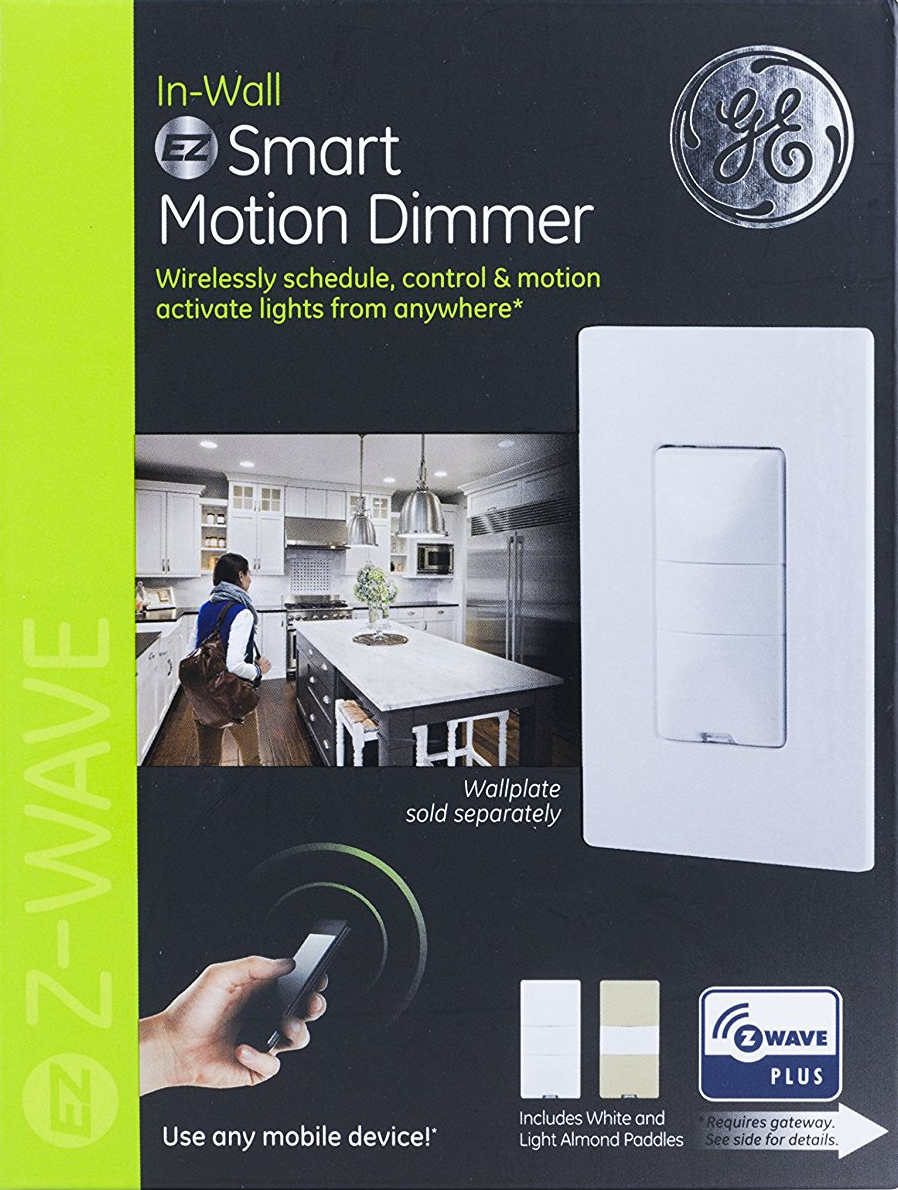
Light-Motion combination switch

Light-Motion combination switch

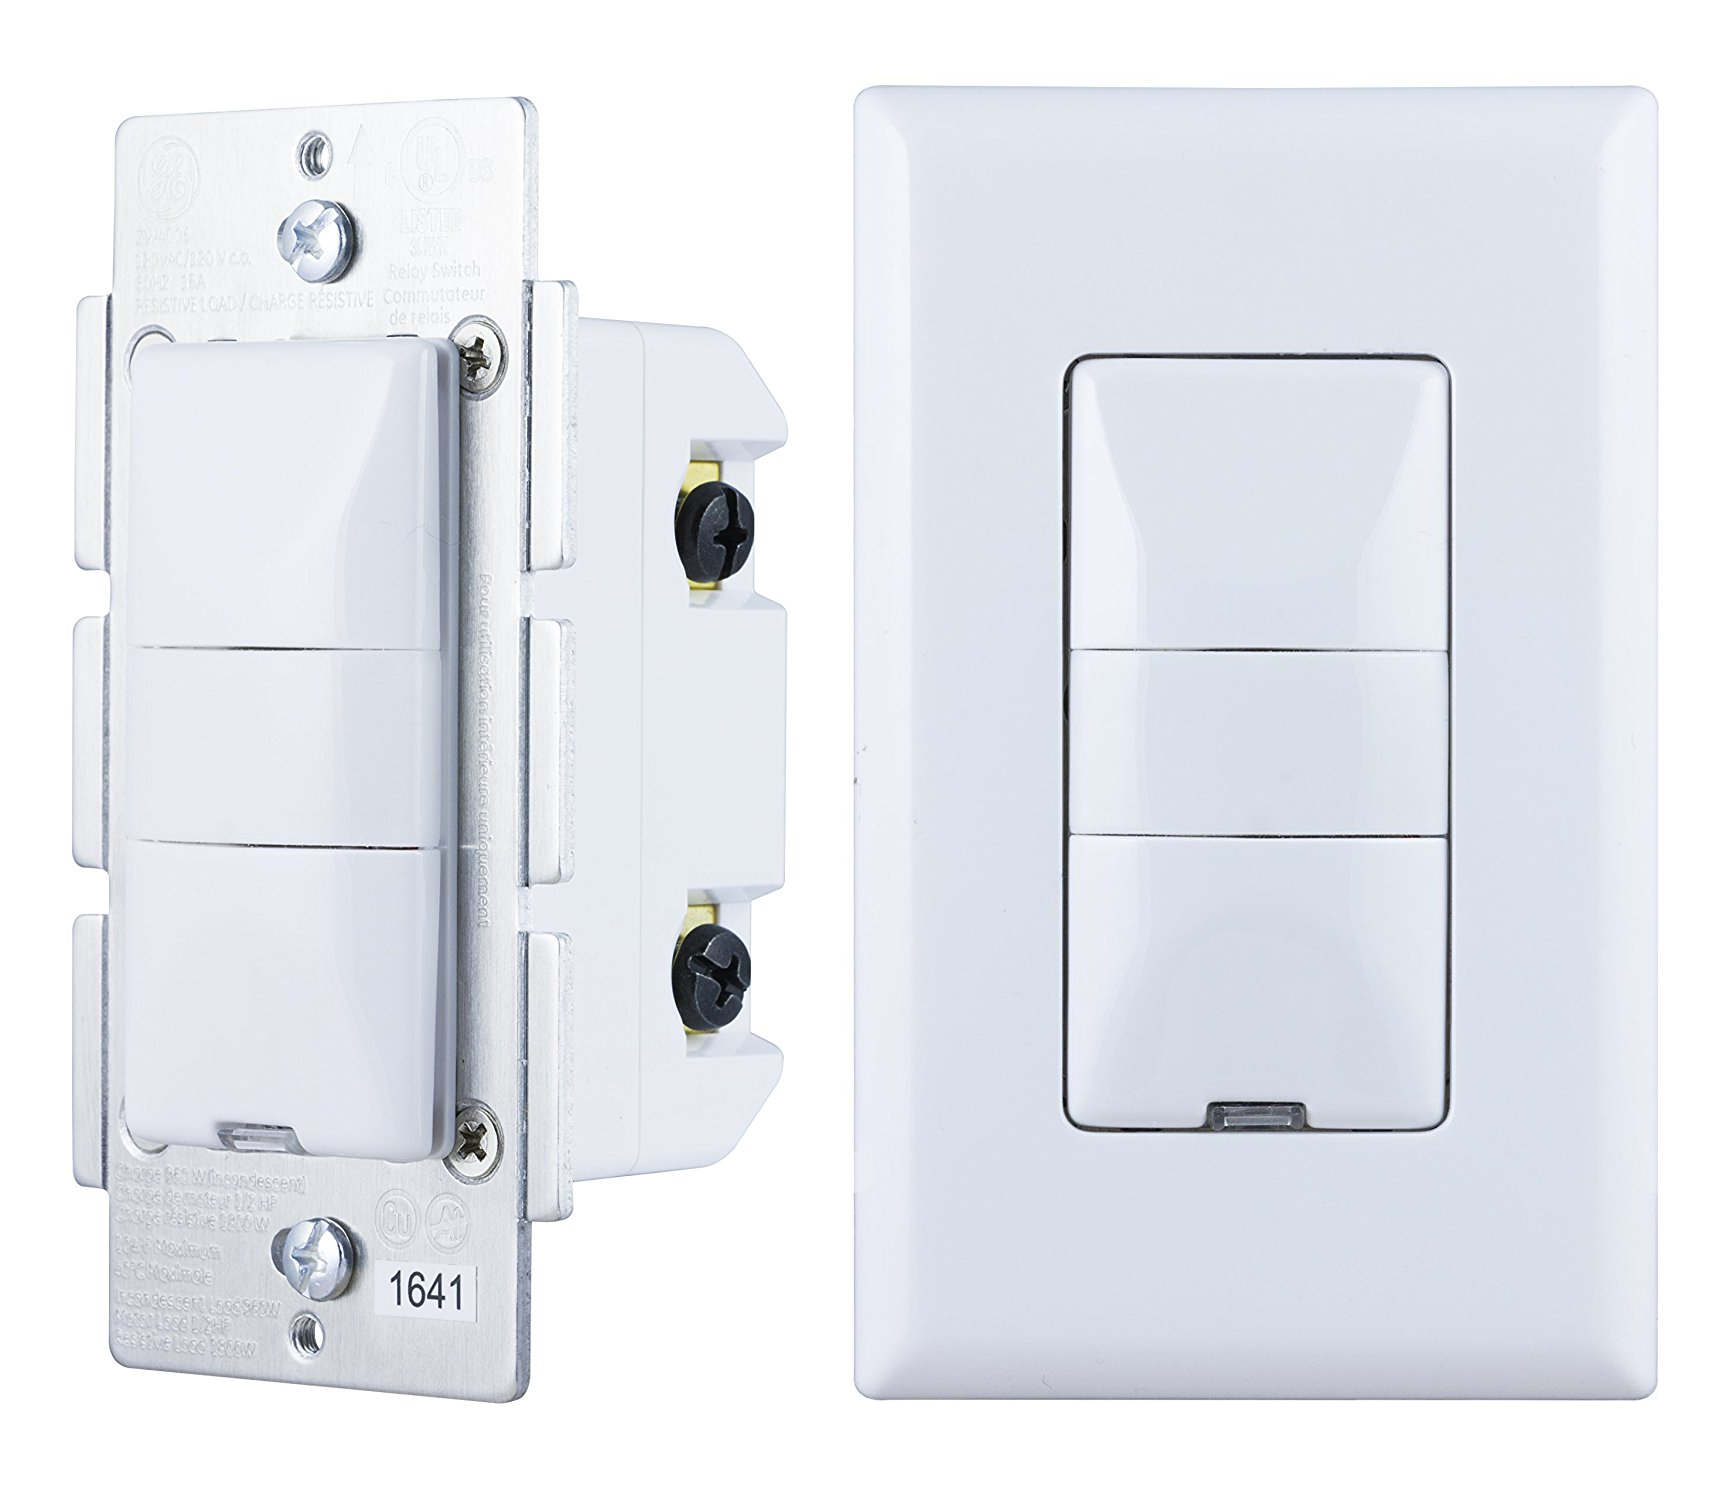
GE/Jasco released a new Z-wave certified switch in Dec 2016, which was made available on Amazon in April 2017. There was no press release or announcement and many people don’t even know that such a switch even exists hence my blog posting here.

The smart hub community quickly jumped on that in Feb 2017 requesting support and given the wide support of GE switches across many smart home hubs, this switch has been integrated rather quickly (Pulse, Trane, Wink, Nexia, Honeywell, HomeSeer, Smart Security, Harmony, Vera, Smartthings and Connect).

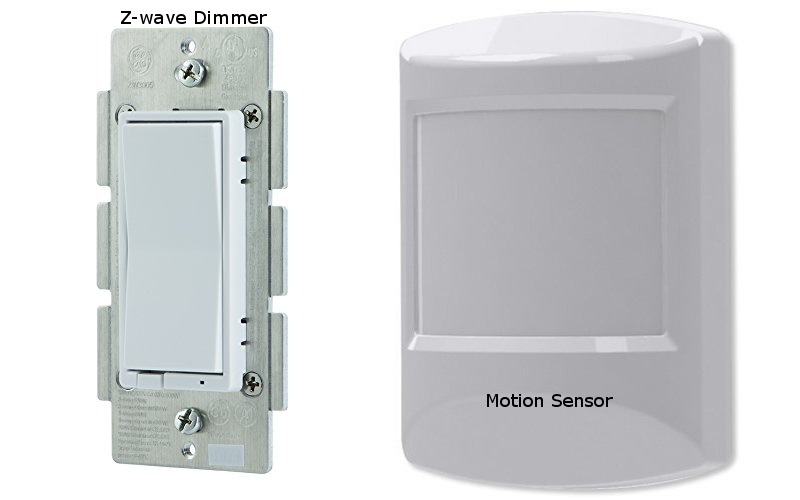
What’s the use case for this switch? Before this switch was released you could buy a Z-wave light switch (on/off or dimmer) and then you had to buy a motion sensor separately. As an example you would install this switch in your bathroom/toilet room and then you had to install a motion sensor somewhere in the same room.

Unless you have a power outlet close and a clunky power supply in that outlet to power your motion sensor, you would have to buy a battery operated Z-wave motion sensor or use a USB outlet and wire the motion sensor with a USB cable. Most people went with battery operated motion sensors which have a standard of 4 min timeout setting to preserver battery life.

This setup required you to purchase the light switch and the motion sensor separately which costs anywhere from $35 to $45 for the switch and $20 to $35 for the motion sensor for a total of $55 to $80 dollars.The new GE26933 combination switch is selling for $55 dollars which is a very reasonable price for a combination of both.

The beauty of having such a combination switch is that the motion sensor is not battery operated and the hassle with wakeup and timeout settings doesn’t apply. As a result you can configure this switch on a very granular level and you don’t have to worry about wires coming from your motion sensor to your outlet trying to have a permanently powered motion sensor like the GE 6 in 1 sensor, which is a great product by itself.

You have a single switch combining motion and light switch into one device. In addition it is a dimmer so you can adjust the brightness above and below the actual motion window of the switch. This switch also supports “Last level” which means when you use the dimming function to lower the brightness to e.g. 50% the next time you power on those lights, it will be at 50%.

This switch comes with a variety of options you can configure via Z-wave settings. You have 19 parameter settings you can use to adjust this switch ranging from Timeout duration e.g. 5 min (default) to 30 min or no timeout, motion sensitivity from high to low with medium being the default, Light sensing on or off to the most important parameter which is operation mode with manual, vacancy or occupancy. You can find more details for those parameters here https://products.z-wavealliance.org/products/2108/configs

For smart home hub integration you switch to manual and your smart home hub will detect 2 Z-wave devices. The actual light switch and the motion sensor enabling you to create now scenes or events based on those devices or other devices from your smart home hub.


Most bathroom/toilet rooms have a fan switch right next to the light switch. You can now configure an event where you specify things like

if motion detected

turn on lights and turn on fan

for 5 minutes

and then turn off lights and fan

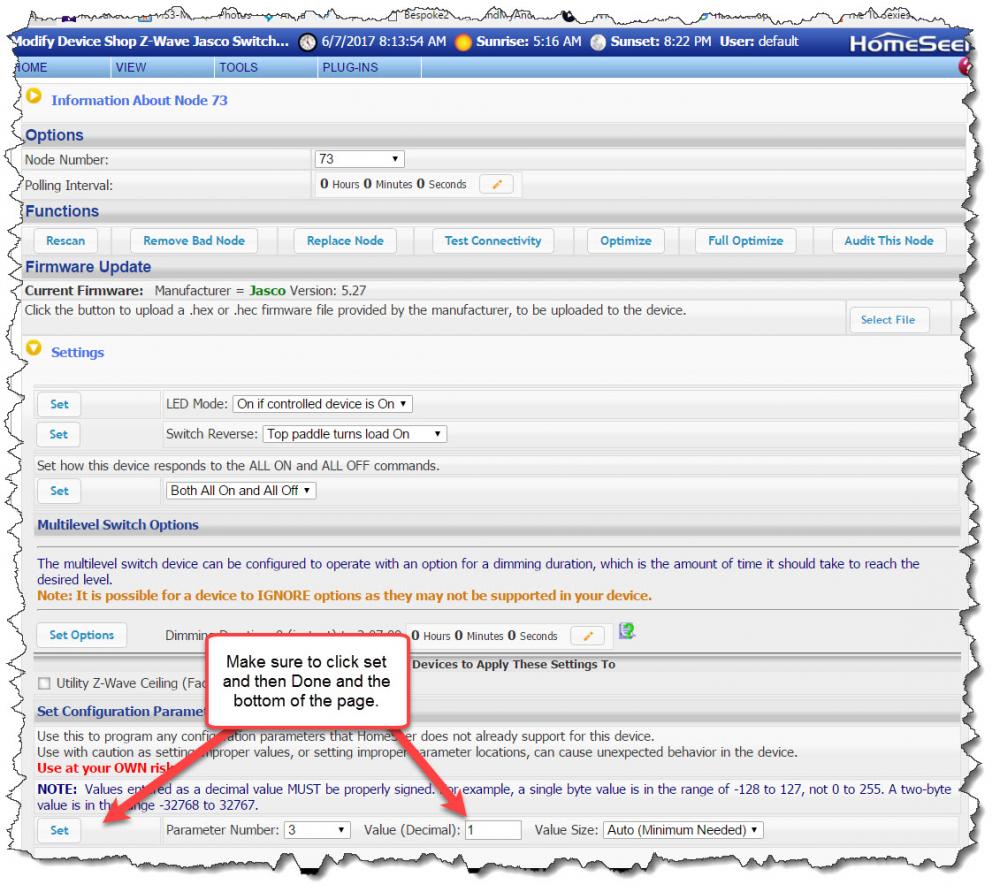
When you integrate your GE26933 switch into your smart hub system make sure to properly save those parameters e.g. Homeseer settings on the picture. Even before you set those parameters your smart hub system should find 2 devices (switch and motion) but motion will not change status as the default parameter setting for this switch is occupancy with 5 minutes.

The other benefit of having a permanently powered motion sensor is not having to deal with any wakeup and timeout values. You can go as low as 1 minute intervals for this light switch. If your switch is facing the restroom toilet with a setting of 1 minute unless the person sitting on the toilet doesn’t move for 60 seconds, will reset the timeout value continuously but again this is adjustable up to 30 min as needed.

In summary, many smart home owners were requesting for years a combination switch from the vendors and GE finally delivered and hopefully more vendors will follow. This switch can be used in many use cases ranging from garage lighting leveraging the daylight sensor to restrooms with no light or window allowing you to configure your room and lighting what fits your needs the best.

The price is very reasonable and totally justifies switching from two separate devices to a single device with the additional benefit of not having to deal with batteries and wires and two separate devices. Great addition to the Z-wave family of light switches from GE and I hope my blog post sparked some ideas for you on how to improve your smart home even further. Personally I already installed two of those at my home and I am going to add more.

Existing blinds voice automated for any smart home hub

Existing blinds voice automated for any smart home hub

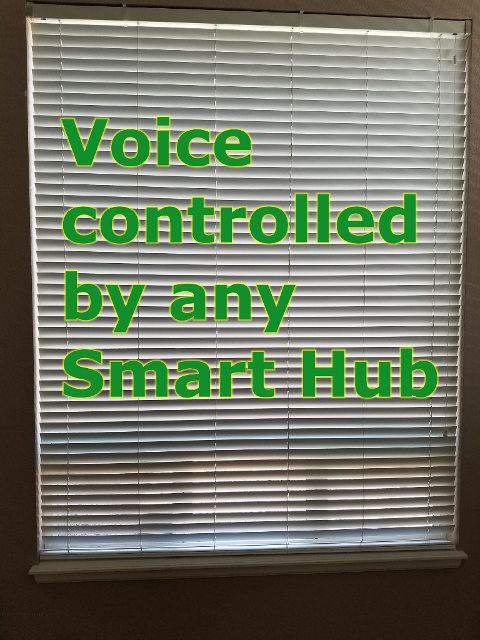
Today’s challenges wanting to automate existing blinds

Automated blinds are in high demand while their price is also very high. In addition it is very hard to find blinds which work with an existing home automation system and several companies have tried to tackle that problem.

The first problem is that not all blinds have the same size. Across the US almost all the blinds are cut to size as home builders are not making each window match each other resulting in additional costs for the home owner.

The second issue is the brand of the blinds and there are only a couple of major brands pre-installed in certain homes and those are all manual controlled for tilt and for raise/lower. There are no upgrade kits from those major brands allowing you to add a simple motor.

The third issue is your goal. Do you want to tilt or lower/raise your blinds. There are only a handful of companies who offer Venetian blinds which can do both. I have made several calls and inquiries to those companies and they all want to sell you new blinds ranging from $500 up to $3.500 per window!!!

The fourth issue is power availability. None of the homes from home builders have any power outlets at every window unless the home was designed from the beginning for wired power blinds and such blinds installed. The good news is that you can buy solar add-ons for new automated blinds, but this is not an option for any existing non-automated blinds. Again, you would have to buy a complete new blind for every window assuming you have power.

Lessons learned from buying new automated blinds

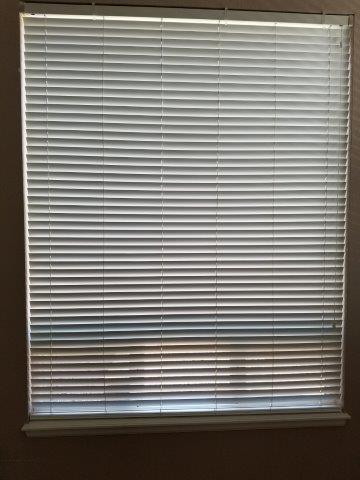
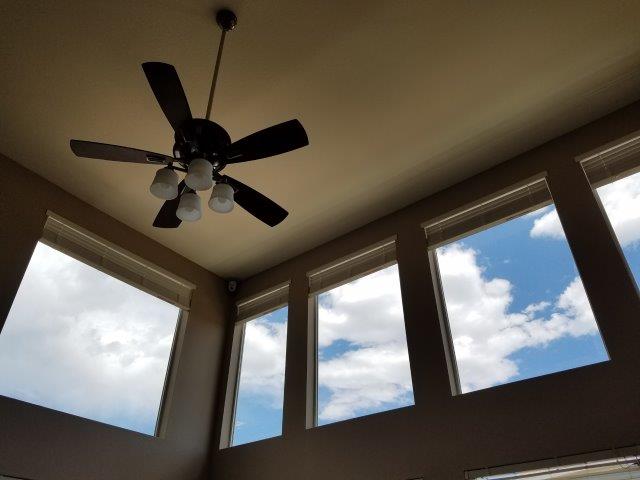
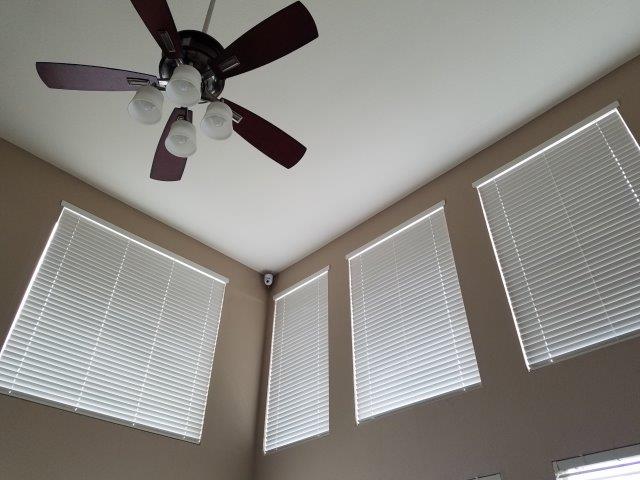
In my case I had large east facing windows in a two story living room and in the summer the raising sun increased the temperature in that living room too much so the air condition was running non-stop.

I did my research to find blinds which work with Z-wave and my specific smart home hub which was Vera at that time. I found Somfy but again they couldn’t tilt and raise/lower as it was either or. I worked with a custom blind company in Colorado to develop a solution which could do both and I had an electrician run power to all the upper blinds and lower blinds (in case I want to add lower blinds later).

The result of this exercise was Somfy controlled blinds using RF between the blinds and the Somfy Z-wave module and this Z-wave module did create 5 blinds in Vera (max is 16 blinds in Somfy Z-wave module) at a cost of over $10.000. This cost included the custom blinds, Z-wave module and install. It did not include the Z-wave integration into Vera as those vendors are only obligated to pair the Somfy blinds to the Somfy Z-wave module and anything after that is not their responsibility.

I have additional 19 windows in my home I would like to automate and the cost for pulling power to those windows would be enormous not to mention the cost for each blind. We are talking north of $30.000 dollars hence this new project of mine trying to tackle affordable voice automated blinds for existing blinds and the ability to integrate those with any smart home hub supporting Alexa and/or Google Home.

Raspberry PI + RC motor + smart home integration + voice control

There are many solutions out there on how to automate existing blinds using either RC motors or step motors as the engine to tilt the blinds. Some of them also include blinds motors for raise/lower but now we are talking about hundreds of dollars again and most of those motors are proprietary so you would be better of buying the complete solution from those vendors.

The second aspect of the solution is the brains within each blind. Again many solutions are out there using Arduino or Raspberry PIs. Some of the published solutions are really neat while others are a complete mess with wires everywhere or bulky attachments on the wall controlling the existing blind cords. None of those were an option for me as my goal was to not see any hardware while the blinds should be automated.

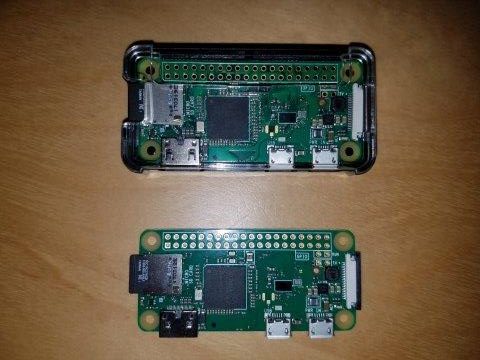
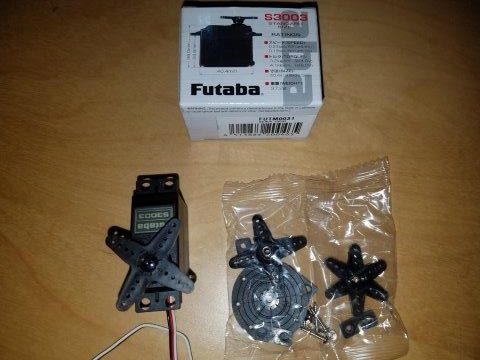
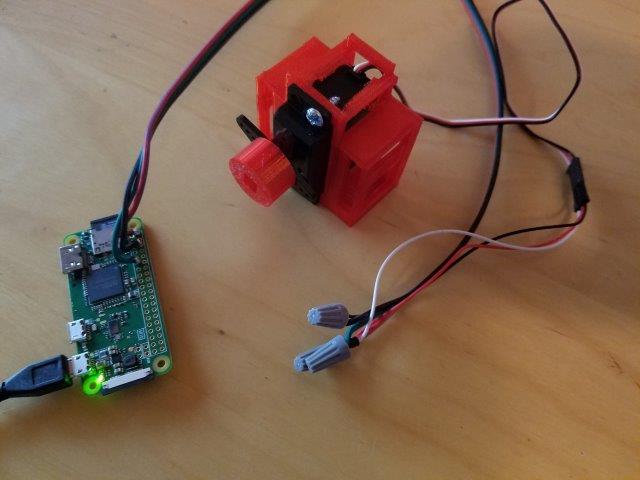
The choice I made was Raspberry PI Zero W + RC Motor Futaba. The reason for Raspberry PI Zero W was simple. $10 for a Raspberry PI including WiFi and Bluetooth having Linux at my fingertips and the reason for an RC motor was the simplicity of connecting this straight to the Raspberry PI without any additional regulator hardware or special power considerations. The only consideration was the torque of the RC motor to be able to tilt even large blinds and that’s why I chose the Futaba S3003.

Customization for any blinds brand make or model

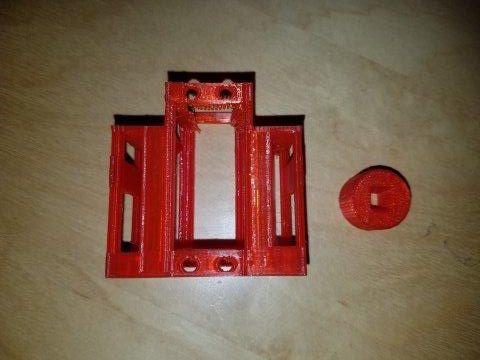
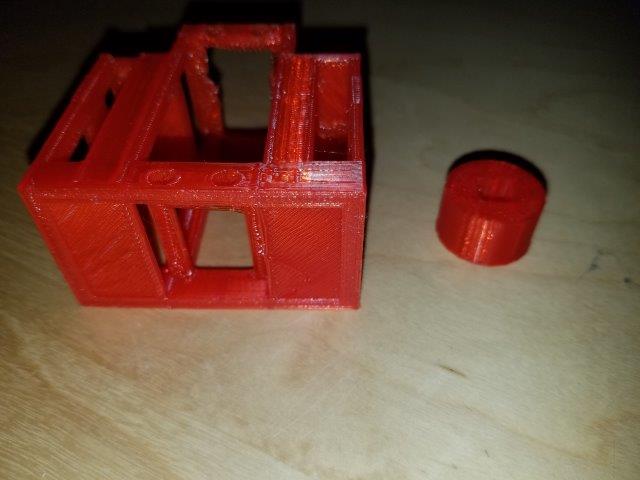
The next challenge was to be able to attach the RC motor to the existing rod of my blinds. This was a bigger undertaking than expected as my blinds are using a 1/4 x 1/4 inch square rod while most blinds have either a D-shaped or hexagon shaped rod. After several weeks of emailing, calling companies and researching to find an adapter for square rods (also known as coupler) I gave up. I decided to design and 3D print the adapter myself.

My first attempt was to design the SLT print file fitting my specific blind channel and fit the square rod and then take this design to a 3D print shop (even UPS now offers 3D prints for affordable prices). I used this opportunity to actually buy a 3D printer and print them myself. I like having new toys 🙂

The next challenge was to attach the RC motor to the channel providing a stable base to actually tilt the blinds. Again, depending on your blind and your rod your channel might be 2 or 2 1/2 inches. I found a 3D design online for a futaba base which I modified to fit my channel and have the rod fit.

By choosing this approach I am flexible enough to create any adapter and any base for any blind and print it myself or go to any 3D print shop and let them print those for me.

3D Software to create models

Having had no experience with 3D printing there are a variety of software options out there ranging from beginner level to very advanced and from free to very expensive. Some come with a 3D printer and others don’t. Some only come if you buy their printer and only works with their printer.

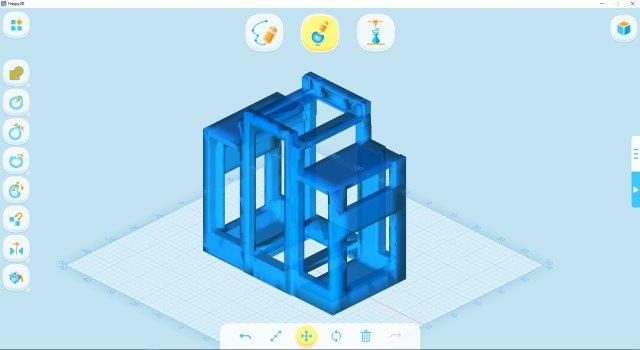
I am not going to judge which software is the best as this is very subjective and I will simply share that I used for my first steps the “Happy 3D” software from Flashforge and the FlashPrint from Flashforge after having tried additional 5 different 3D modelling software solutions.

Raspberry PI operating system configuration

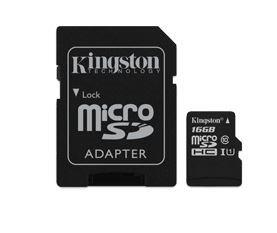
Every Raspberry requires an SD card to host the operating system. You can go as low as 8GB but I do recommend at least 16GB. Once you have the SD card you have to upload the operating system.

First download the latest Raspberry OS from https://www.raspberrypi.org/downloads/raspbian/ You can choose between a graphical user interface Desktop which also support VNC remote desktop or the lite OS which is command line online. For my first one I chose the Desktop version to start developing my solution in an easier way.

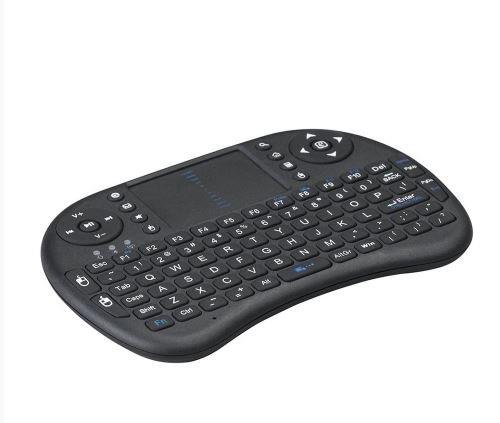
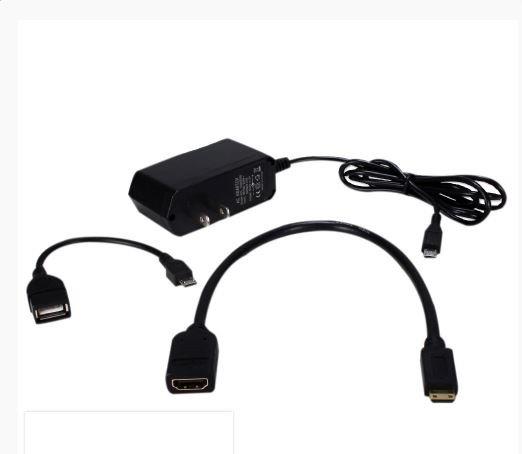
To do this I also purchased the power supply combo which includes an HDMI adapter and USB connector cable and a Bluetooth keyboard and touch pad to configure the Raspberry. You can chose to have an external powered USB hub and attach a USB mouse and keyboard but I chose that model as it combines mouse and keyboard in one device.

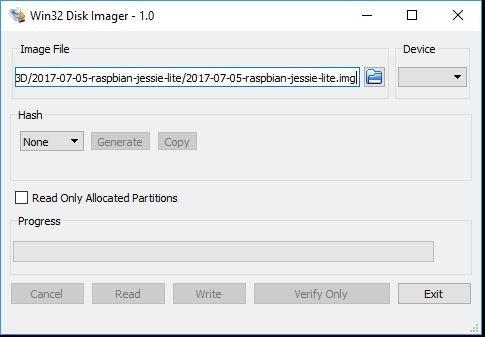
To get the OS onto the SD card I used Win32 Disk Imager where you select the OS image and your USB port of the SD card to load the OS. Once loaded you put the SD card into your Raspberry and boot it up.

The final OS deployed on all my Raspberry PI Zero Ws is the lite version reducing power consumption and I even went as far as disabling the HDMI output circuits to save some power because if you’re running a headless Raspberry Pi, there’s no need to power the display circuitry by running /usr/bin/tvservice -o (-p to re-enable). Add the line to /etc/rc.local to disable HDMI on boot.

Once booted up you need to perform some initial settings:

Configure WiFi and join your home network:

pi@raspberry: ~$ sudo nano /etc/wpa_supplicant/wpa_supplicant.conf

Go to the bottom of the file and add:

network={
    ssid="Your WiFi Network Name "
    psk="Your WiFi Password"
}
Note: I do recommend to configure a reserved IP address for each of your raspberry devices on your router once they join the network. It will make your life much easier going forward.
Configure timezone, services, hostname and password:

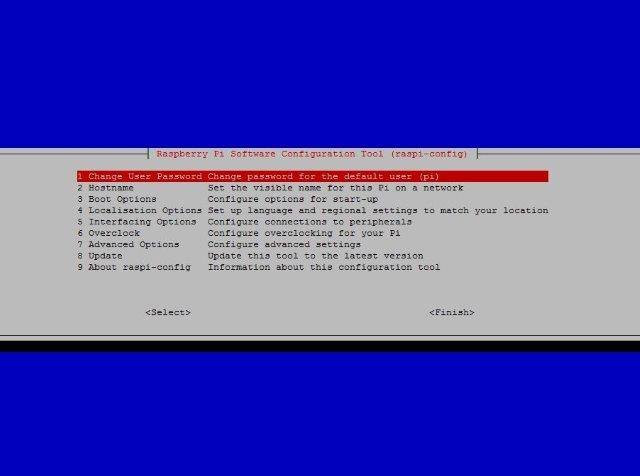
pi@raspberry: ~$ sudo raspi-config

Let’s walk through the most important changes:

  1. change the default password from “raspberry” to something else to have at least some increased security
  2. change your hostname which will make it easier dealing with multiple blinds
  3. Change the boot options to Desktop or CLI (as mentioned before I recommend the final deployment on the lite OS)
  4. Localization to adjust to country US, keyboard, timezone, etc
  5. Interfacing options to enable SSH (remote shell) and/or VNC (remote Desktop) at your liking


Controlling the RC motor with the Raspberry Hardware

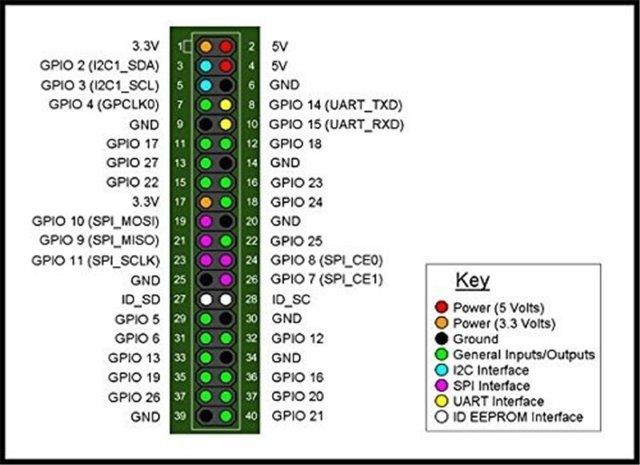
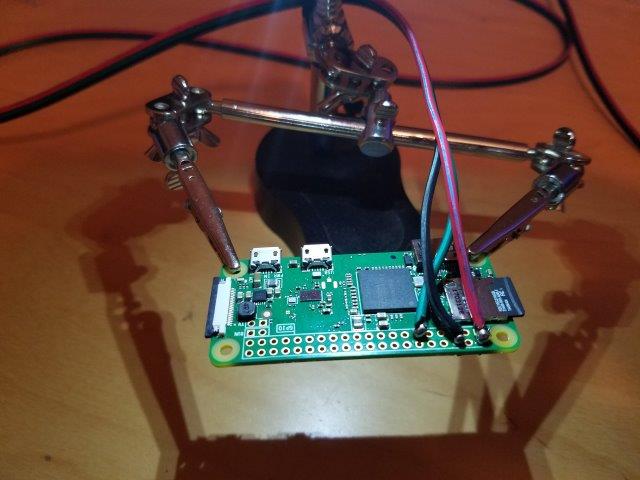
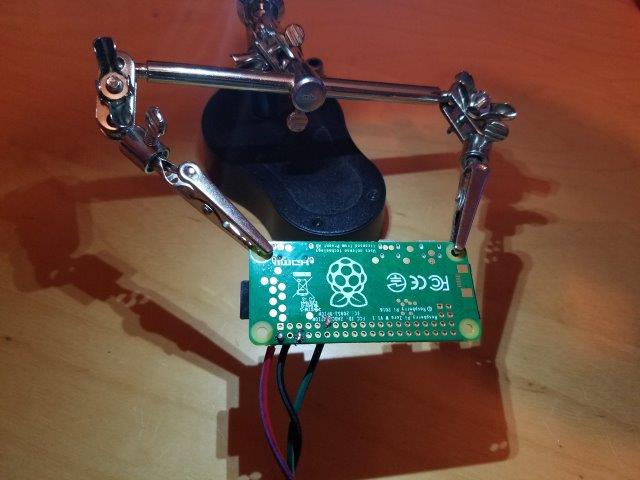
To control the RC motor you will need to attach the 3 wires from the Futaba S3003 to 3 pins on the raspberry PI.

  1. Power to PIN 2 (5V)
  2. Ground to PIN 6
  3. Data to PIN 11 (GPIO 17)

Controlling the RC motor with the Raspberry Software

To control the RC motor you will need to create two scripts. One to open and one to close the blinds. Future versions will include more granular control of the blinds but for now open/close is sufficient.

Make sure you are in your home folder with the “pwd” command. Then run the following command to install the Domoticz Home Automation software. This software will be used to receive JSON commands to open and close the blinds from any smart home hub. This was the main reason why I chose this implementation method. The software is for free and it is fairly easy to configure.

pi@raspberry: ~$ sudo curl -L install.domoticz.com | bash

This will install the software and run auto update and auto upgrade on your raspberry PI as well.
Then go into the subfolder domotics/script to create the two python scripts mentioned above.

pi@raspberry: ~$ cd ./domoticz/scripts

Cut and paste the following into your editor to create the two scripts. One for opening the blinds and one for closing the blinds.

pi@raspberry: ~$ sudo nano servo_tilt_on.py

#!/usr/bin/python

import RPi.GPIO as GPIO
import time
GPIO.setmode(GPIO.BOARD)
servoPin=11
GPIO.setup(servoPin, GPIO.OUT)
pwm=GPIO.PWM(servoPin,50)
pwm.start(7)
for i in range(0,180):
 DC=2./45.*(i)+2
 pwm.ChangeDutyCycle(DC)
 time.sleep( .01)
pwm.stop()
GPIO.cleanup()

Press Control + O to save and then Control + X to exit.

pi@raspberry: ~$ sudo nano servo_tilt_off.py

#!/usr/bin/python

import RPi.GPIO as GPIO
import time
GPIO.setmode(GPIO.BOARD)
servoPin=11
GPIO.setup(servoPin, GPIO.OUT)
pwm=GPIO.PWM(servoPin,50)
pwm.start(7)
for i in range(180,0,-1):
 DC=2./45.*(i)+2
 pwm.ChangeDutyCycle(DC)
 time.sleep( .01)
pwm.stop()
GPIO.cleanup()

Press Control + O to save and then Control + X to exit.

Now you have to make both scripts executable:

pi@raspberry: ~$ sudo chmod +x servo_tilt_on.py

pi@raspberry: ~$ sudo chmod +x servo_tilt_off.py

Controlling the RC motor with the Domoticz Software

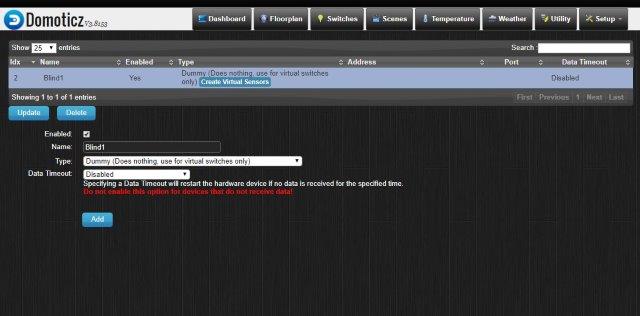
To control the RC motor you will need to control the two scripts created above with one virtual device. You can access the control panel of the domoticz software via the IP address of your raspberry PI. http://YOUR_IP:8080/ and this will bring you to the dashboard. Click on hardware to create a new virtual dummy device and then create a switch controlling the blinds.


Select Enabled and define the name of your device e.g. Blind1. Select Type “Dummy” and Data Timeout “Disabled”.

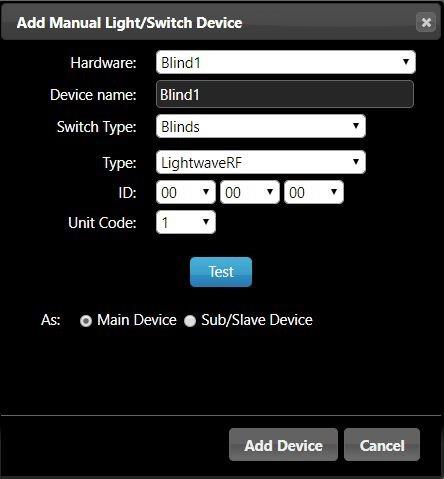
Then go to switches and add a manual switch. The hardware option should show you e.g. Blind1 already. Now you have to name your actual switch e.g. Blind1 switch. Switch type “Blinds” and Type pick e.g. “Lightwave RF” as this doesn’t matter given that we will call the two scripts created earlier.


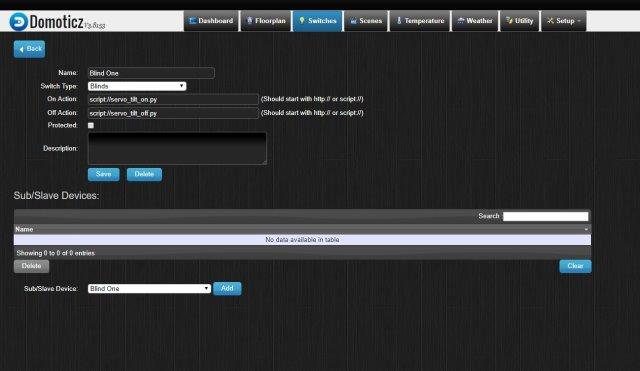
Selecting the new switch you just created allows you to configure the details.

Enter into the “On Action” field the following line:

script://servo_tilt_on.py

Enter into the “Off Action” field the following line:

script://servo_tilt_off.py

Click on Save.

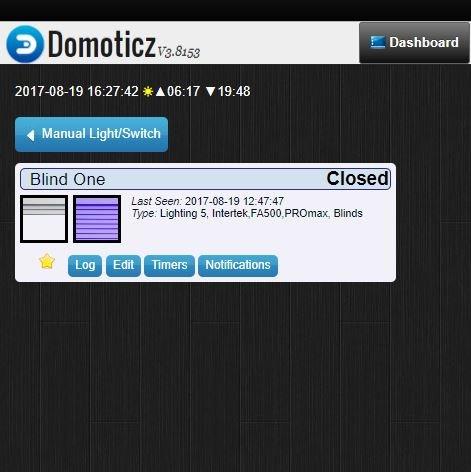
Last but not least click on the STAR icon which will make the blind switch appear on your dashboard every time you login.

Hardware assembly for first test run

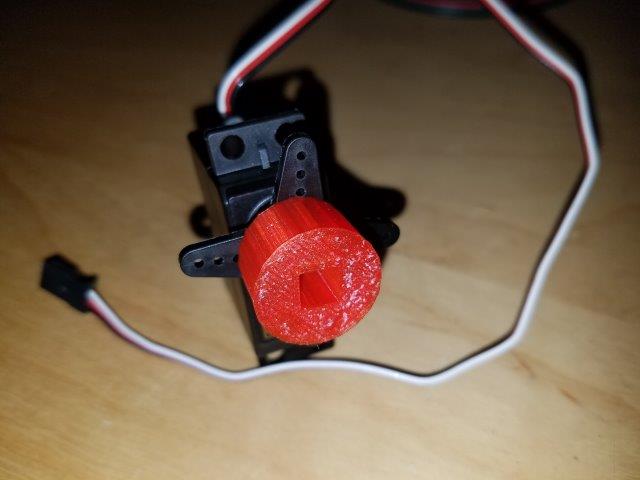
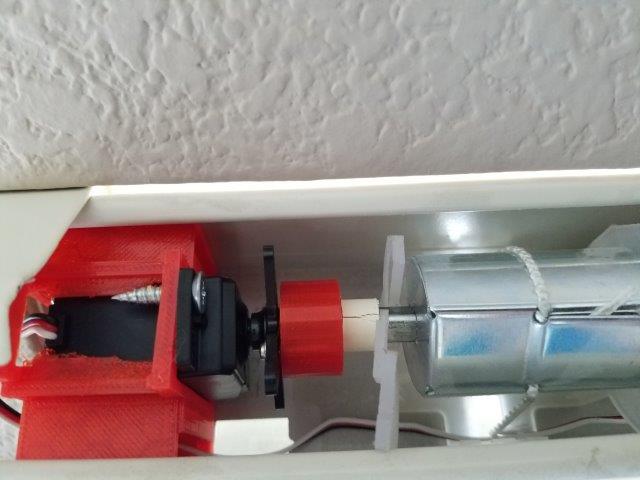
After removing the screw on the Futaba S3003 holding the wheel in place, you can start attaching the rod adapter 3D printed earlier to the servo wheel via 2 screws. I do recommend NOT to put the center screw for the wheel back on, until you have put the RC motor into the final position within the blind channel and adjusted. Most likely you will have to come back and adjust the wheel turning it by a couple of teeth to fit your blind setting in terms of closed or open.

Test to control the components

Here are a couple of tests you should perform to verify your installation and configuration before moving onto embedding the solution into your blind channel.

  1. run each script manually in your shell or remote shell to open and close the blind
    1. pi@raspberry: ~$ sudo python /domoticz/script/servo_tilt_on.py
    2. pi@raspberry: ~$ sudo python /domoticz/script/servo_tilt_on.py
  2. run JSON commands to see if the domoticz software properly controls the RC motor from your Web Browser:
    1. http://YOUR_IP_ADDRESS:8080/json.htm?type=command&param=switchlight&idx=1&switchcmd=On
    2. http://YOUR_IP_ADDRESS:8080/json.htm?type=command&param=switchlight&idx=1&switchcmd=Off

In all 4 cases above the RC motor should turn. If it doesn’t turn via command line, then you most likely have your wiring wrong between the raspberry PI and the RC motor or you have an issue with your software e.g. Python not properly installed, etc.

If the Web browser commands to turn the RC motor but the command line, then you need to go back and check your settings in domoticz especially the part where you enter the scripts names to execute. Easy to make a typo there.

Integration into Smart Home Hub

Now that we have a Raspberry PI Zero W, configured with Domoticz software to receive JSON commands to open and close blinds, it is time to integrate this solution into your smart home hub. In my case it is Homeseer right now but I could have taken one of my Veras or my Smartthings hubs.

Device Management:

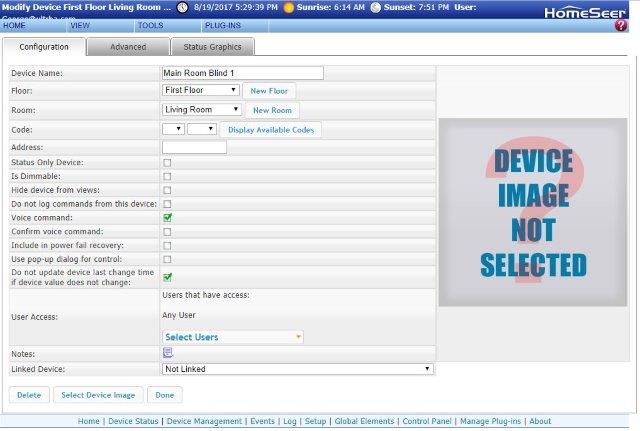
  1. Log into Homeseer and create a new virtual device e.g. Blind 1
  2. Enable Voice Control for that new virtual device for Alexa to find it.
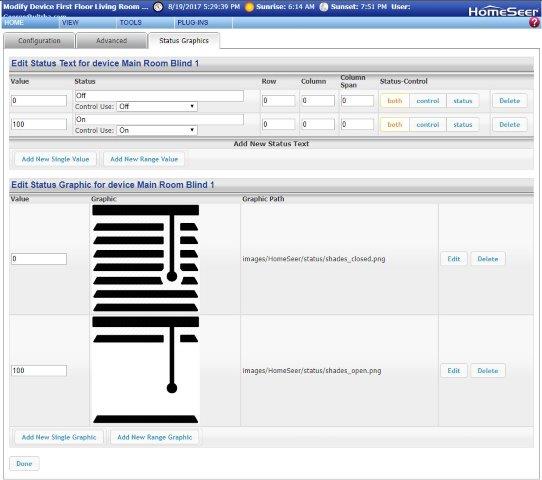
  3. Under Status graphics replace the on and off graphics with blind open and close graphics (optional task)

Events:

On Event

  1. Create a new event named Blind 1 ON
  2. If condition is when your virtual device you just created above changes state with “If Blind 1 changes and becomes ON
  3. Chose “Run a Script
  4. Check box “Execute immediate script command
  5. Enter the URL to your Raspberry PI JSON command under the Homeseer call URL command &hs.URLAction(“http://YOUR_IP_ADDRESS:8080/json.htm?type=command&param=switchlight&idx=1&switchcmd=On”,”GET”, “”, “”)

Off Event

  1. Create a new event named Blind 1 OFF
  2. If condition is when your virtual device you just created above changes state with “If Blind 1 changes and becomes OFF
  3. Chose “Run a Script
  4. Check box “Execute immediate script command”
  5. Enter the URL to your Raspberry PI JSON command under the Homeseer call URL command &hs.URLAction(“http://YOUR_IP_ADDRESS:8080/json.htm?type=command&param=switchlight&idx=1&switchcmd=Off”,”GET”, “”, “”)


Powering the solution

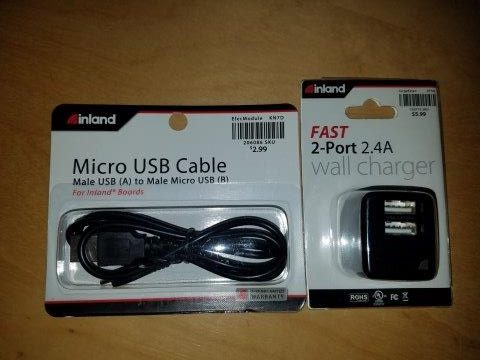
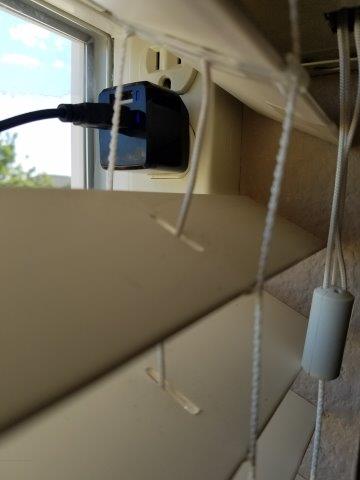
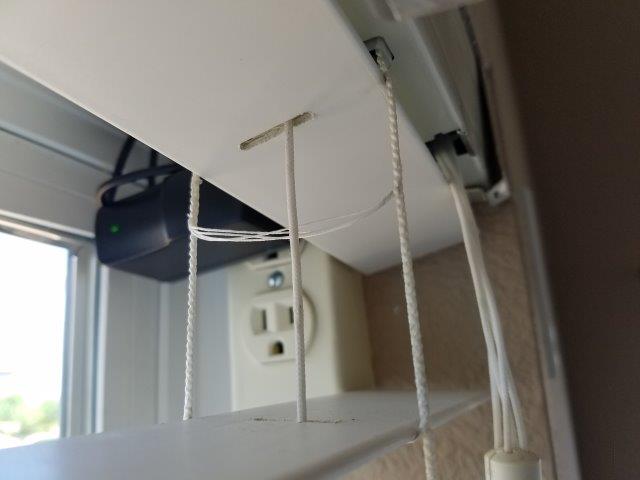
To make it easier to attach I chose a USB charger and USB micro cables to connect the Raspberry PI Zero W to the power outlet in the window. The good news is that it works with the 2.4A USB adapter for smaller blinds. The bad news is that you need a more powerful adapter for larger blinds.

Also please consider how your outlets are windows for all windows as in some homes all outlets are attached to a single 15A breaker. Attaching 7 x 2.4A USB chargers will trip your breaker so you will have to find the right balance of enough power to turn your blinds or replace your breaker and go for 20A. Most outlets can handle 15A and 20A but let your electrician do this job for you.

Total solution assembled and functional

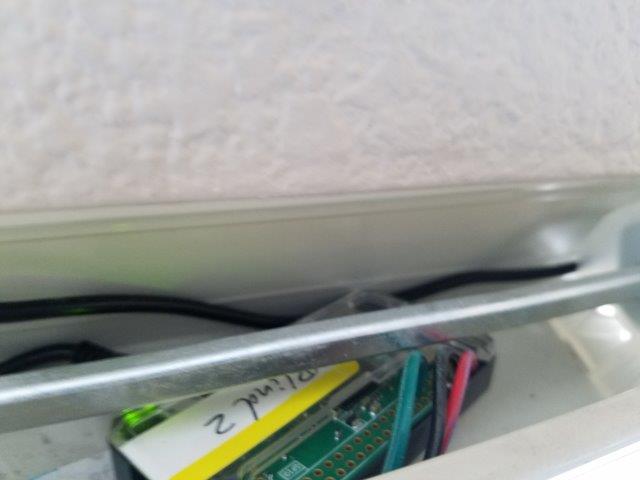
Last steps are to embed the Raspberry PI and the RC motor into the channel of each blind, attach the USB cable from the Raspberry PI into the corresponding Power adapter and then go into your Alexa app and run Device Discovery and then say “Alexa, turn on Blind 1”.

Once you have all blinds installed and discovered by Alexa, you can group them in the Alexa app to e.g. “Living Room blinds” and then say “Alexa, turn on Living Room blinds”. ENJOY!


Total cost and components:


  1. Raspberry PI Zero W = $10
  2. Raspberry PI Zero case = $5 (optional but highly recommended to avoid contact with blind channel)
  3. USB charger = $8
  4. USB Micro cable = $3
  5. Futaba S3003 RC motor = $12
  6. Various wires and small screws = $3
  7. 3D print (cost of goods doing it yourself $2 for rod adapter and base)

Total cost per blind to voice control and integrate into existing smart home hub: $43

Additional one time charge used across all blinds:
  1. Power supply kit with HDMI and USB adapter $20
  2. Canakit USB keyboard and touchpad $25
  3. 3D Printer $300 – $3,000 (optional) in my case Flashforge Finder for $500
Tools needed:
  1. Soldering Iron
  2. Solder wire wick
  3. 3D printer (your own or from 3rd party shop)
  4. Screw drivers (small and large Philips)
  5. Filament for 3D printer (my printer came with one and I didn’t have to buy any filament for this project)

Total cost for my project automating 5 blinds and owning a new 3D Printer: $760

Additional note on security

I strongly suggest to give security some special thought. Here are some areas to consider and some of them are already mentioned above while others are not. Change the login and the password for your Raspberry PI

  1. Chose passwords at least 8 characters or more with lower and upper case and special characters (note: be careful as the Raspberry comes with UK keyboard enabled in most cases and your special characters might not be where you think they are)
  2. Enable security on Domoticz for the dashboard login for each Raspberry PI
  3. Enable authentication on Domoticz for your JSON commands via setup settings in Domoticz
  4. Use HTTPS wherever possible instead of HTTP to encrypt your JSON commands from your smart home hub
  5. Restrict SSH access on your Raspberry PI to IP addresses only within your home network or install a firewall on your Raspberry PI
  6. etc

Amazon to the rescue with TTS

Amazon to the rescue with TTS

2 weeks ago I published a blog post about Microsoft shutting down their Data Market place with a deadline of March 25th 2017, leaving many smart home owners with almost no options for having a somehow decent quality Text-to-Speech (TTS) event notification and announcement offering for their smart homes.

To make things worse, Microsoft is now redirecting all customers from http://datamarket.azure.com to their standard azure website. As an existing user of their Translation to Text engine you will try to find your existing service and your authorization keys with no luck. All their links on their azure website will try to make you sign up for a new Azure account with a $200 credit… unless you have the old URL/Link available for your service, which is https://datamarket.azure.com/dataset/bing/microsofttranslator or alternatively you can use https://datamarket.azure.com/account/.

As an end user I have to say, that this kind of customer handling is unacceptable especially after Microsoft emailed every customer, that their access will be available until March 25th 2017 and this was even stated on their old data market place website in a top banner. I posted screenshots about those in my previous blog here http://homeautomation.expert/azure-datamarket-shutdown.

With all this uncertainty about the future of Text-to-Speech (TTS) for smart home owners Amazon announced yesterday the release of their new service called “Amazon Polly” https://aws.amazon.com/polly/.

“Amazon Polly is a service that turns text into lifelike speech. Polly lets you create applications that talk, enabling you to build entirely new categories of speech-enabled products. Polly is an Amazon AI service that uses advanced deep learning technologies to synthesize speech that sounds like a human voice. Polly includes 47 lifelike voices spread across 24 languages, so you can select the ideal voice and build speech-enabled applications that work in many different countries.”

Here is an example of the quality of Amazon Polly.

Amazon Polly is offered under the Amazon Free Tier concept for 12 months free of charge, from the day an end user creates his/her AWS account. Under the Free Tier account an end user can submit up to 5.000.000 characters per month. After the Free Tier trial period has ended the end user receives 1.000.000 characters per month for the price of $4.00 per month.

Let’s compare the currently active Microsoft TTS and the Amazon Polly service, despite Microsoft is shutting down their Data Market place and moving this feature under their “Cognitive Services accounts” category in Azure, currently available under preview only with no pricing information ,unless you sign up for an Azure account:

Amazon also provides example use cases enabling end users to estimate, how many characters certain voice tasks will consume. The examples range from number of requests with number of characters per request, emails, book examples and news articles. For this exercise, I examined a typical standard smart home usage using the following formula:

~50 characters per request x 14 requests per hour x 24 hours per day x 30 days per month = 504.000 characters / month

Those numbers are average numbers over the duration of 1 year normalized. A smart home owner would have to double the amount of requests or the length of the announcements to overcome the 1.000.000 character barrier into the next price range of Amazon Polly.

Efficiency

The other important aspect of comparing those two Text-to-Speech (TTS) services is their efficiency. By efficiency the aspect of file size and transfer time is important.

The example voice output above consumes 48kb using Amazon Polly. The same text synthesized using the Microsoft TTS engine consumes 142kb. Taking into account the time to upload the text to be synthesized, the amount of time it takes to actually synthesize this text into a voice output and then pushing it back to the end user, will be impacted by the file size and amount of characters.

Both engines allow the output to be defined in terms of the file format, while the most commonly used output is and will continue to be .mp3 in terms of smart home usage from a compatibility perspective.

Amazon offers a comprehensive tutorial about Polly and code examples using Python, IOS and Android. Microsoft offers examples for Ajax, Soap and HTTP. For both TTS services the end user has to create credentials to use the actual service. For Microsoft the end user creates a client ID and a client secret, which will be used to authenticate the application/end user.

With Amazon the security model is much more sophisticated. Identity and Access Management (IAM) is being used with Amazon, where the end user has a root account, which can be and should be protected with multi-factor authentication. From there the end user can create various users and groups, which can actually use the Amazon Polly service.

The actual Polly service offers two groups per default. The Full access and Read Only access group policies and those can be assigned to user accounts to user the Amazon Polly service utilizing the signature version 4 Test Suite from Amazon for the signing process.

One more important item to mention is that Amazon Polly supports Speech Synthesis Markup Language (SSML). Amazon Polly generates speech from both plain text input and Speech Synthesis Markup Language (SSML) documents that conform to SSML version 1.1. Using SSML tags, you can customize and control aspects of speech such as pronunciation, volume, and speech rate as defined in the W3C recommendation https://www.w3.org/TR/2010/REC-speech-synthesis11-20100907/.

In summary… Amazon released their Text-to-Speech (TTS) service Amazon Polly at the right time, offering superior efficiency in terms of response time and file size, while being 2.5x more cost efficient than Microsoft’s Text-to-Speech (TTS) service today.

First integration attempts into smart home hubs are already in progress e.g. LUA code sharing within 48 hours of Amazon releasing Polly.

HomeAutomation.Expert

Disclaimer: This blog and tweets represent my own view points and not of my employer, Amazon Web Services.

Chinese Alexa or Chinese Google Home

Chinese Alexa or Chinese Google Home

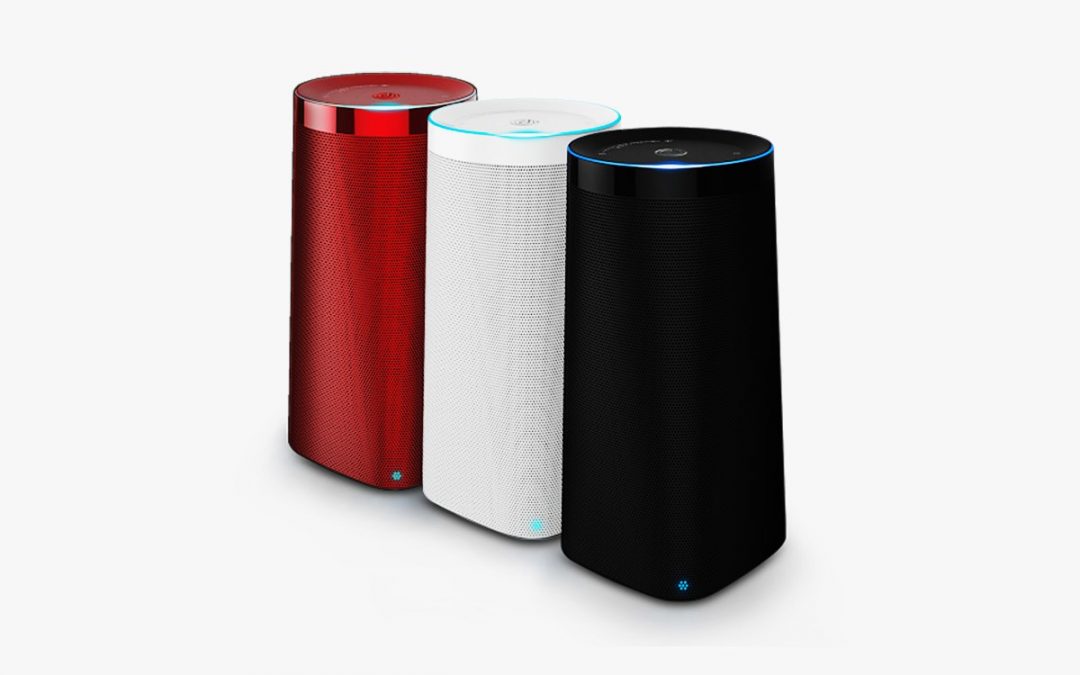
With Google Home entering the VCD (Voice Command Device) market, people assumed that there will be a rivalry between Google and Amazon. Out of the blue a third competitor entered the stage out of China. This device named “Ling Long Ding Dong” (name is for real) will address the Chinese VCD market.

The DingDong, which costs the equivalent of $118, provides news, weather, and stock updates. It answers questions, manages schedules, provides directions, and plays music and audiobooks. It is the first product from Beijing LingLong Co., a $25 million joint venture between JD.com, China’s largest online retailer, and voice recognition powerhouse iFlytek.

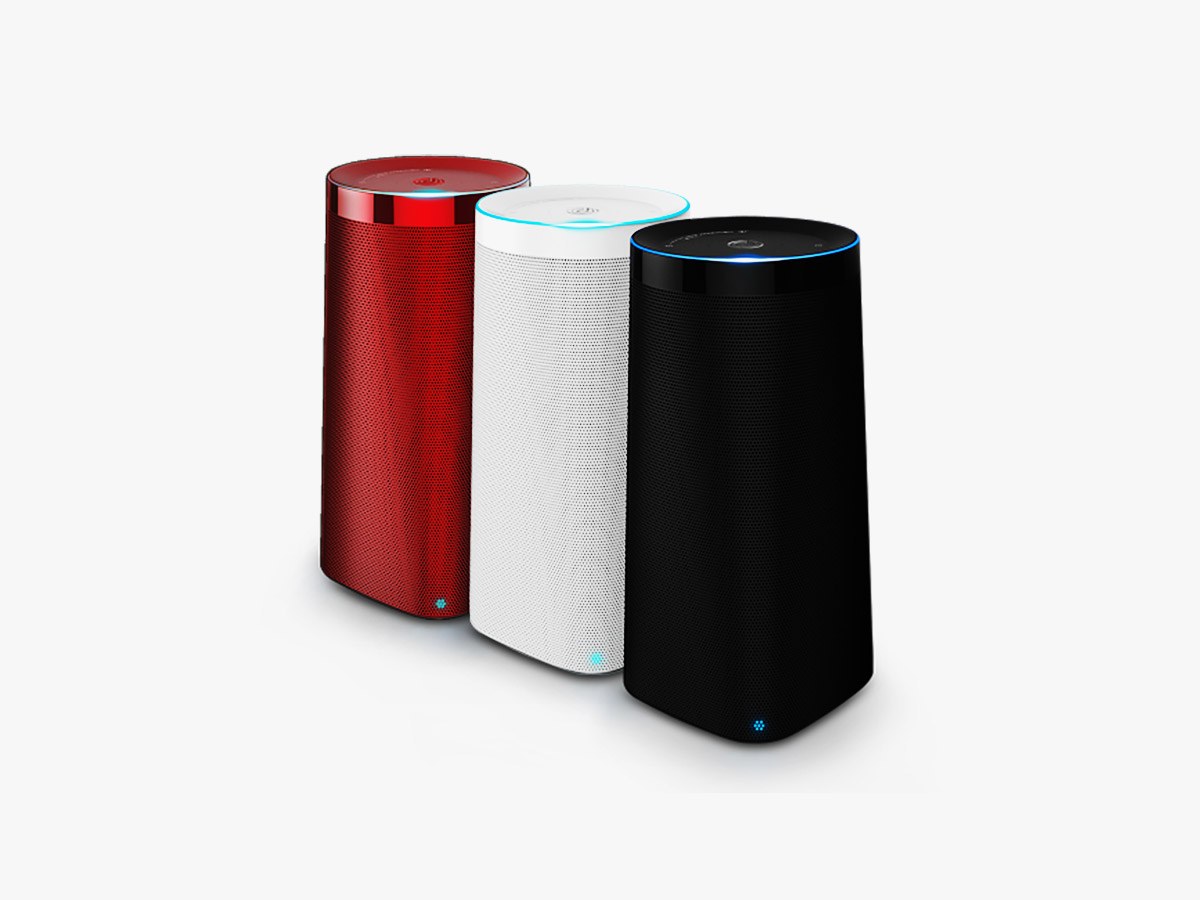
The gadget weighs about 3 pounds and stands 9.5 inches tall. It is circular at the top and square on the bottom, and available in white, red, black, and purple. The shape symbolizes tiānyuán dìfāng—the notion that “heaven is round, Earth is square,” a concept that Liu says is central to LingLong’s design language. The colors also are imbued with meaning; white is associated with purity, and red with prosperity.
Three commands wake the device: DingDong DingDong, Xiaowei Xiaowei (a girl’s nickname), and BaiLing BaiLing(skylark). The DingDong comes in Mandarin and Cantonese versions (the engines required to understand the languages are too complex to include them both in one device). Most people speak Mandarin, and the myriad accents and dialects present a Herculean challenge. Still, the company claims the DingDong understands roughly 95 percent of the population.

The company will have their own skill market place, which will include applications and skills for home automation.

x  Powerful Protection for WordPress, from Shield Security
This Site Is Protected By
Shield Security
Verified by ExactMetrics